If you’re managing a WooCommerce marketplace, manually adding products one by one can feel like a never-ending task. The good news? WooCommerce bulk product upload can save you hours of work and help you scale your store efficiently.
In this guide, we’ll walk you through the entire process, from preparing your data to uploading and managing your products.
By the end, you’ll be a pro at bulk import and your store will thank you.
So, let’s get started!
Why Bulk Upload Is Essential For WooCommerce Stores
Adding products individually might work for small stores, but as your marketplace grows, it becomes a bottleneck. Here’s why bulk upload is a must:
- Saves time: Upload hundreds of products in minutes instead of hours.
- Reduces errors: A well-structured CSV file ensures consistency across your product listings.
- Improves scalability: Easily manage large inventories without breaking a sweat.
Before You Upload: Get Your Data Ready
Before diving into the upload process, you’ll need to prepare your product data in a specific format. Here’s how to get started:
Step 1: Prepare your tools and product information
Before you start the bulk import process, you’ll need to use programs like Microsoft Excel or Google Sheets and organize your WooCommerce product data.
Compile all the necessary information for each product you plan to upload. Basically, this includes:
| Product name | Make it clear and specific to help customers understand what you’re offering. |
| Product description | Highlight key features and benefits to attract buyers. |
| Type | Use “simple” for standard single products and “variable” for products with variations. |
| SKU (Stock Keeping Unit) | Use a unique identifier for each item (e.g., “PROD123”). |
| Regular Price | Enter the standard price without currency symbols. |
| Sale Price | Add a discounted price if applicable. Leave this blank if there’s no sale. |
| Stock quantity | Note how many units are available for each product. |
| Category | List the relevant categories for each product. Make sure these categories already exist in your WooCommerce settings. |
| Images | Provide URLs or file paths for product photos. Upload images before importing or use publicly accessible URLs. |
| Additional attributes | Add details like weight, dimensions, or tax status if needed |
Step 2: Use the WooCommerce CSV template

Download the template and fill in the Product Data
- Go to your WooCommerce dashboard.
- Navigate to Products > Import.
- Download the sample CSV files provided on GitHub.
- Replace the placeholder data with your own product details to ensure accurate formatting before importing.
Step 3: Save and organize your CSV file
Once you’ve entered all your product data, it’s time to save the file:
- Use the Save As function in your spreadsheet software and choose the CSV format.
- Pick a clear and descriptive name, such as “Store_Products_February_2025.csv,” so you can easily identify it later.
Start Your WooCommerce Bulk Product Upload
Now that your data is ready, it’s time to upload it to your WooCommerce store. Here’s how:
Step 1: Upload the CSV file
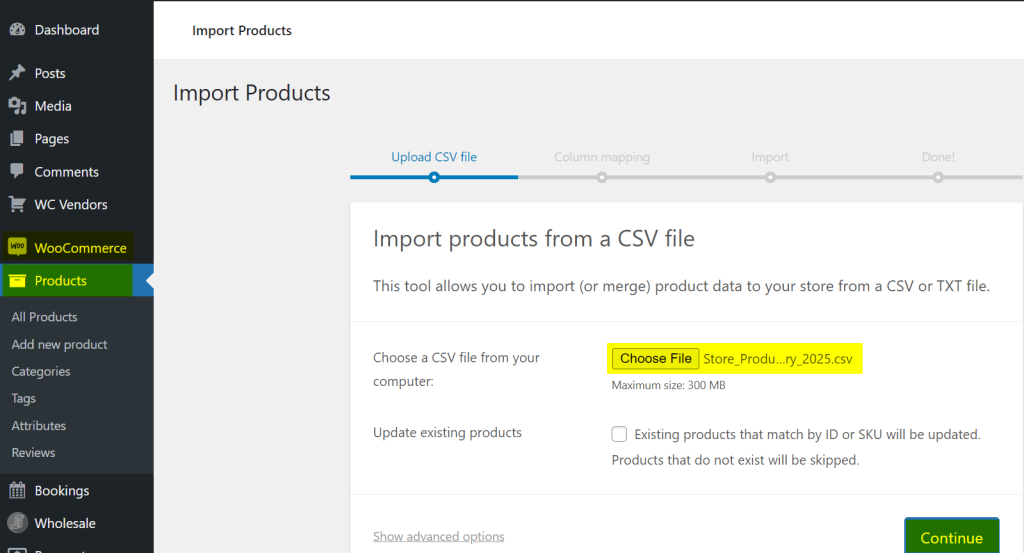
- Go to your WordPress dashboard.
- Navigate to WooCommerce > Products > Import.
- Click Choose File and select your completed CSV file.
- Click Continue.
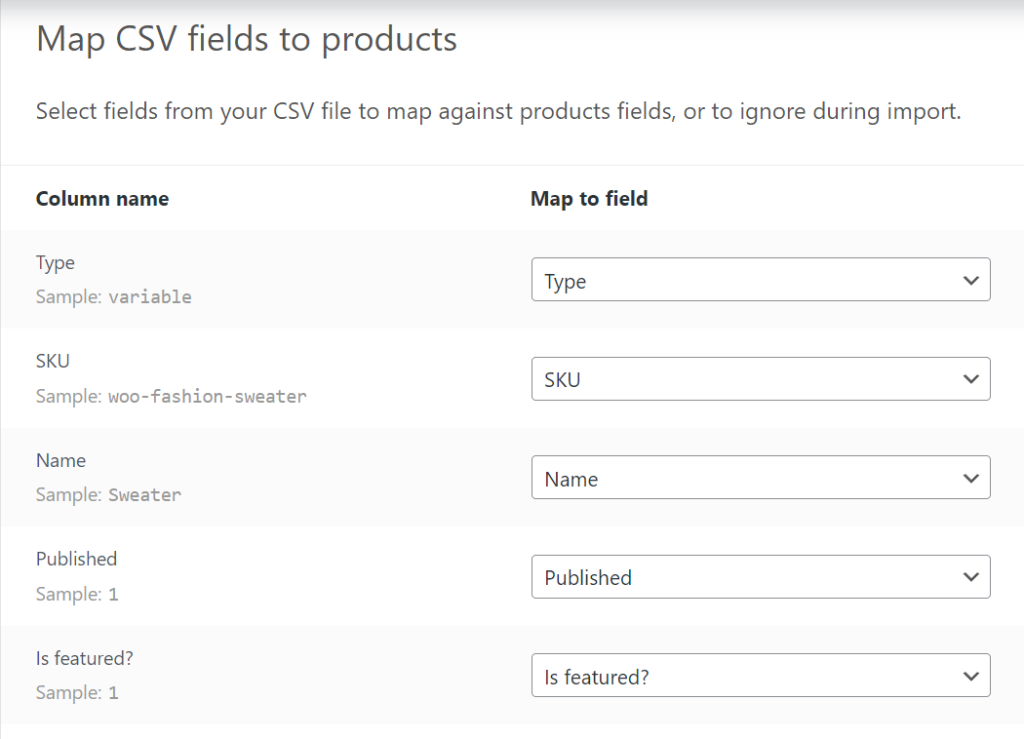
Step 2: Map the CSV columns
After uploading, WooCommerce will ask you to map the CSV columns to the appropriate fields. Here’s what to do:
- Match each column in your CSV file to the corresponding WooCommerce field (e.g., map “Title” to “Product Name”).
- Ensure all required fields are mapped correctly.
Step 3: Validate and run the import
Before finalizing the upload, WooCommerce will scan your CSV file for errors. Here’s how to handle this step:
- Review any errors or warnings displayed by WooCommerce.
- Common issues include missing data, incorrect formatting, or duplicate SKUs.
- Fix the errors in your CSV file and re-upload it if necessary.
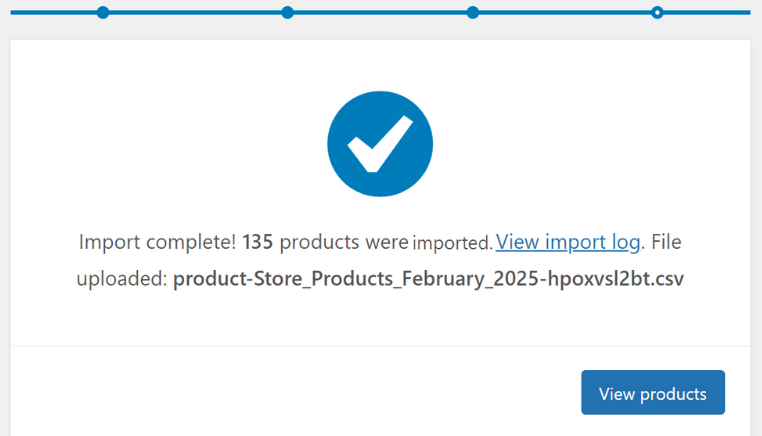
- Once everything looks good, click Run the Importer.
After The Upload: Managing Your Products
Once your products are uploaded, it’s time to review and organize them:
- Visit your storefront to ensure all products are displayed correctly.
- Use WooCommerce’s category management tools to create a user-friendly shopping experience.
- Regularly update your stock levels and product details to keep your store accurate.
Bonus Tip: Start with a small batch to test the process and catch any issues early. Before uploading, make sure to keep a backup of your product data in case something goes wrong. And lastly, consider using plugins like Product Import Deluxe for added flexibility and more advanced options.
Build A Scalable Marketplace With WC Vendors
For multivendor marketplace owners, you’re not just managing a WooCommerce store, you’re creating a thriving marketplace where vendors can succeed.
WC Vendors is designed with this in mind, offering tools that simplify product management while giving you full control over your platform.
With WC Vendors, you can:
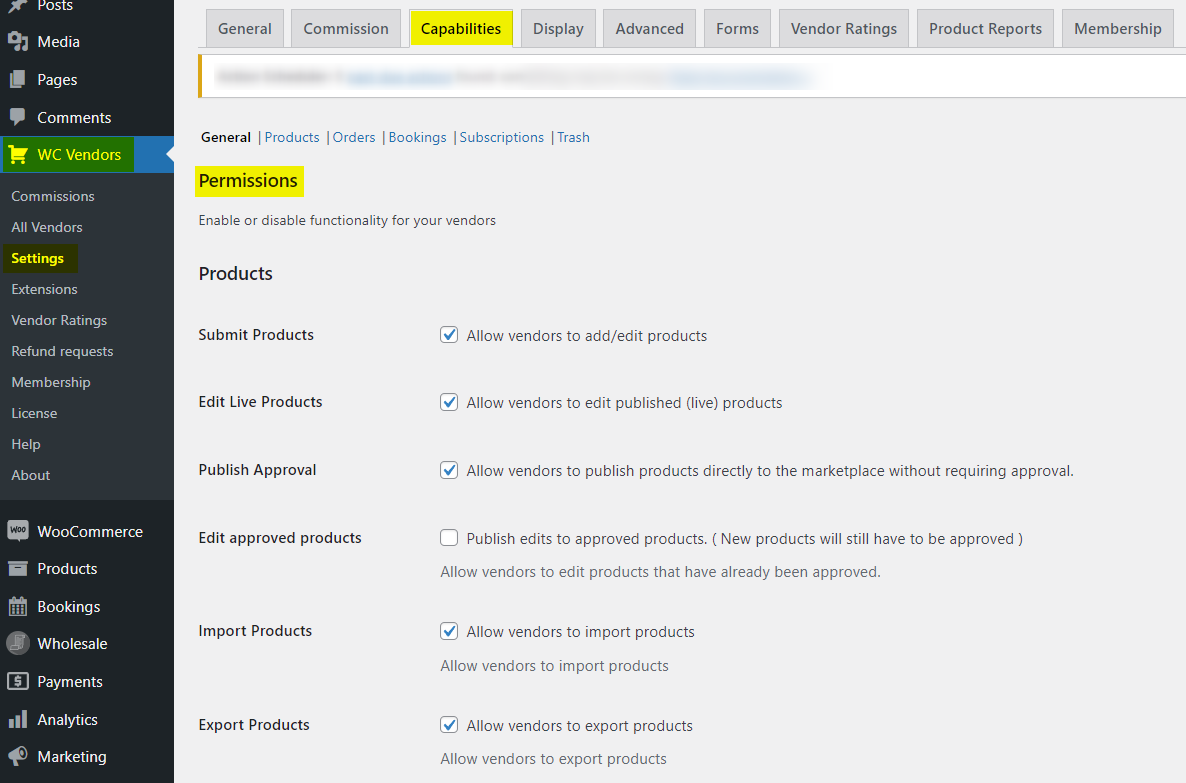
- Enable vendors to upload and edit their own products by activating the Submit Products option on the Permissions page.
- Require admin approval before going live, ensuring marketplace quality and relevance.
- Review listings before they go live by approving bulk product uploads from vendors.
- Ensure only high-quality, relevant products are published, providing a better shopping experience for customers.
This level of control is especially important when vendors use WooCommerce bulk product upload. While bulk uploads save time and streamline the process, having a review system in place ensures that every product added to your marketplace is relevant and up to standard.
WC Vendors makes it easy to balance vendor autonomy with administrative oversight. Thus, it gives you the tools to build a scalable, professional marketplace.
Conclusion
Uploading products in bulk is a game-changer for WooCommerce store owners. It saves time, reduces errors, and makes scaling your business much smoother. But without the right setup, it can quickly become overwhelming.
To recap, here’s what we covered:
- Why Bulk Upload Is Essential For WooCommerce Stores
- Before You Upload: Get Your Data Ready
- Step 1: Prepare your tools and product information
- Step 2: Use the WooCommerce CSV template
- Step 3: Save and organize your CSV file
- Start Your WooCommerce Bulk Product Upload
- Step 1: Upload the CSV file
- Step 2: Map the CSV columns
- Step 3: Validate and run the import
A well-structured import process keeps your product data clean, prevents errors, and ensures vendors can bulk upload products quickly without hassle. WC Vendors makes this even easier by giving you the flexibility to manage vendor uploads while ensuring only approved products go live.
Have any questions? Let us know in the comments—we’d love to help!
Frequently Asked Questions (FAQ)
1. How to bulk publish products in WooCommerce?
To bulk publish products, use the WooCommerce CSV Importer. Ensure the “Status” column in your CSV file is set to “Published.” Basically, this will automatically publish all imported products.
2. How do I bulk edit all products in WooCommerce?
You can bulk edit products by exporting your WooCommerce product list as a CSV file, making changes in a spreadsheet tool like Google Sheets, and re-uploading the file.
3. How many products can WooCommerce handle?
WooCommerce can handle thousands of products, but performance depends on your hosting setup and optimization.
4. Can I import variable products in WooCommerce?
Yes, you can import variable products in WooCommerce using the CSV importer. Ensure your CSV file includes all necessary attributes and variations.
