Effective seller management is vital for the success of your multi-vendor marketplace. Unfortunately, regardless of your team’s size, overseeing your vendors’ activities can be challenging.
This is where WC Vendors’ latest feature, the All Vendors: Vendor Management page, comes in. Designed to revolutionize how you manage vendors within your online platform, this lets you view and modify vendor data and abilities from one convenient location. Thus, it helps boost your efficiency, productivity, and overall performance.
Join us as we explore the power and simplicity of the All Vendors page, and discover how it can elevate your marketplace to new heights!
All Vendors: A New, Extra-Convenient Seller Management Feature
All Vendors: Vendor Management is a new feature that enhances seller management within your multi-vendor marketplace. It boasts all the tools you need to view and customize vendor data and abilities. Thus, it provides you with convenient yet comprehensive control over vendor settings.
Below is a sampling of what you can do with All Vendors page:
- Control fundamental details: The feature lets you easily revise key information about each vendor’s store, including their shop’s name, description, opening hours, etc.
- Manage commissions and payouts: You can customize settings related to how vendors are paid.
- Optimize SEO and social presence: Fine-tune any vendor’s SEO strategy and social media presence.
- Adjust shipping settings: Modify any vendor’s shipping-related settings, including shipping types and addresses.
- Access extensive user settings: Examine and edit any vendor’s account details, including but not limited to their store address, seller description, and password.
- Track outstanding commissions: Monitor the commissions owed to vendors for sales they’ve made, ensuring timely and accurate payments.
- View registration dates and status: Quickly view when vendors registered on your platform and their current selling status (active, inactive, pending approval).
- Perform actions: Take various actions related to vendor management, such as editing vendor details, viewing products, and accessing order information.
The All Vendors page offers a centralized hub for efficiently managing vendors, streamlining administrative tasks, and enhancing the overall vendor experience within your multi-vendor marketplace.
How To Use The All Vendors Page To Streamline Marketplace Seller Management (2 Easy Steps)
Is your marketplace powered by the top-notch WooCommerce marketplace solution, WC Vendors? Then you’re in luck, because the All Vendors: Vendor Management page brings a whole new level of convenience to seller management. And we’re going to teach you how to use it!
For this guide, we’ll assume you know how to create an online multi-vendor platform using WC Vendors.
However, if using WC Vendors is something you’ve yet to learn, then we strongly recommend checking out the following articles first:
- How To Create An Online Marketplace: A Beginner’s Guide
- How To Build Your First Multi-Vendor E-Commerce Website (Full Guide)
With all that in mind, let’s proceed!
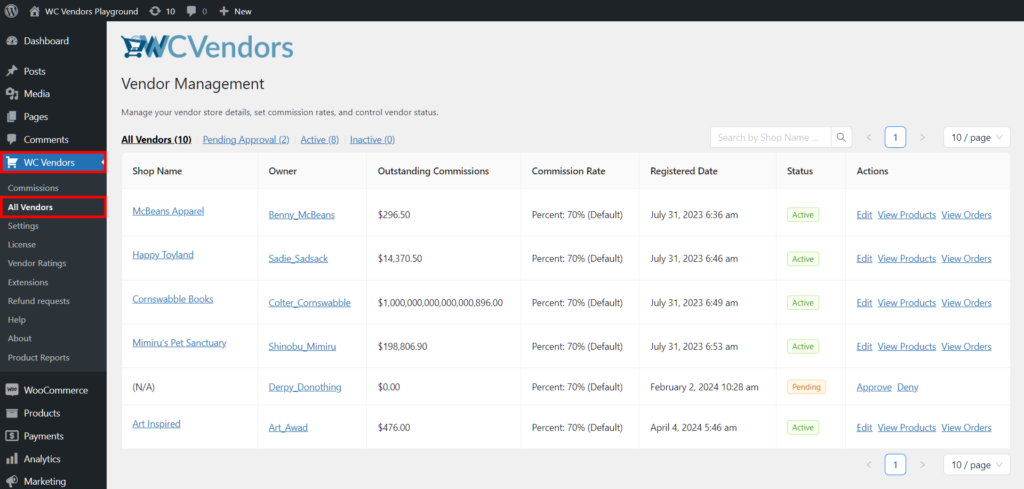
Finding the All Vendors: Vendor Management page is easy. Basically, head to your WordPress dashboard, then click WC Vendors > All Vendors.
As you can see in the above image, the All Vendors page contains a list of all the vendors in your marketplace. In addition, you can access many options allowing you to modify any vendor or vendor store any time you wish. Thus, this page grants you quick and easy access to not only your team of sellers but also various customization options, making seller management super easy.
Which brings us to…
Step 2: Implement seller management
Eager to learn how to use All Vendors to manage your vendors? Then let’s discuss the options available on the page!
A. Options for list control
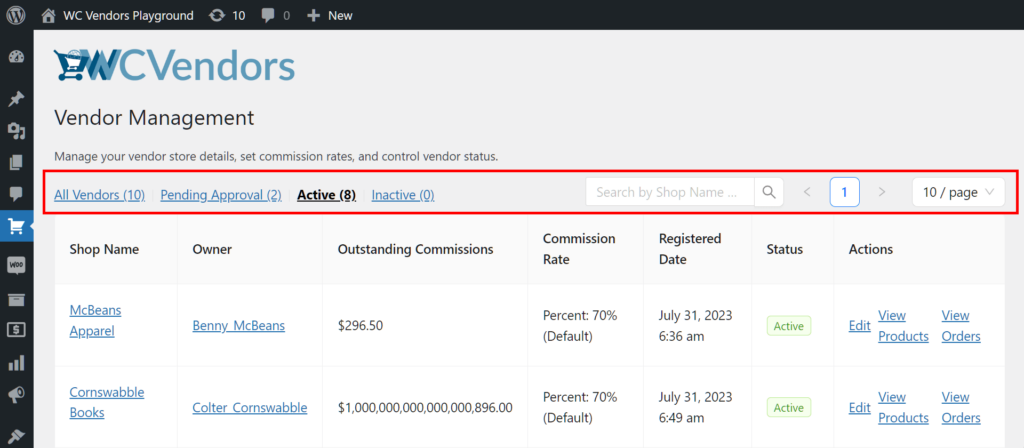
Want to locate specific vendors fast? Then use the tabs above the list of vendors.
Let’s explore what each tab does:
All Vendors: Displays all your vendors on the list. However, there’s a limit to the number of vendors the list can display per page; going over this limit will separate the vendors via pagination.
Pending Approval: This lists individuals and businesses applying to your marketplace to become vendors but still waiting for your approval.
Active: This lists vendors actively selling their products and/or services through your platform.
Inactive: Click this if you need a list of vendors who are no longer active in your marketplace.
Search Bar: Do you already know the name of the specific vendor you wish to find? Then enter their name or the name of their store in the search bar. This immediately provides you with all links associated with the vendor in question.
Pagination: If you have too many vendors to appear on a single page, then the pagination function will divide them into multiple pages. Thankfully, you can specify a page number or click the arrow buttons to navigate through those pages more easily.
Vendors Per Page: Lastly, you can determine how many vendors appear on each page of your list. For example, you can have as few as 5 or as many as 100 vendors per page.
B. Shop Name
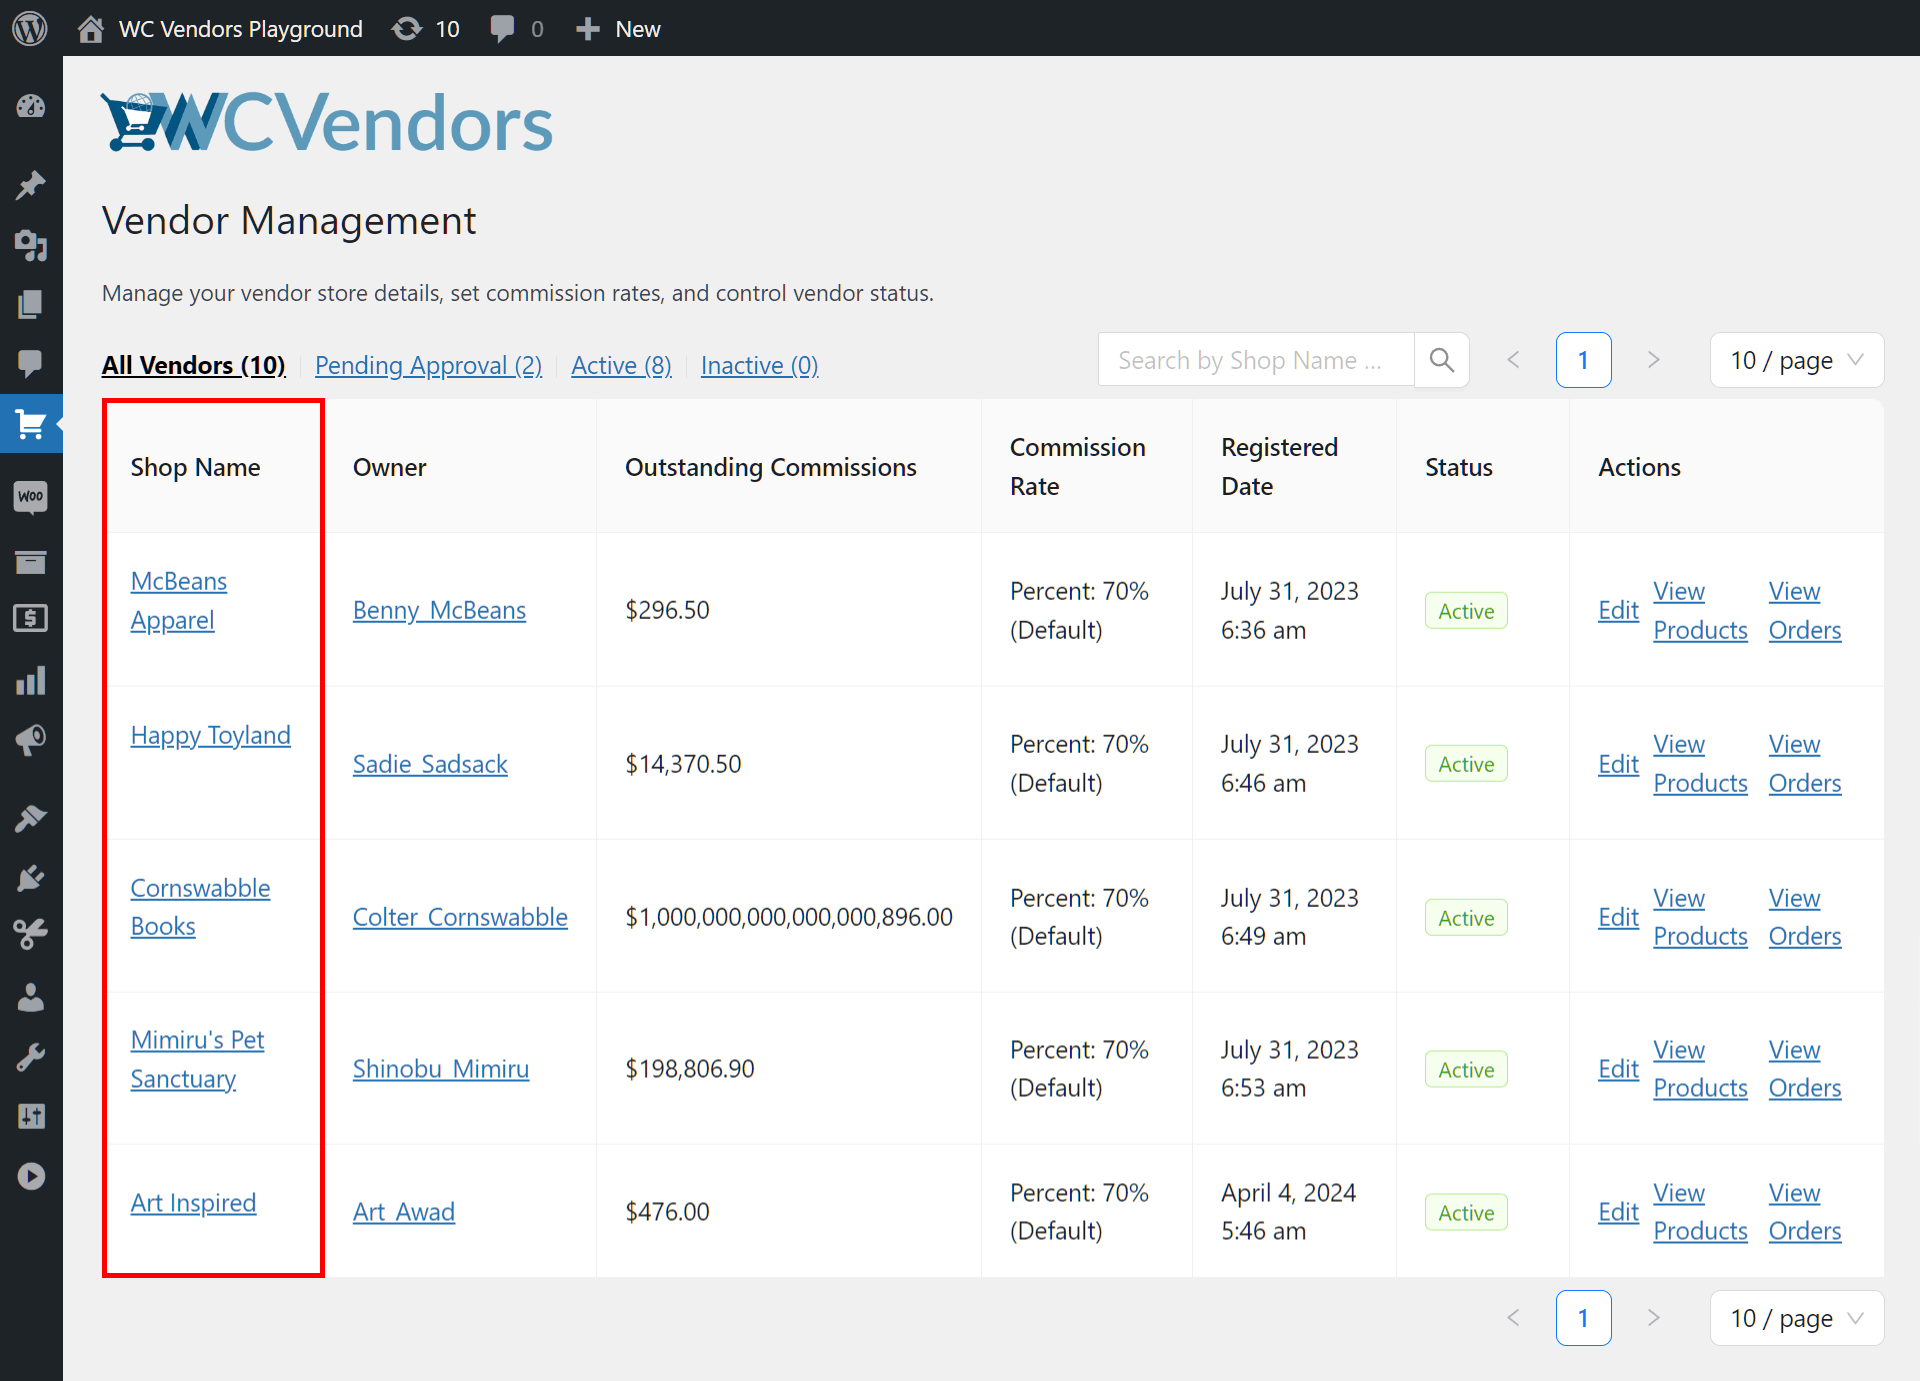
The first column, “Shop Name,” contains the names of the vendor stores within your marketplace.
Each row contains two links. The vendor store name redirects you to the frontend vendor store, allowing you to see what customers see when they visit it.
The other link appears as a pencil icon whenever you hover your mouse cursor over the shop name. This redirects you to the Vendor Management page, which offers extensive vendor editing options.
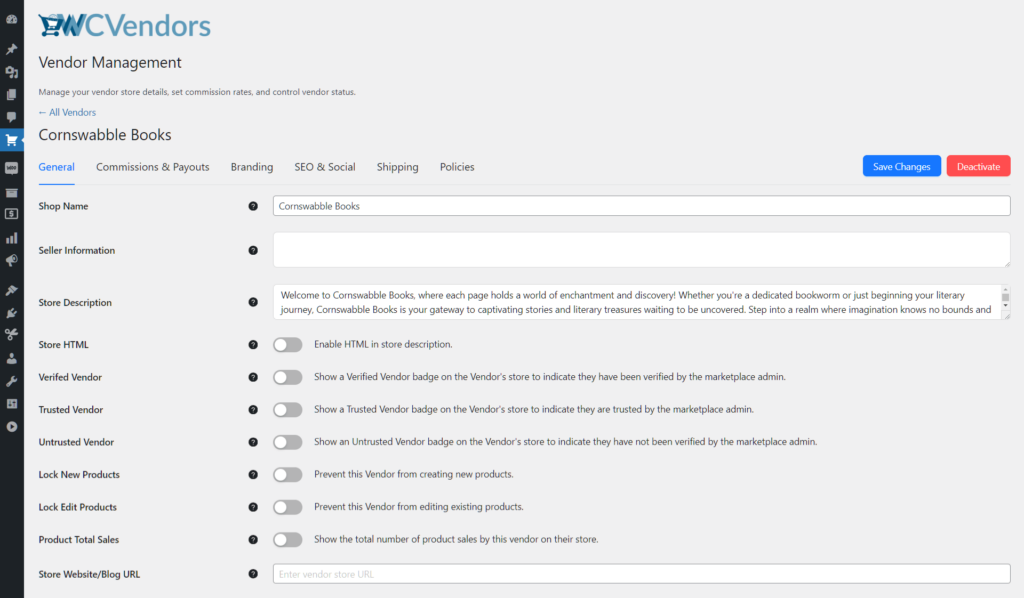
The Vendor Management page is divided into six different sections:
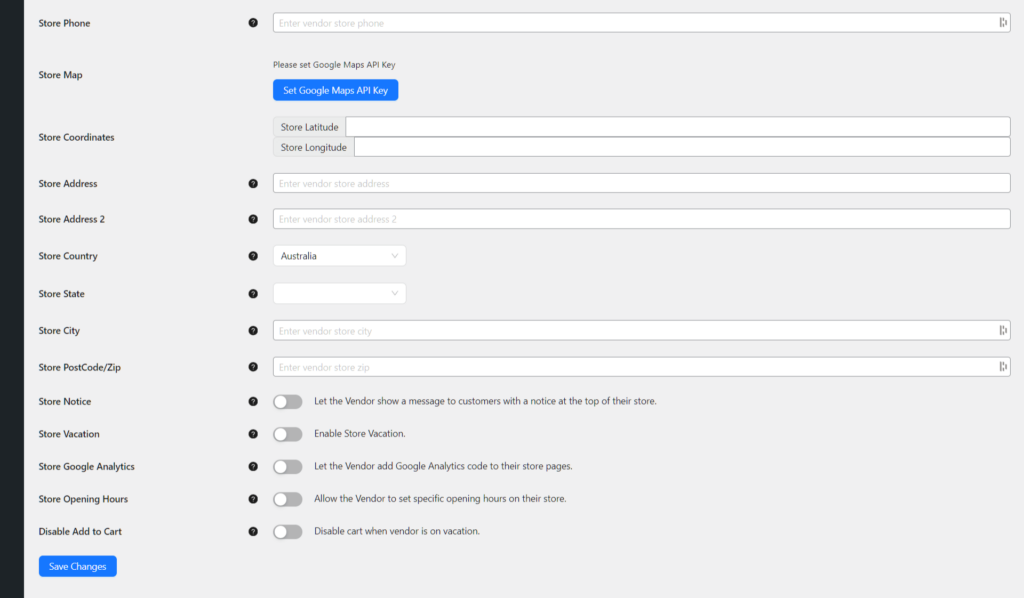
General
This contains multiple options controlling fundamental details about the store, including its name, description, address, and opening hours.
As you can expect, you can modify any of these details if you wish.
In addition, you can perform actions. For example, you can prevent the vendor from editing products. You can give the vendor the “Verified” status. You can even state whether they’re a “Trusted” or “Untrusted” vendor.
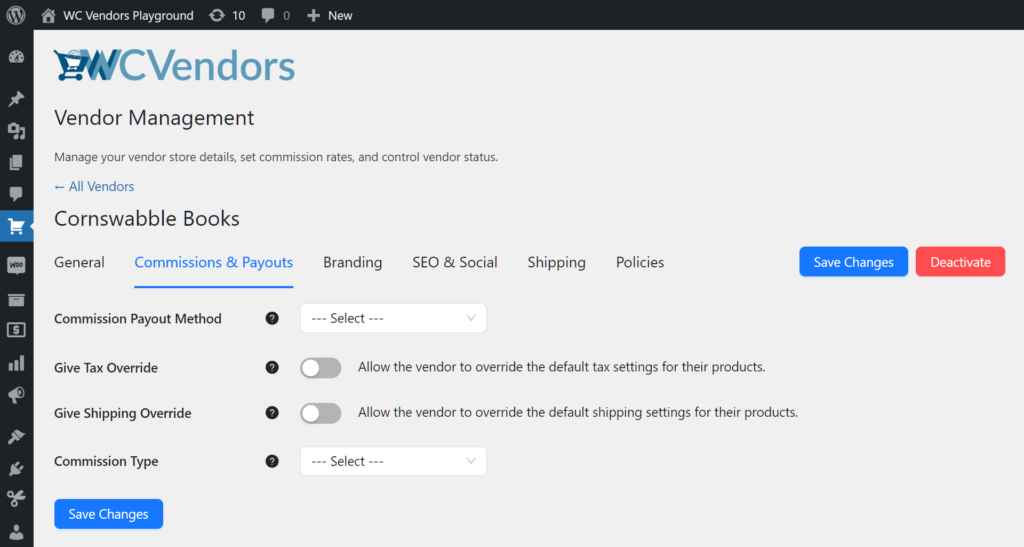
Commissions & Payouts
This section lets you revise settings associated with how vendors are paid, specifically through commissions.
For instance, you can choose if your payout method is via PayPal or bank transfer. In addition, you can pick the vendor’s commission type.
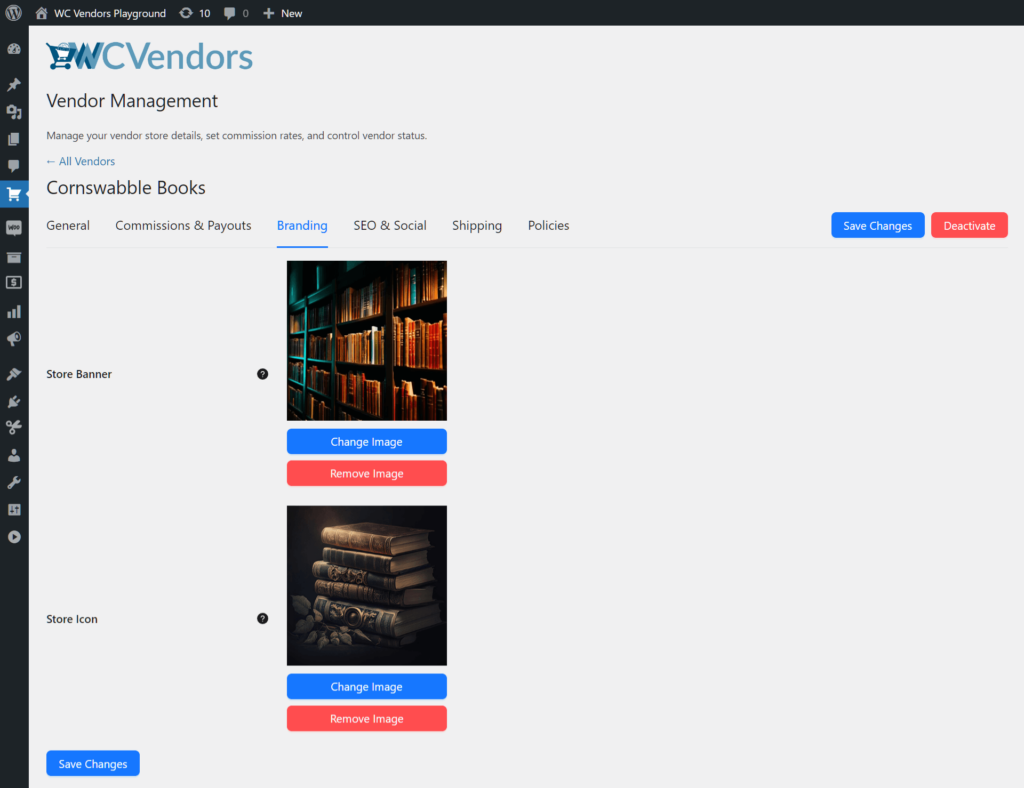
Branding
Need to tweak a vendor’s branding? This section lets you change or remove their store banner and store icon.
SEO & Social
This section lets you tweak any vendor’s SEO strategies and their social media presence.
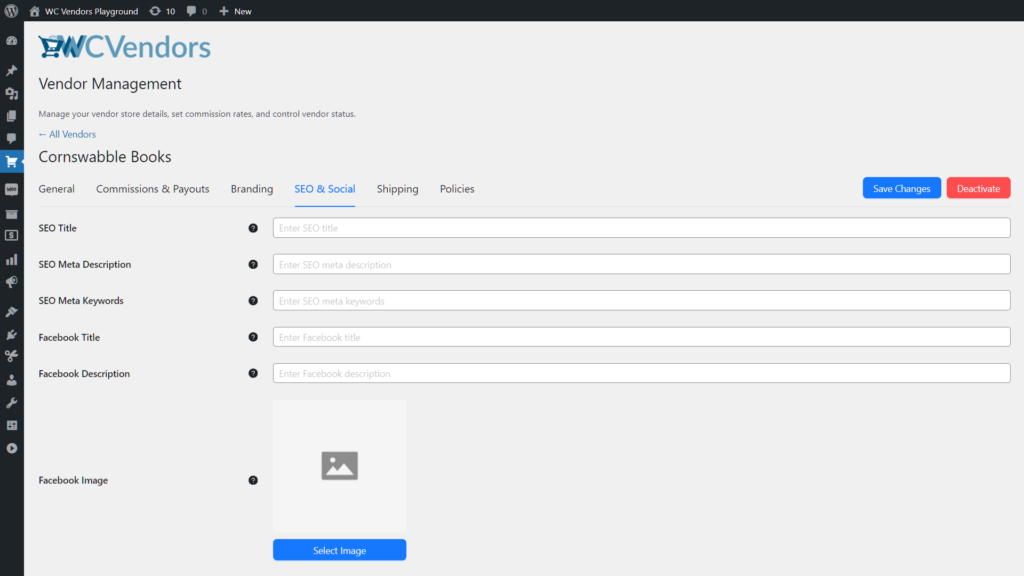
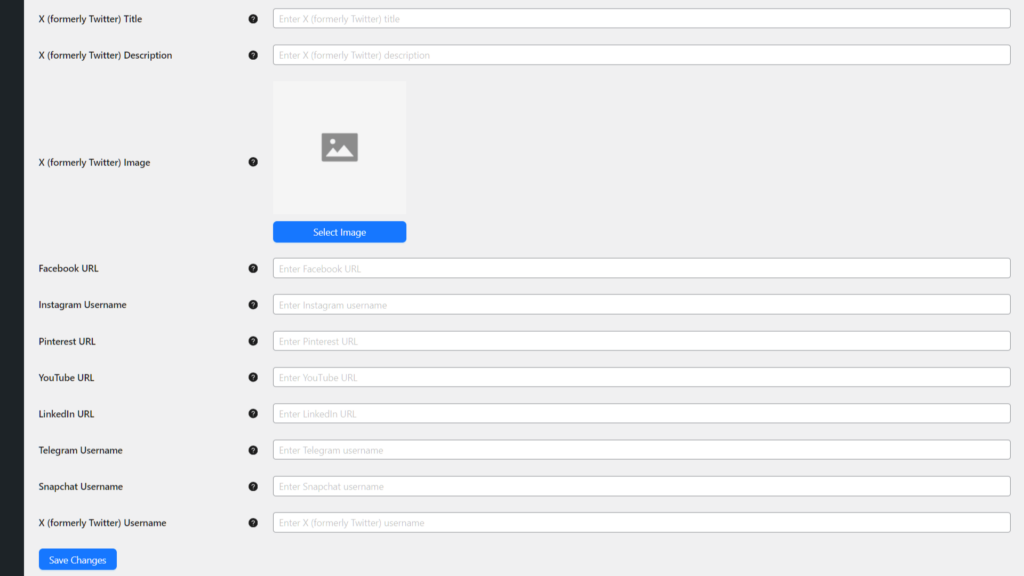
For example, you can alter their SEO title and meta description. Furthermore, you can tweak their social media URLs, usernames, and profile images.
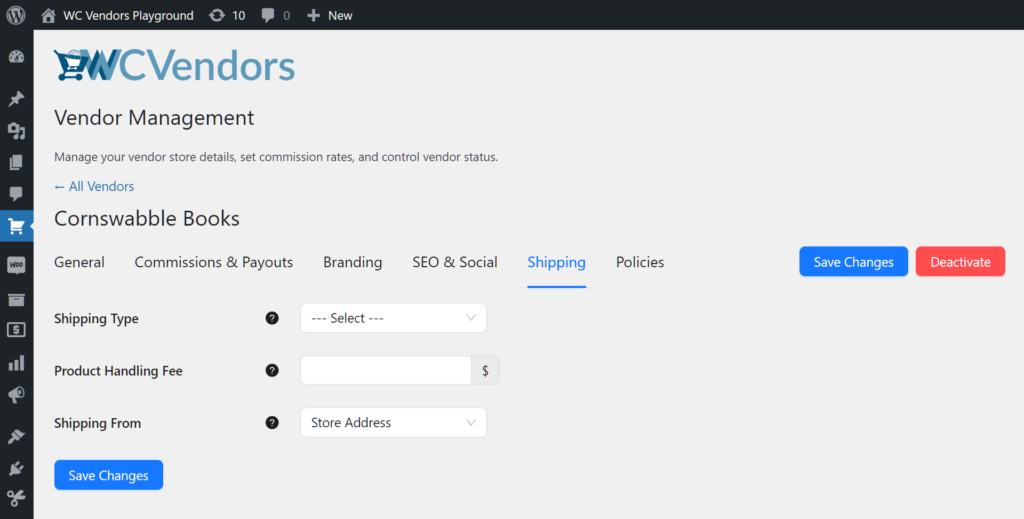
Shipping
If you need to adjust a vendor’s shipping-related settings, this is the section to go to.
For instance, you can tweak their shipping type or product handling fee.
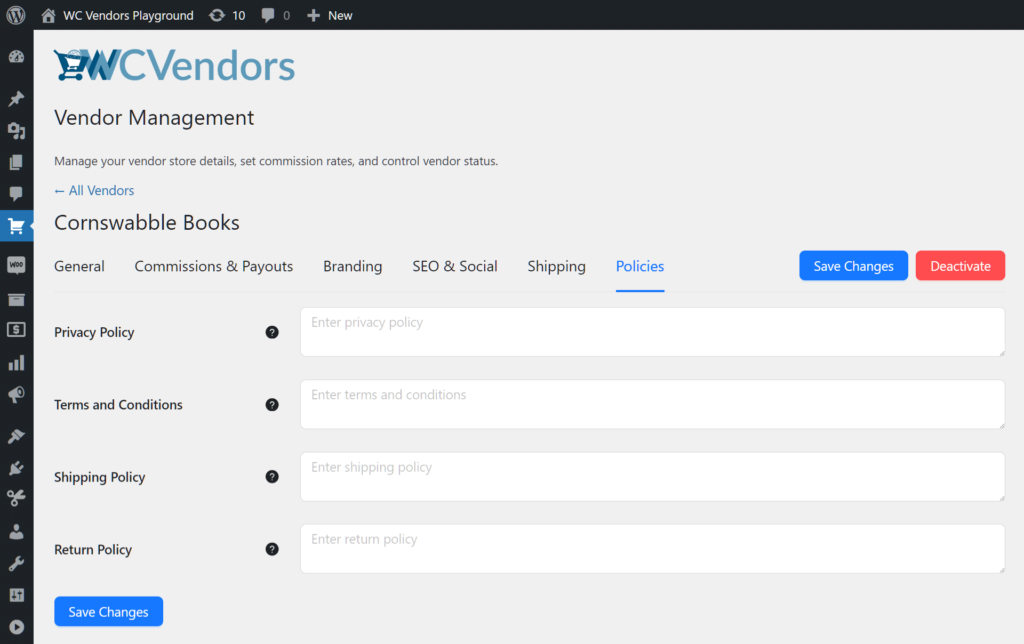
Policies
Explore this section if you need to modify a vendor’s policies.
For instance, you can customize their return policy or terms and conditions.
For every section you visit, don’t forget to click the Save Changes button to implement any changes you make.
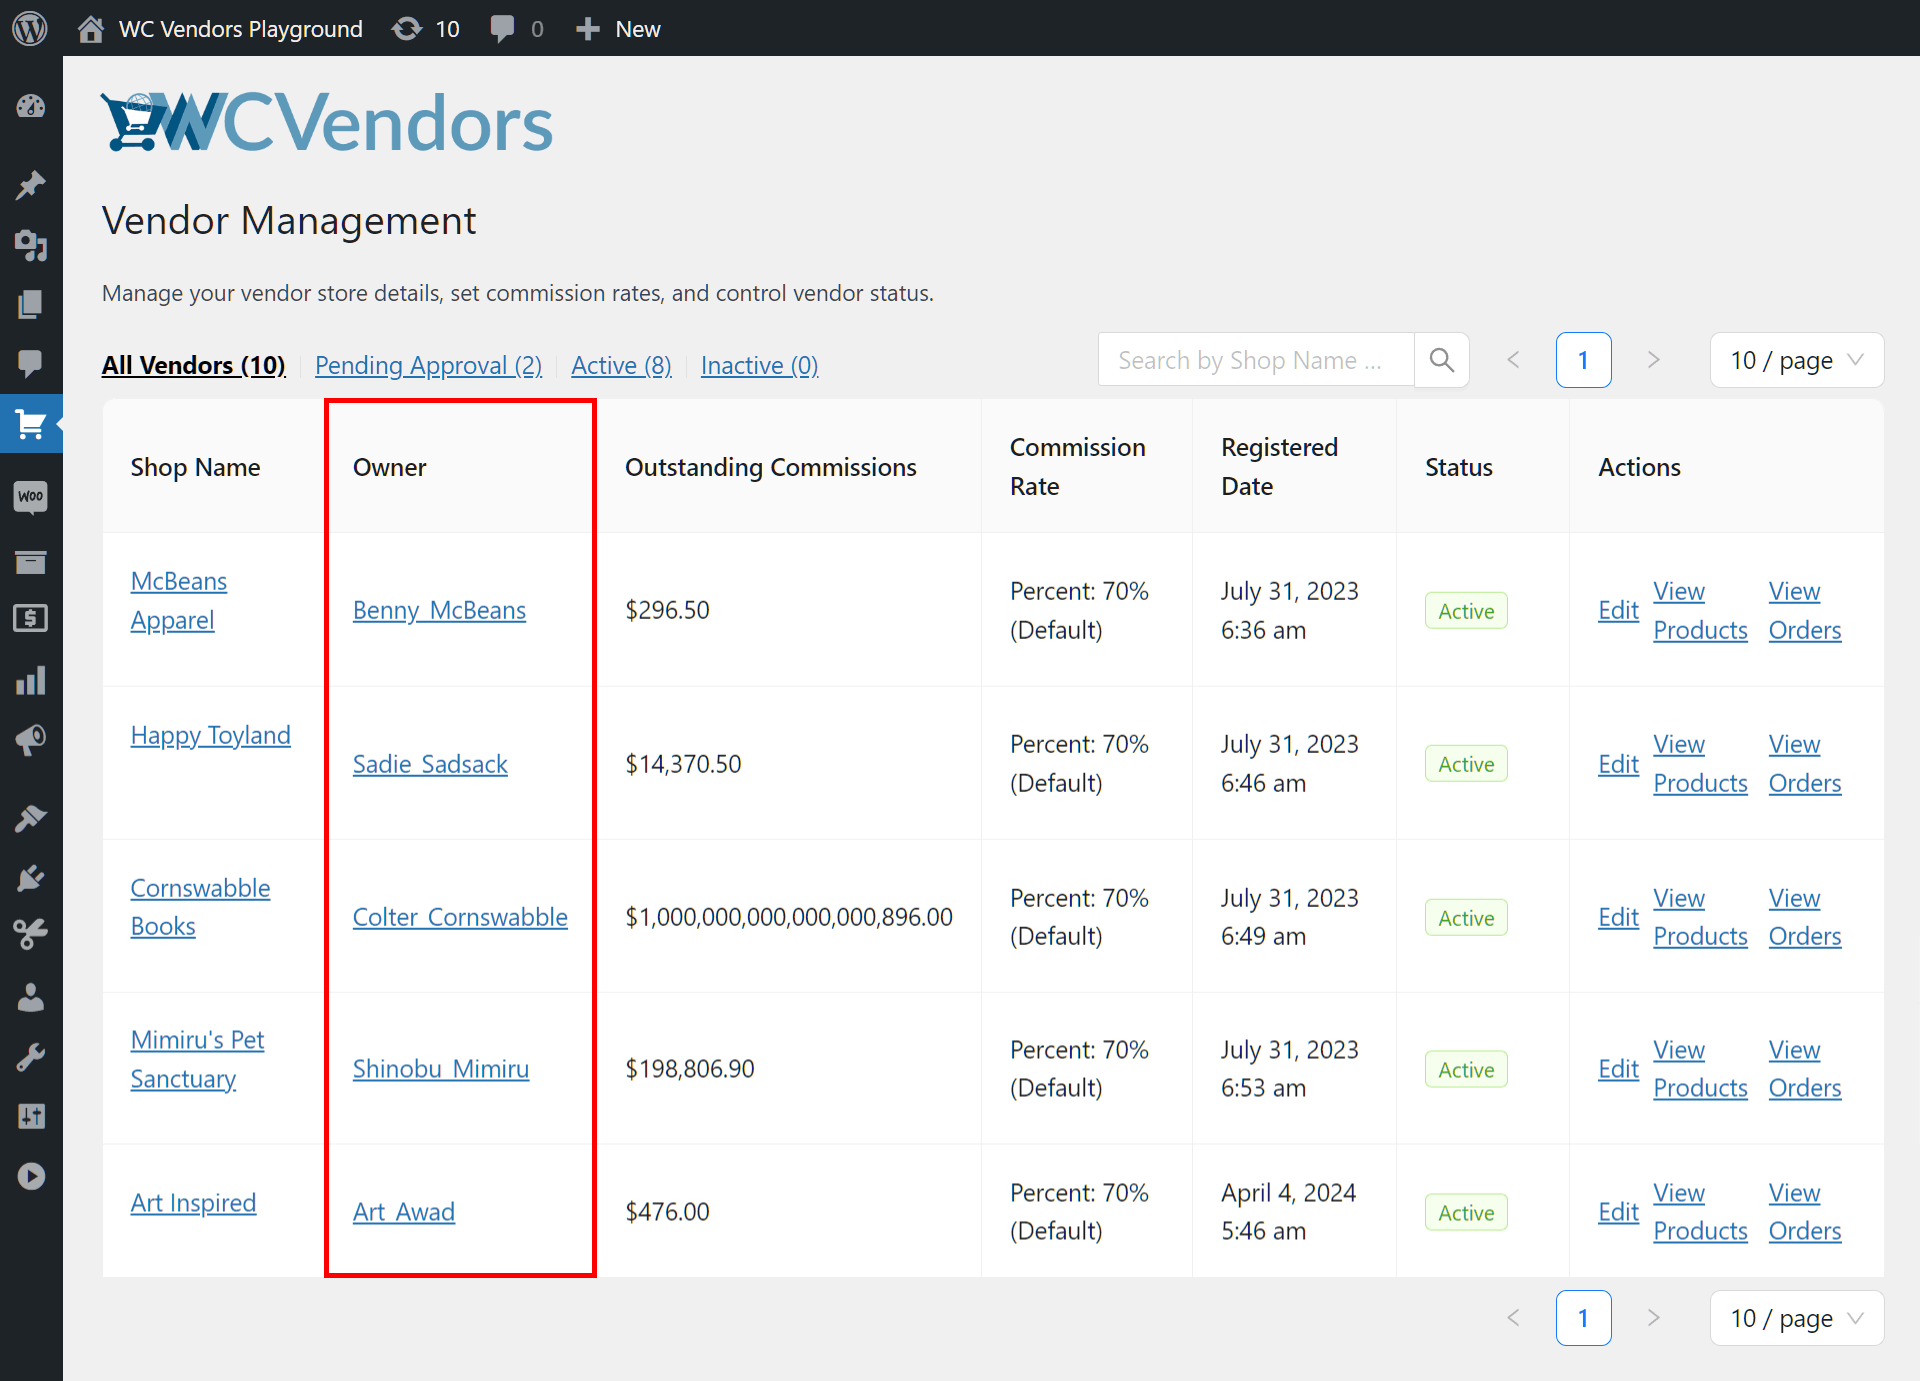
C. Owner
The “Owner” column contains the names of the vendors who own the stores listed in the first column.
While these names can’t be altered, they can be clicked. Doing so brings you to their Edit User page, which is the same page you’ll wind up on if you click on their name via User > All Users.
Like the Vendor Management page, this page lets you make extensive adjustments to the vendor’s settings. However, it gives you access to several more options. For example, you can change the vendor’s password through the Edit User page.
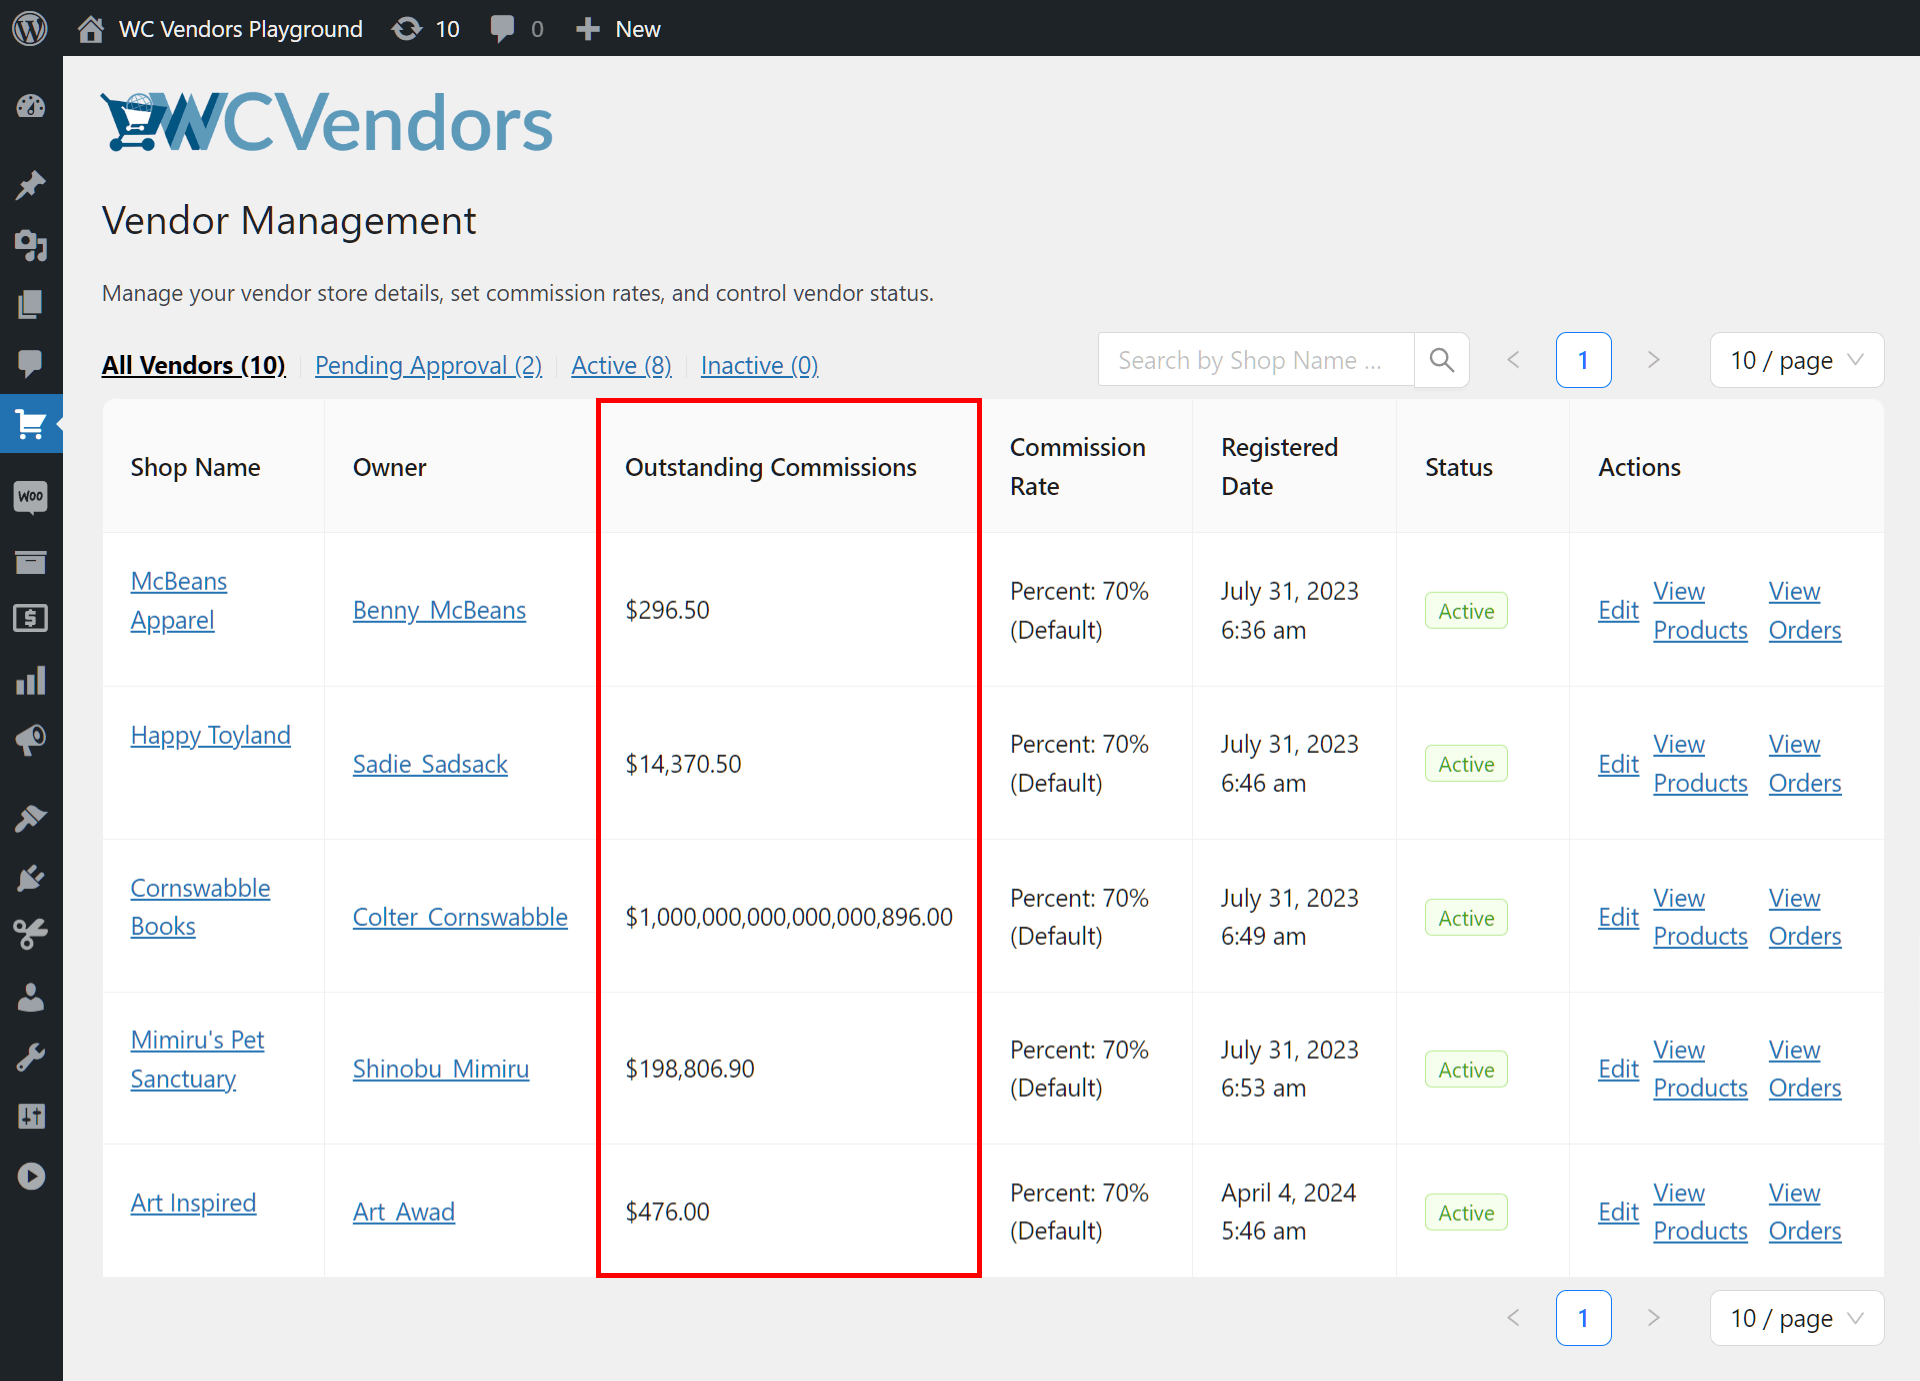
D. Outstanding Commissions
The “Outstanding Commissions” column displays the commissions your vendors have earned but not yet received. In other words, this is the money you owe vendors for the sales they’ve made.
Once you’ve paid a vendor the money you owe them, their outstanding commission will drop to $0.0.
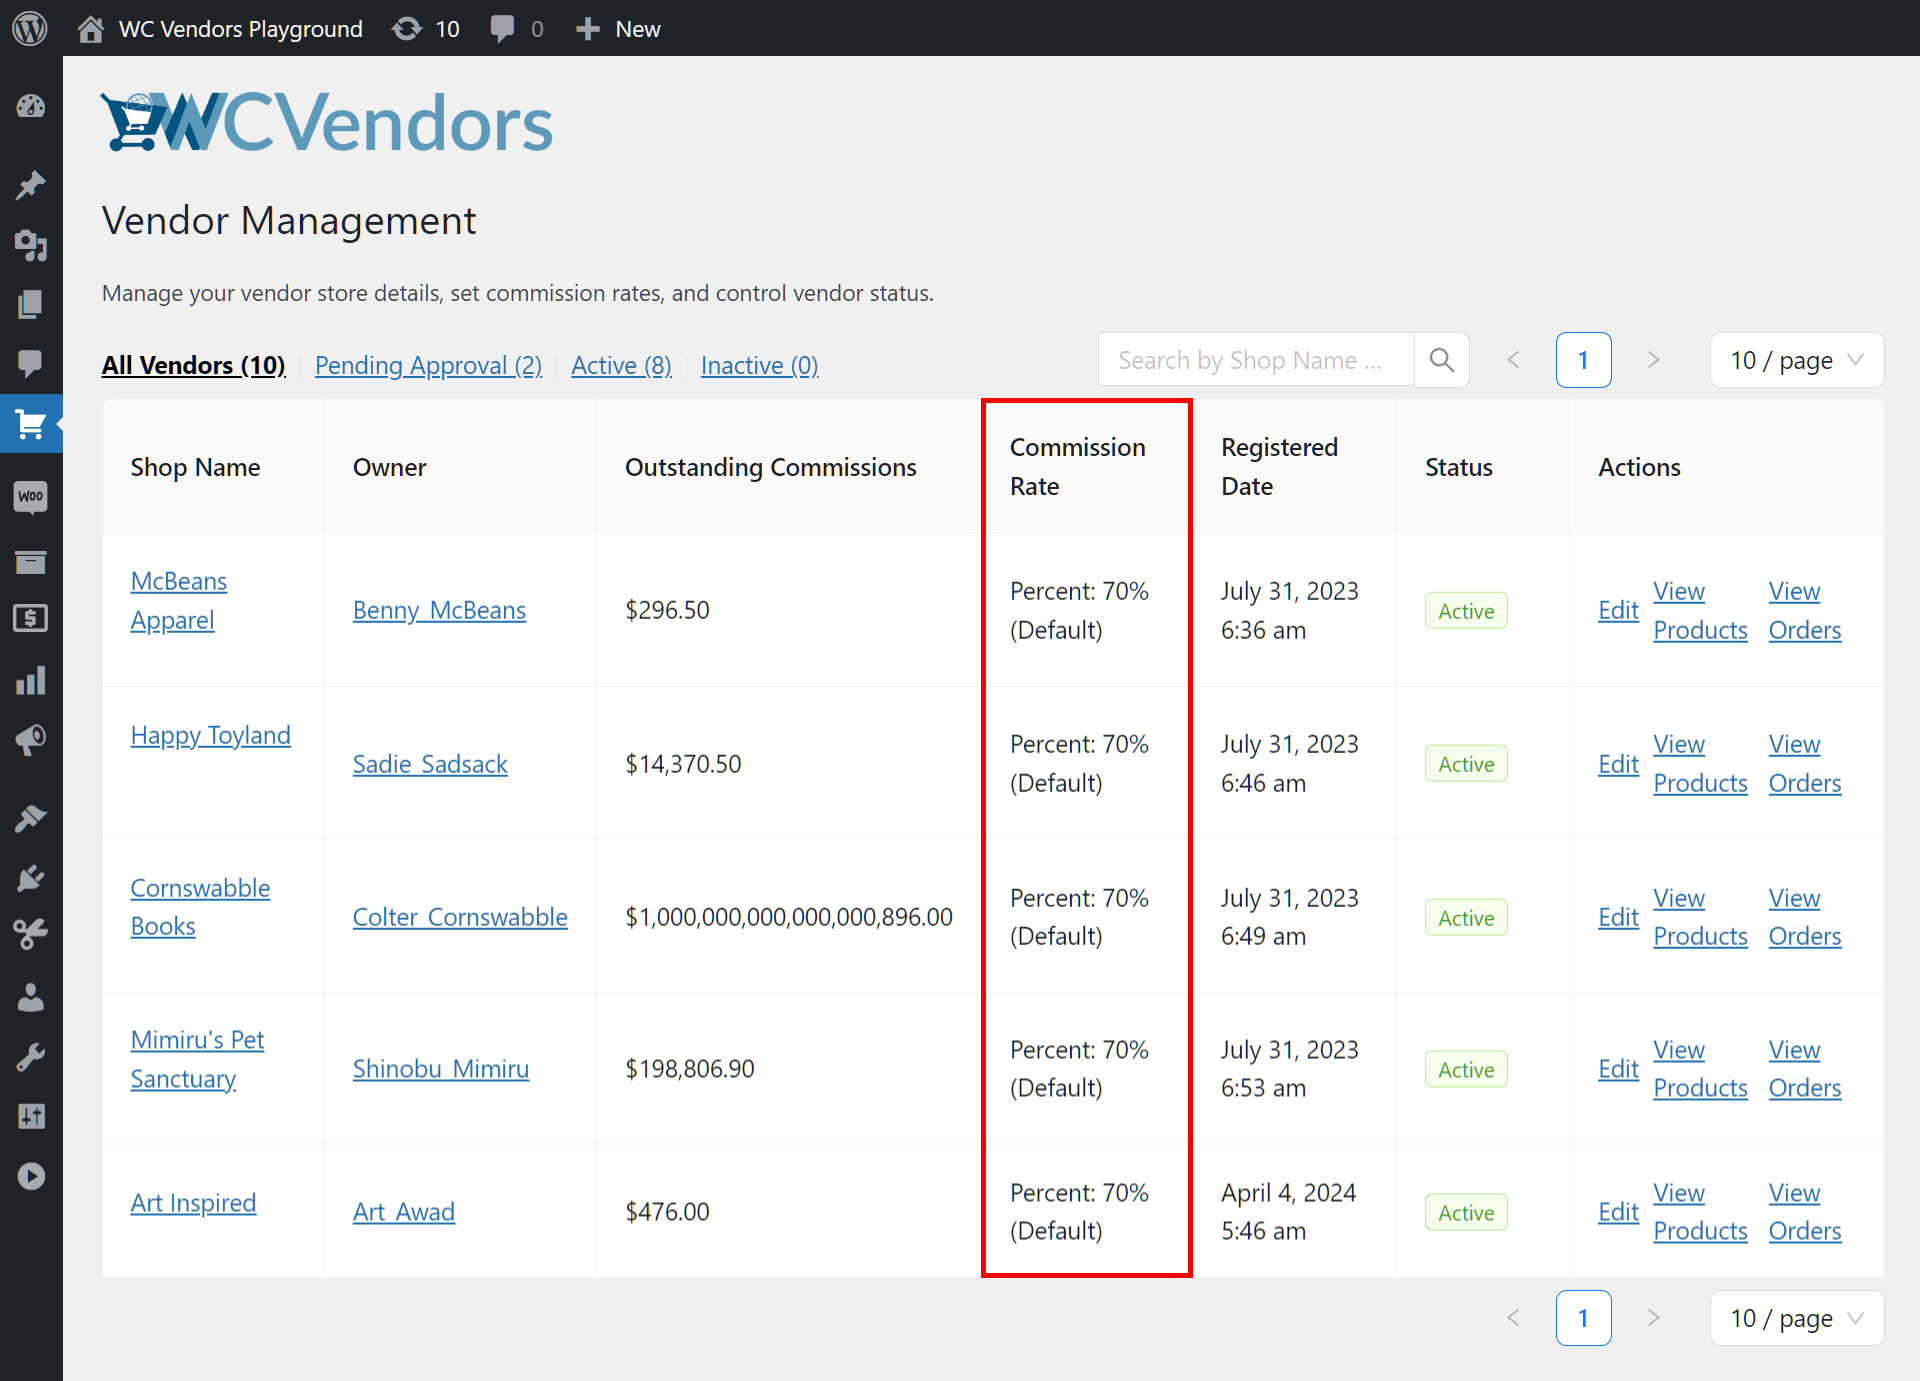
E. Commission Rate
The “Commission Rate” column shows the commission rates of the vendors in your marketplace.
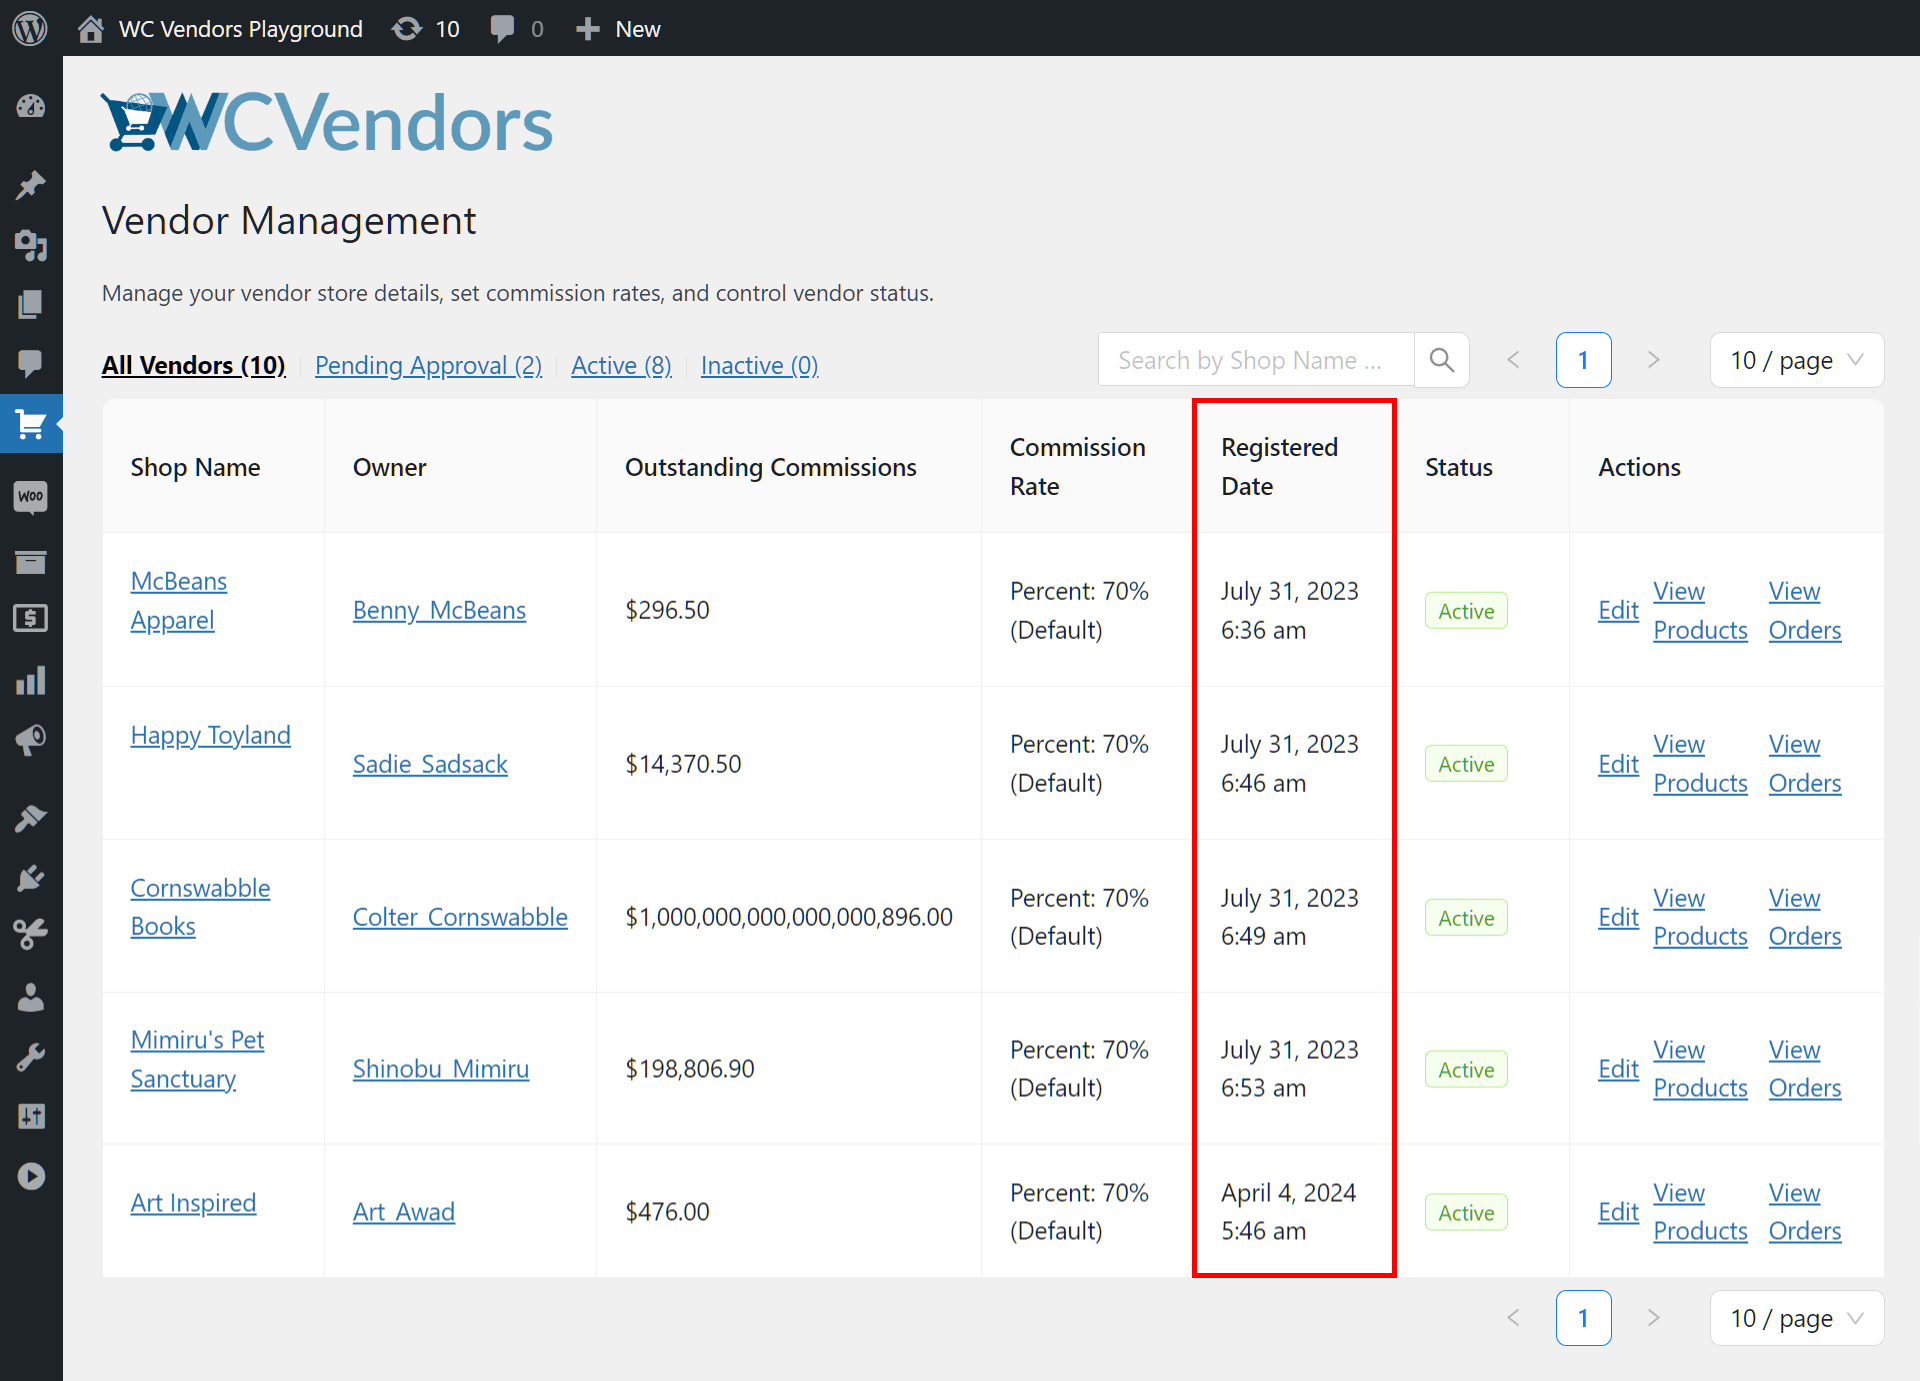
F. Registered Date
If you’d like to know when a vendor registered on your platform, check their row in the “Registered Date” column.
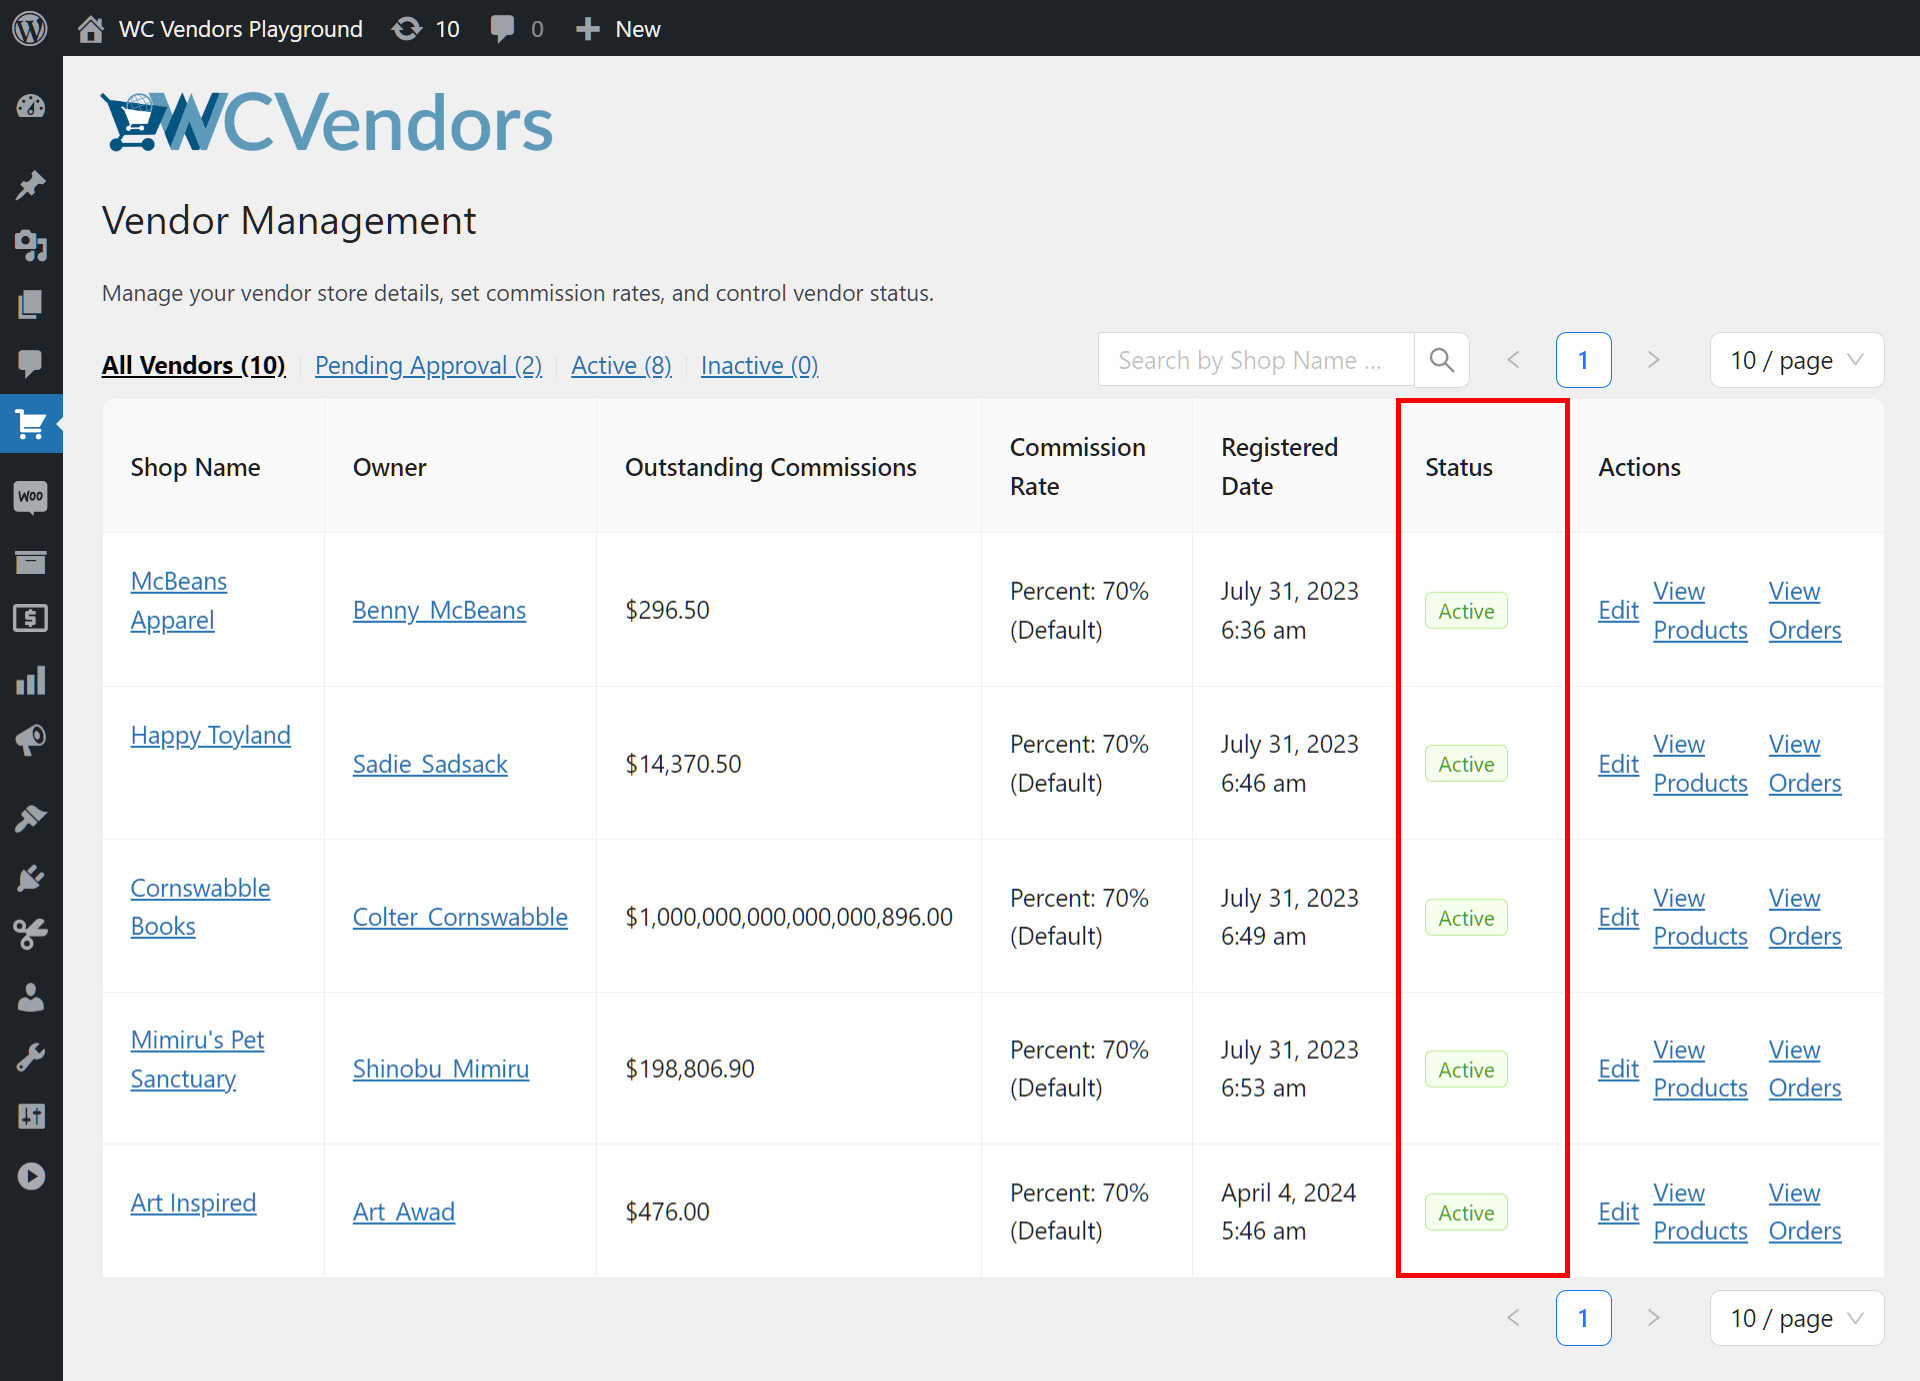
G. Status
The “Status” column reveals if a vendor is actively selling within your marketplace, inactive, or waiting for your approval to join your platform.
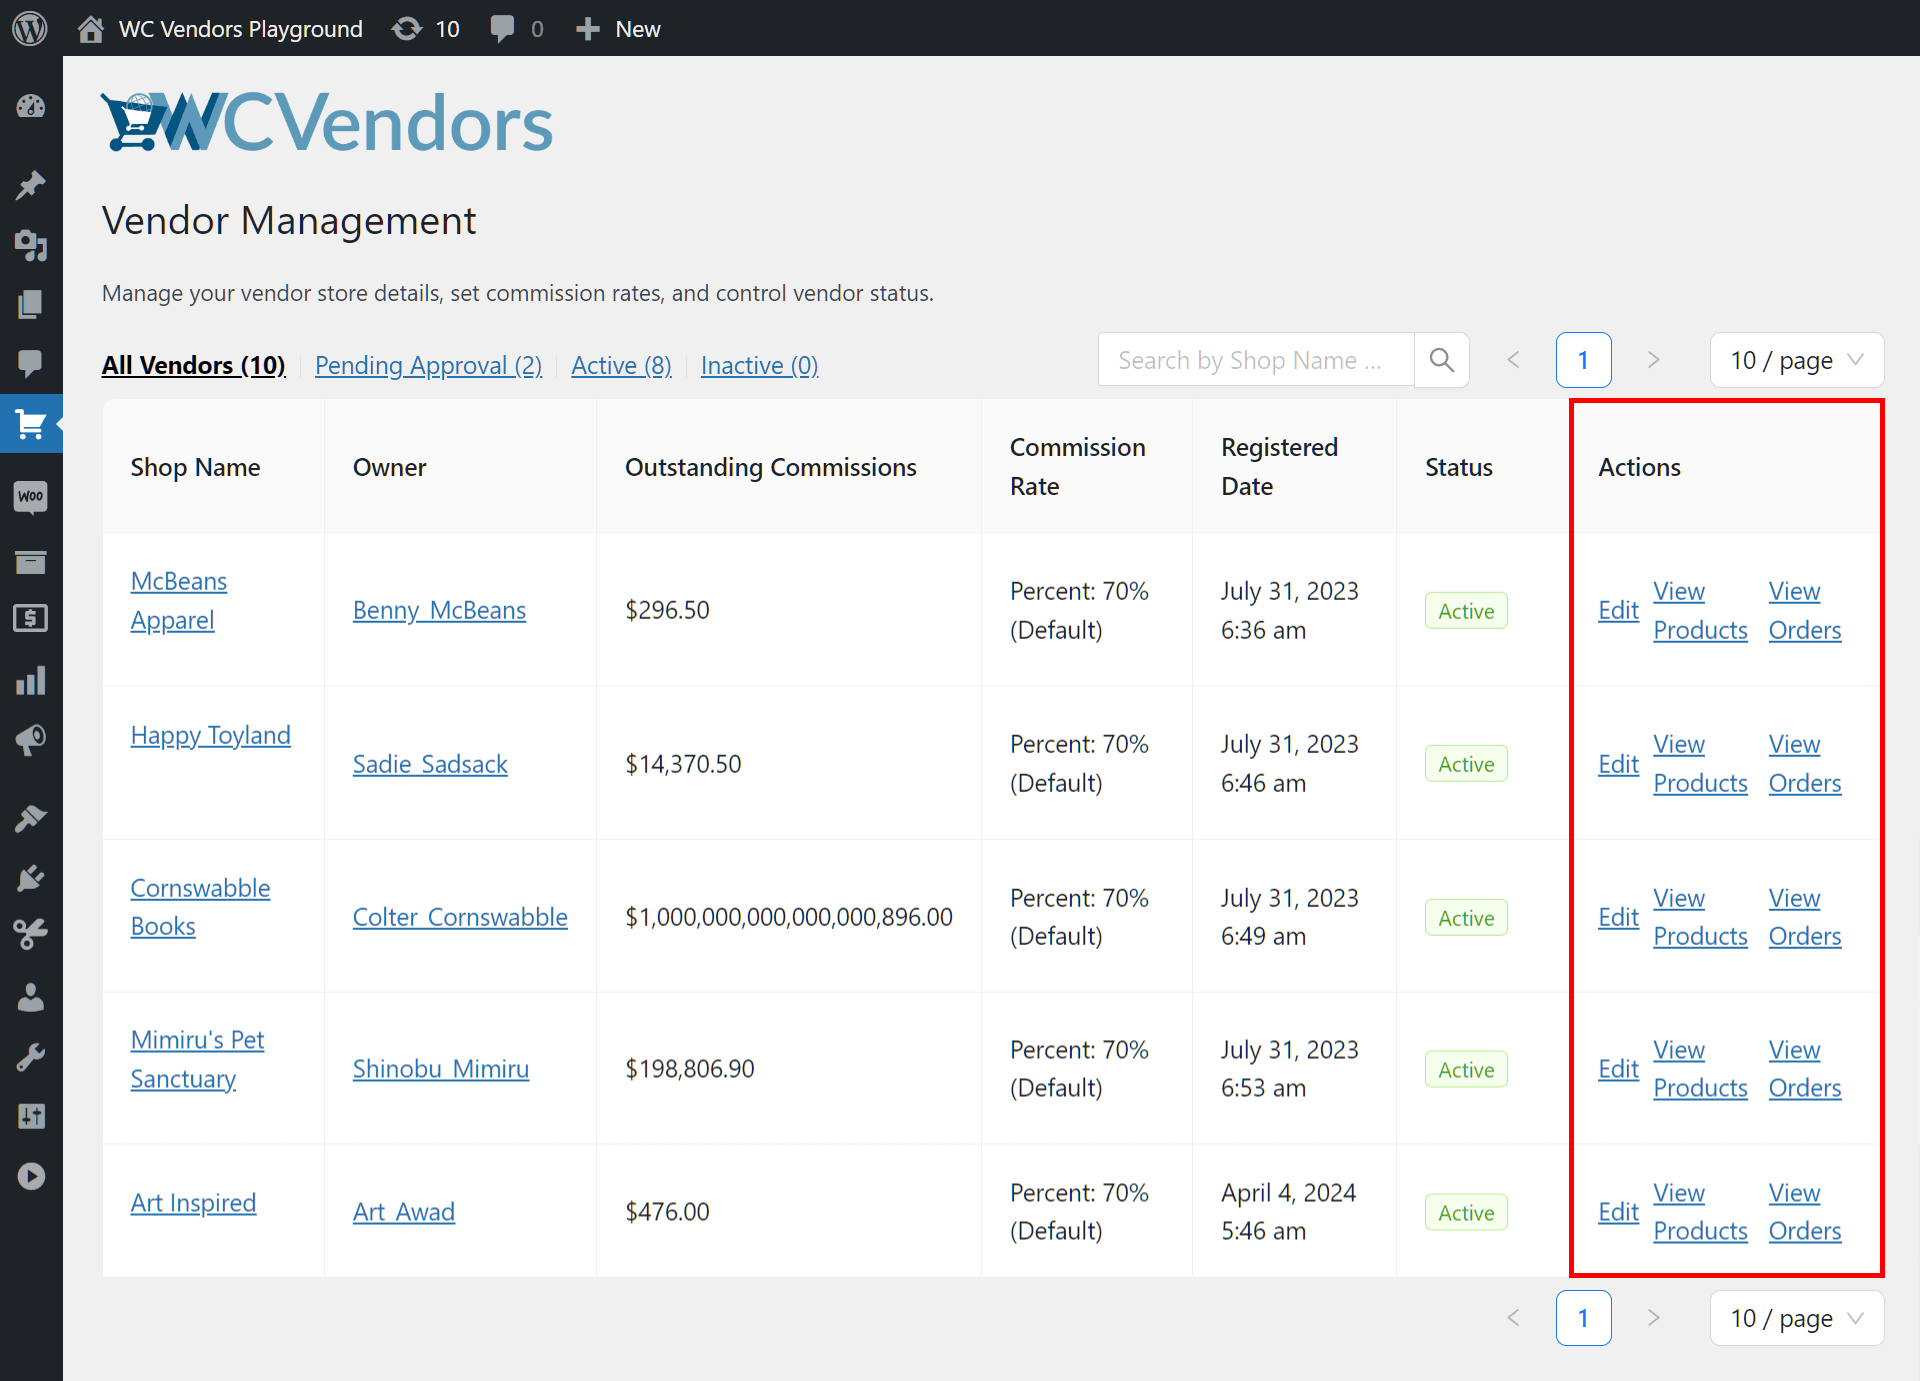
H. Actions
The “Actions” column comes with various links. You can click these to view data or perform specific customizations related to your vendors and their stores.
For example, if a vendor is “Active,” the links are as follows:
Edit: This takes you to the previously discussed Vendor Management page.
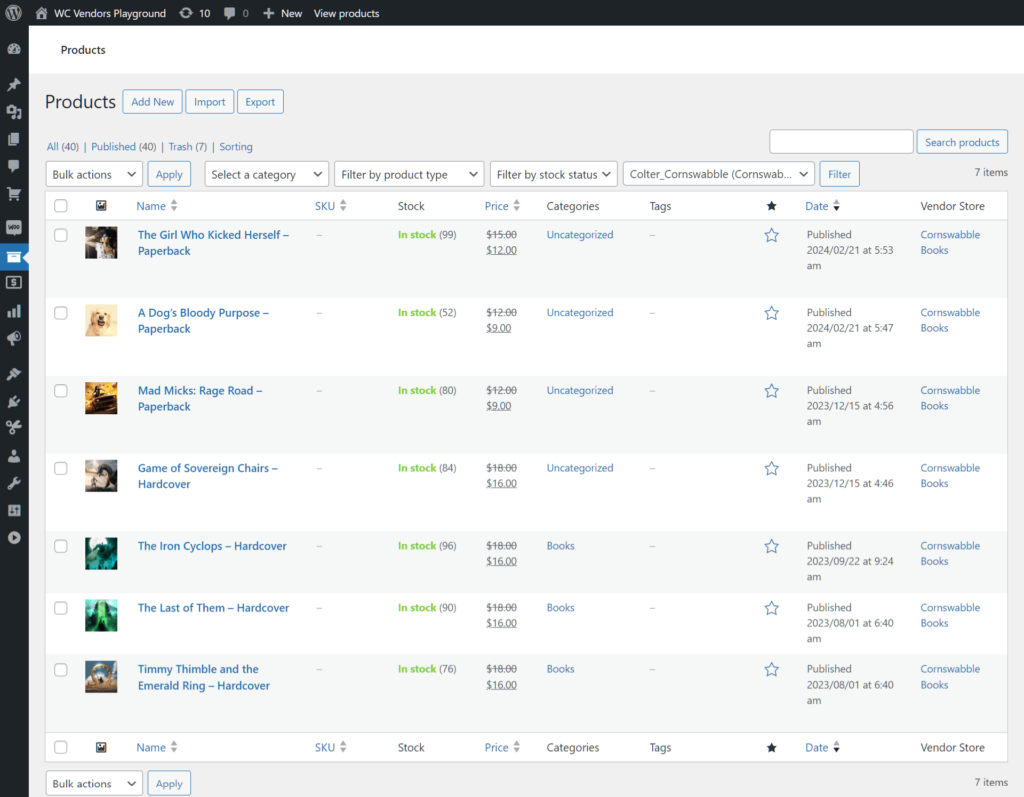
View Products: This redirects you to a page listing the products a vendor is selling within your marketplace. Basically, it’s the same as clicking Products > All Products, then selecting the vendor’s name.
This page lets you view or edit a vendor’s products.
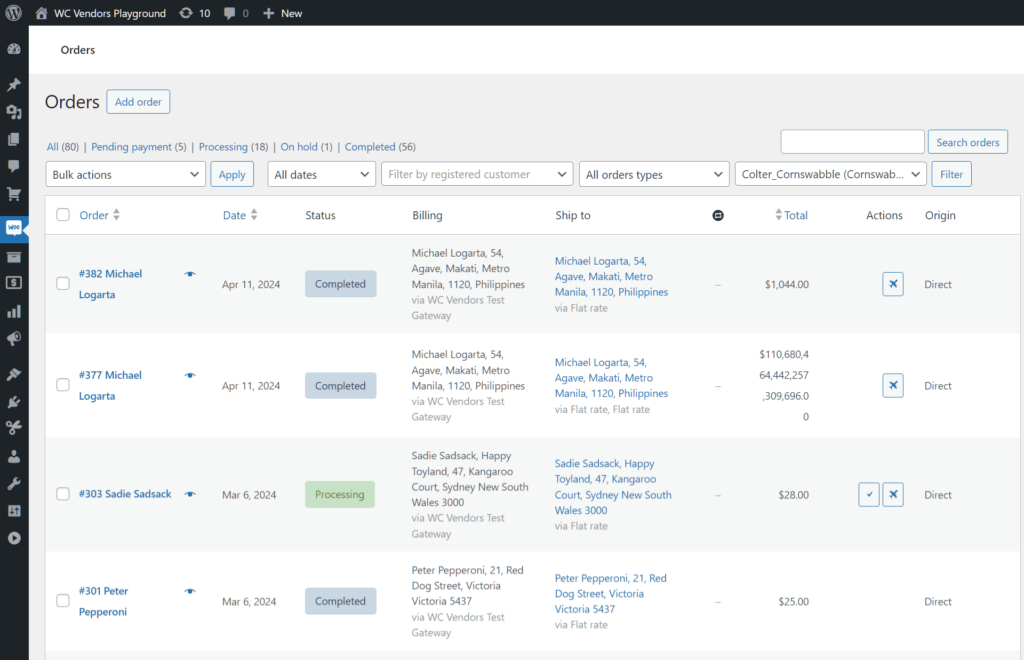
View Orders: This takes you to a page listing the customer orders related to a vendor. It’s the same as clicking WooCommerce > Orders and then selecting the vendor’s name.
Go to this page to alter or view customer order data.
Conclusion
The All Vendors page allows you to enjoy effortless and efficient seller management in your multi-vendor marketplace. With its intuitive interface, comprehensive tools, and user-friendly design, this feature lets you streamline administrative tasks, optimize vendor settings, and enhance your and your vendors’ overall experience.
To recap, it only takes two steps to benefit from convenient yet comprehensive seller management:
Take advantage of the All Vendors feature today and unlock the full potential of your online marketplace!
Would you like to know more about streamlining seller management by using the All Vendors page? Feel free to contact us with your questions; we’d be glad to offer assistance!

