WC Vendors Pro now includes built-in menu options, making it simple to create custom navigation for your vendors. In the past, you would have needed a plugin like Nav Menu Roles to conditionally
display menu items.
If you want to add vendor navigation outside of the Vendor Dashboard, you can use the standard WordPress menu system to link directly to the various dashboard pages.
Links to all the main Vendor Dashboard pages are available as conditional menu items. These will only appear to users with the Vendor role.
Create Vendor Menu

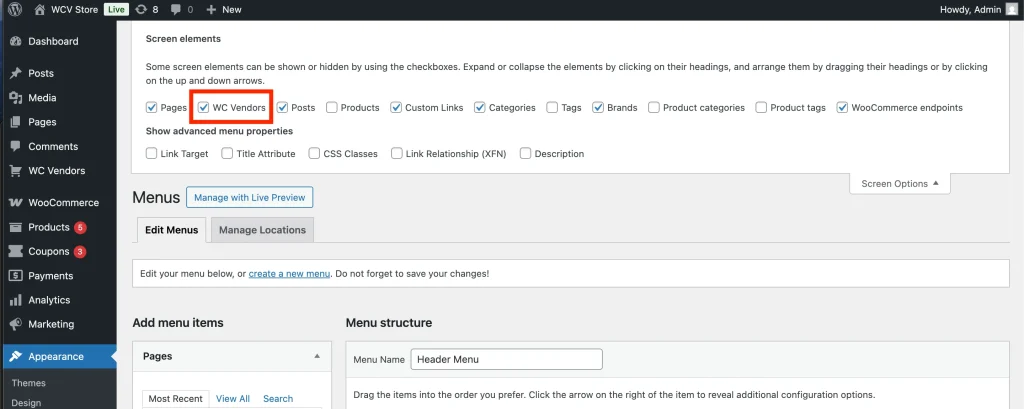
- Click the “Screen Options” button on the top right.
- Mark the “WC Vendors” checkbox from that Screen Elements box to display all WC Vendors menu items.
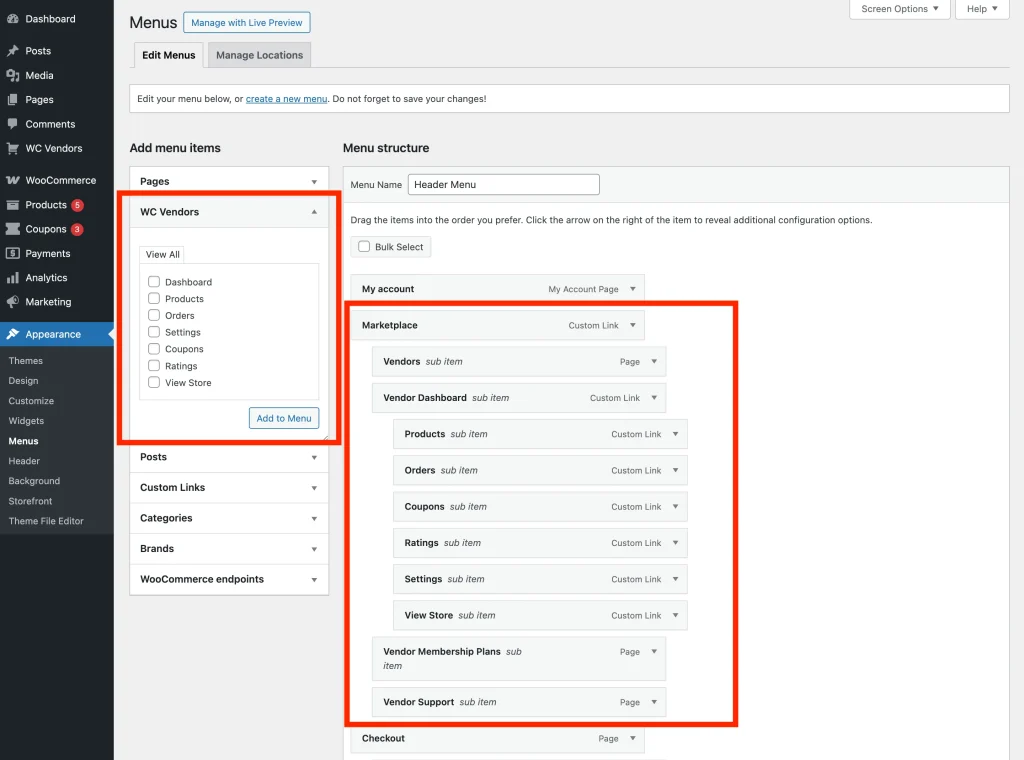
- Afterward, the menu item will be shown from the “Add menu items” panel on the left.
- Select the WC Vendors menus and click the “Add to Menu” button to place them in the “Menu structure” panel on the right.
- Use these menu items to quickly build a vendor-only menu. Once added, the WC Vendors menu items will only display for logged-in vendors, keeping navigation relevant.
- If you wish to add a logout menu, it is also available under the “WooCommerce endpoints” section at the bottom of the menu items list.

Vendor Only Menu Output
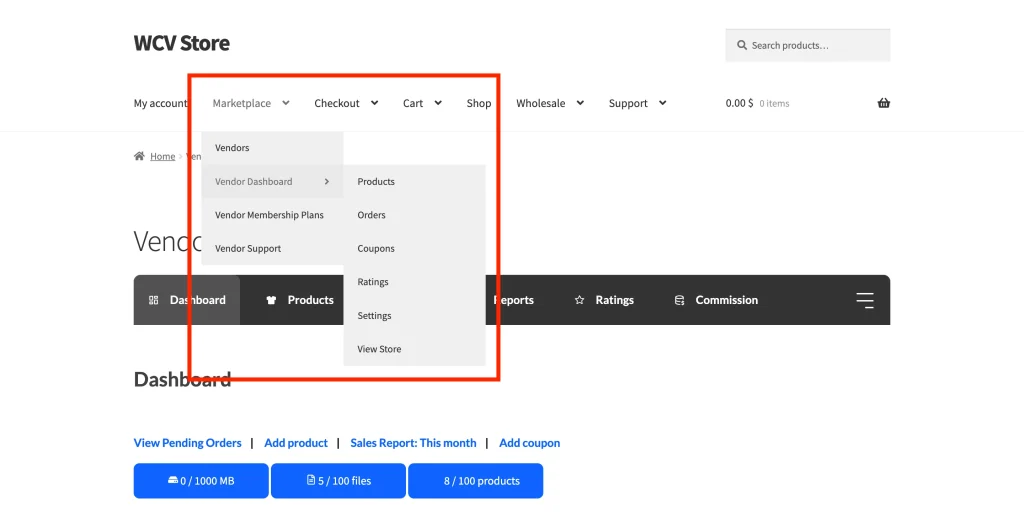
This is the output on the front end when a vendor user is logged in to your marketplace. This allows them to quickly access their dashboard or view their store.

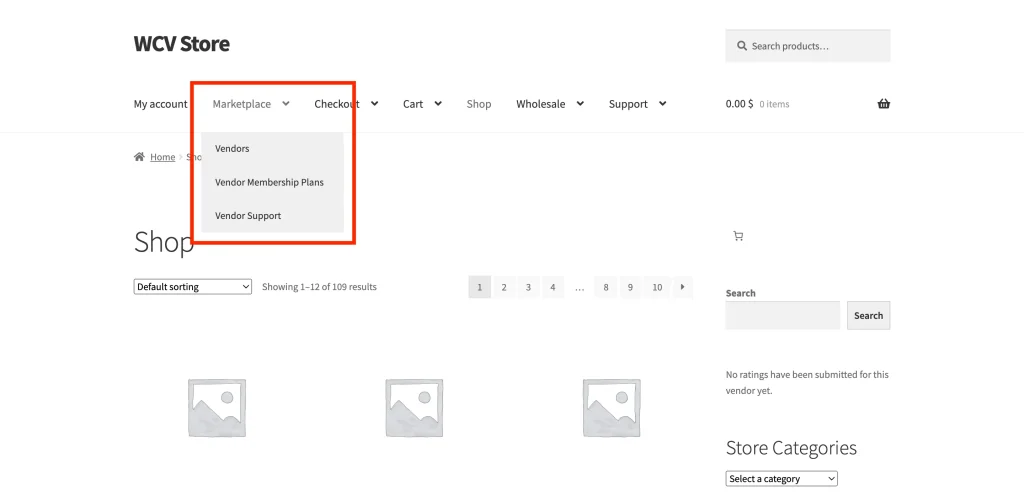
For all other users, they will only see the menus that are not from our WC Vendors menu elements.

If you add a logout menu item, it will be the only menu item displayed for logged-in users. For logged-out users, the menu does not display at all.