Anyone operating a multi-vendor marketplace would do well to provide clear and detailed seller information.
This is because sharing such details is essential for building trust in your vendors. And the more shoppers trust your sellers, the more sales you can expect.
Today, we’ll delve into the significance of seller info in multi-vendor marketplaces. Furthermore, we’ll teach you how to use WC Vendors, a premium WooCommerce marketplace solution, to display these details on vendor stores.
So let’s get cracking!
What Is Seller Information?
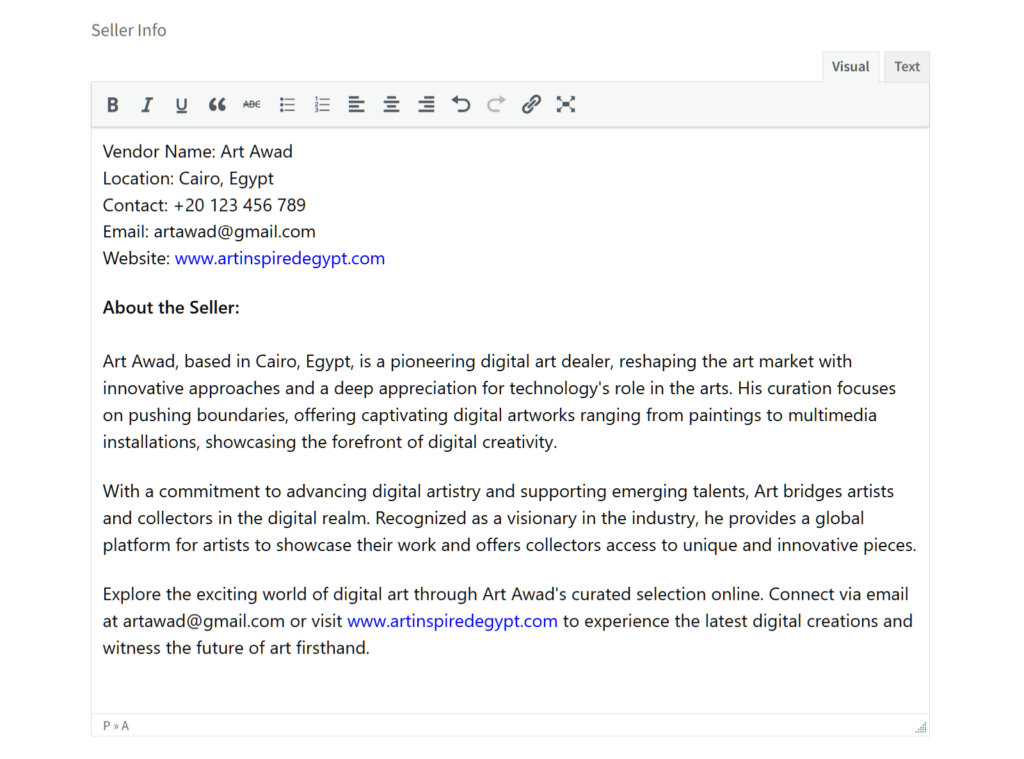
In the context of a multi-vendor marketplace, seller information refers to the details and background information provided about individual sellers on the platform. This information may include any number of details, such as:
- Vendor/business name: The name of the individual or business operating the store within the marketplace.
- Contact information: This may include the vendor’s means of communication such as their email addresses and phone numbers. Basically, this allows customers to reach out to the seller for inquiries or support.
- Location: The vendor’s geographical location (if they have one). This can be useful for customers to understand shipping times and costs, especially if they prefer to support local businesses.
- Company history: A brief overview of the seller’s journey. This includes when their store was founded, its growth over time, and any significant achievements.
- Expertise and specialization: This includes information about the vendor’s areas of expertise. For example, it could highlight the products or services they specialize in.
- Quality assurance: Details about the seller’s commitment to quality. For example, this section could discuss their quality control processes or any certifications they may hold.
- Mission or values: The vendor’s mission statement, core values, or guiding principles that shape their business practices and interactions with customers.
- Social responsibility: Any initiatives or commitments the seller has towards social responsibility, sustainability, ethical sourcing, or community involvement.
What’s the difference between a store description and seller information?
In an e-commerce website, particularly a multi-vendor marketplace, the terms “shop/store description” and “seller information” might be used interchangeably. However, they often refer to different aspects:
Shop/Store Description
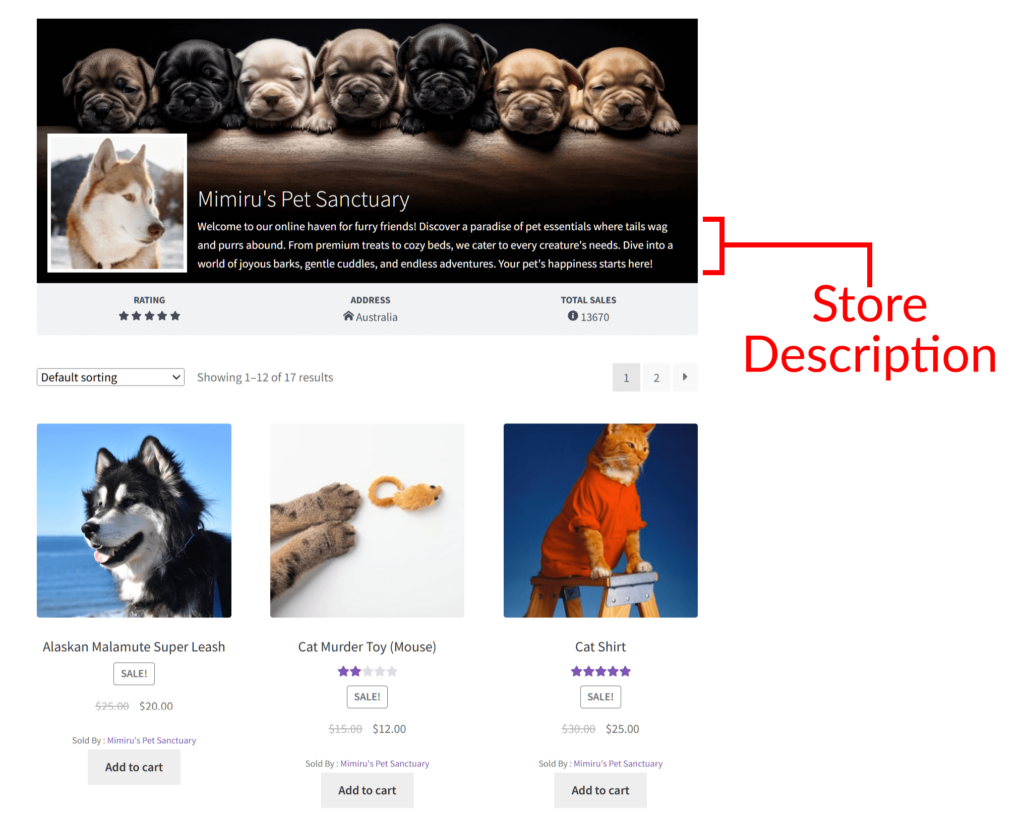
This refers to the information provided by the store within the marketplace. Typically, it includes details about its products or services, unique selling points, and promotions or special offers. It could even share information about the brand or shop’s philosophy. The shop description is aimed at attracting customers to explore what that particular vendor has to offer.
In essence, the shop/store description focuses on marketing and promoting the individual shop’s offerings.
In a marketplace powered by WC Vendors, the store description is typically found at the top of the vendor store’s landing page. Moreover, it’s usually within the store banner.
Seller Information
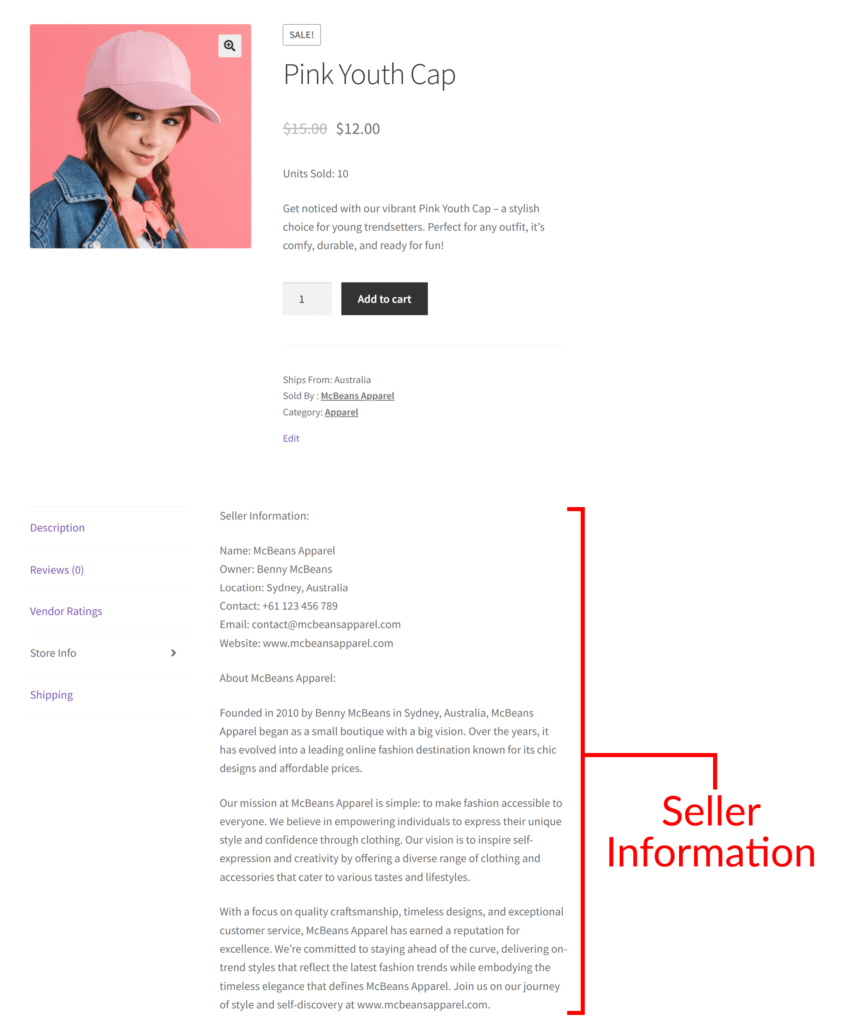
As discussed above, seller information usually encompasses broader details about the vendor on the platform. Thus, it usually includes the vendor’s name, contact information, company history, and mission statement.
Seller information is more about establishing trust and transparency between the seller and potential buyers. It helps consumers make informed decisions by offering insights into the sellers’ credibility, reliability, and the shopping experience they provide.
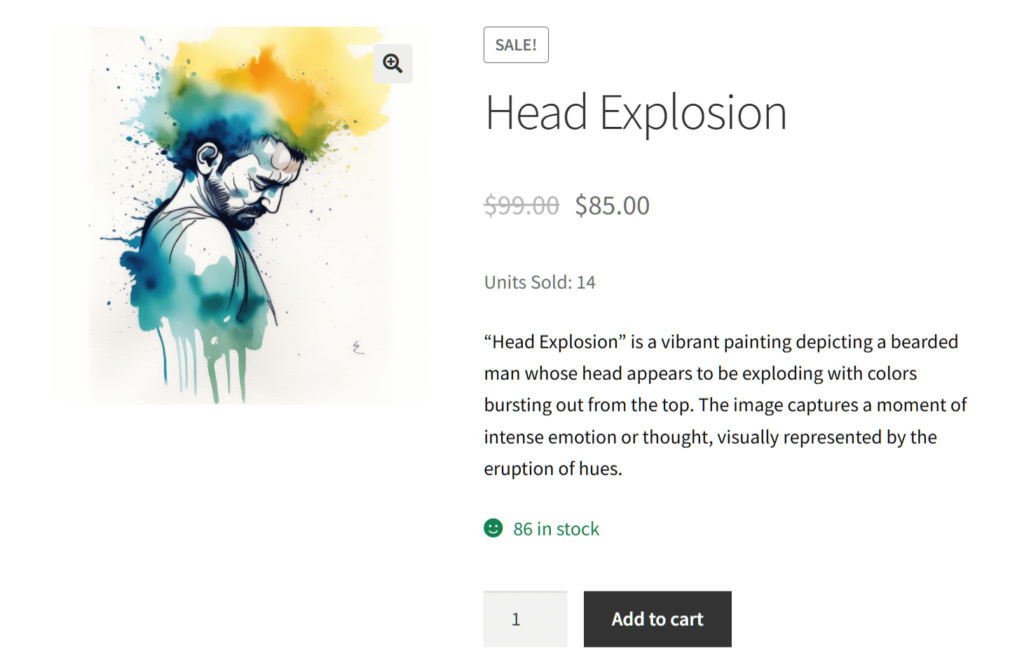
In a WC Vendors-powered marketplace, the seller information is usually found at the bottom of the product listing. Specifically, it’s below the product image, short description, and “Add to Cart” button.
How To Display Seller Information In Your Marketplace (In 3 Steps)
Do you want to effectively share seller info via your platform? Then we recommend building your marketplace using WC Vendors.
However, you’ll first need an online store powered by WordPress and WooCommerce. Then, you must convert this store using WC Vendors. For detailed instructions on how to do this, read the following guides:
- How To Create An Online Marketplace: A Beginner’s Guide
- How To Build Your First Multi-Vendor Ecommerce Website (Full Guide)
With that in mind, let’s learn how you can share seller info in your marketplace!
Step 1: Navigate to the Forms section
Most settings you need to tweak to provide customers with information about your stores can be found in WC Vendors’ Forms section.
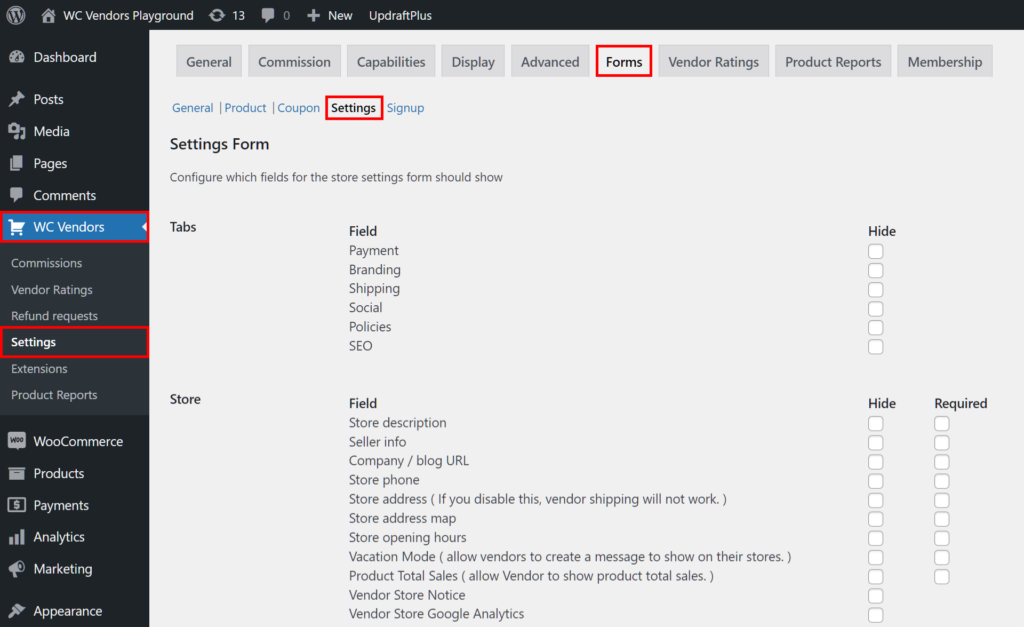
To get there, head to your WordPress dashboard. Then, click WC Vendors > Settings > Forms > Settings.
As illustrated above, Settings is home to various options. When enabled, these become available in every vendor’s dashboard settings, allowing them to modify their store as they see fit.
Step 2: Enable the Seller Info option
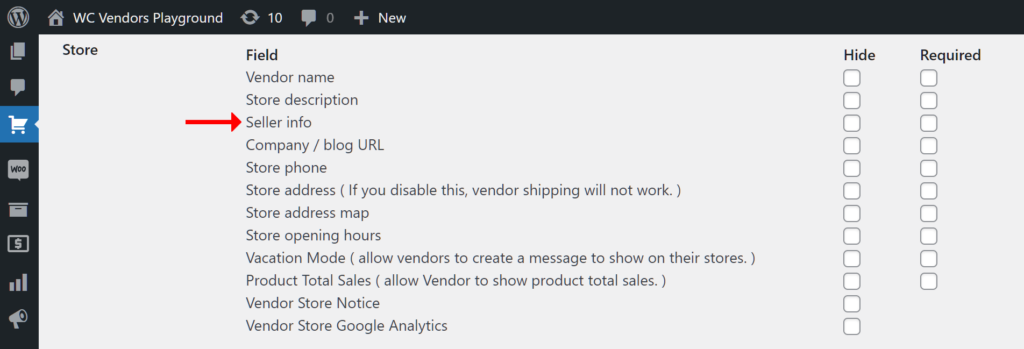
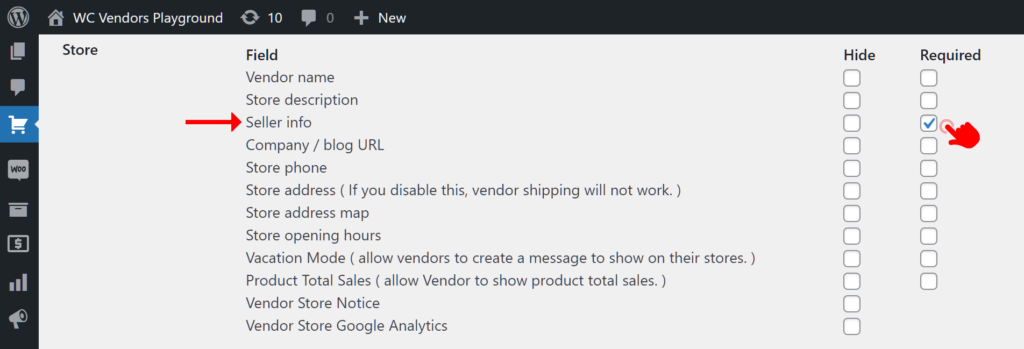
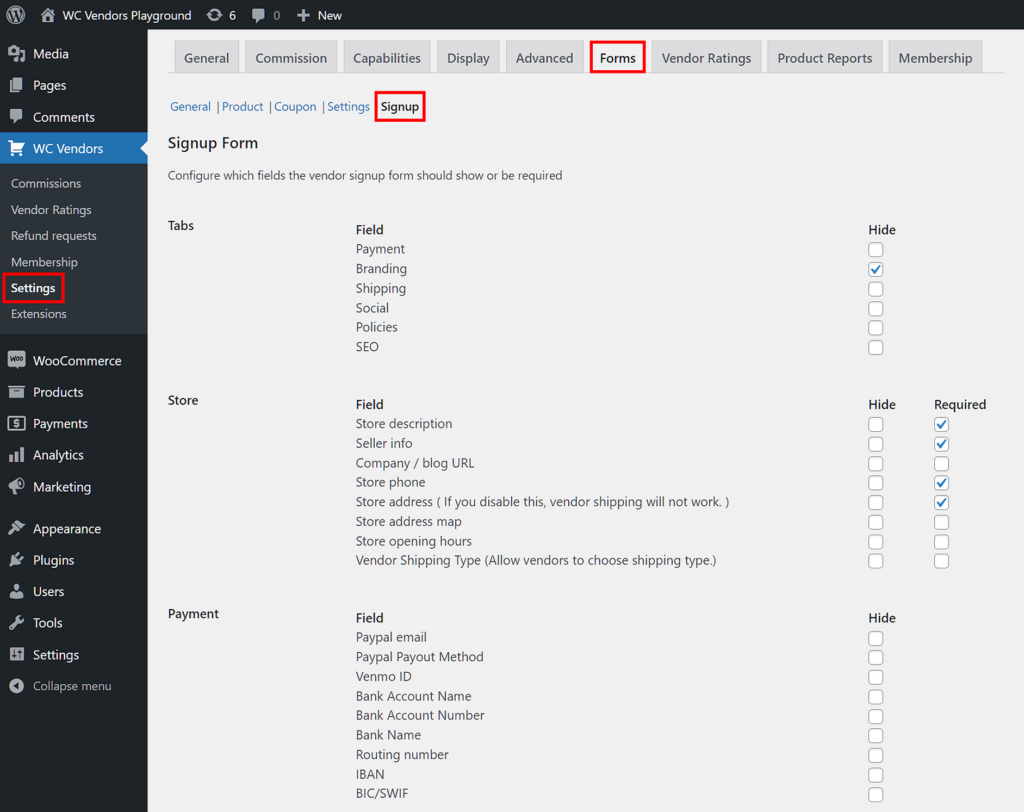
Scroll down to the Store area and look for the Seller Info option. When you enable this option, every vendor can enter information about themselves and their store in the marketplace. Customers will then see this information on the marketplace frontend.
By default, Seller Info is already enabled. However, if you want to require the vendor to provide this information, tick the option’s “Required” checkbox.
For this guide, don’t tick the “Hide” checkbox, as this prevents the vendor from sharing seller information with customers.
Take note: there are other options on this page that you can enable to allow vendors to share useful information with customers.
For example, you can implement store descriptions. To learn how to do this, check out our article, “How To Use Store Descriptions To Boost Customer Interest (In 3 Steps).”
For a full guide on customizing vendor storefronts, read our article, “Empower Vendors: How To Optimize Storefront Customization For Success.”
Step 3: Save your work!
Once you’re satisfied with your settings, scroll down the page and click the Save Changes button. And that’s it! Vendors can now share information about themselves with customers!
Displaying Seller Information: The Vendor’s Perspective
Now that you’ve enabled the Seller Info option, vendors can share information about themselves with customers.
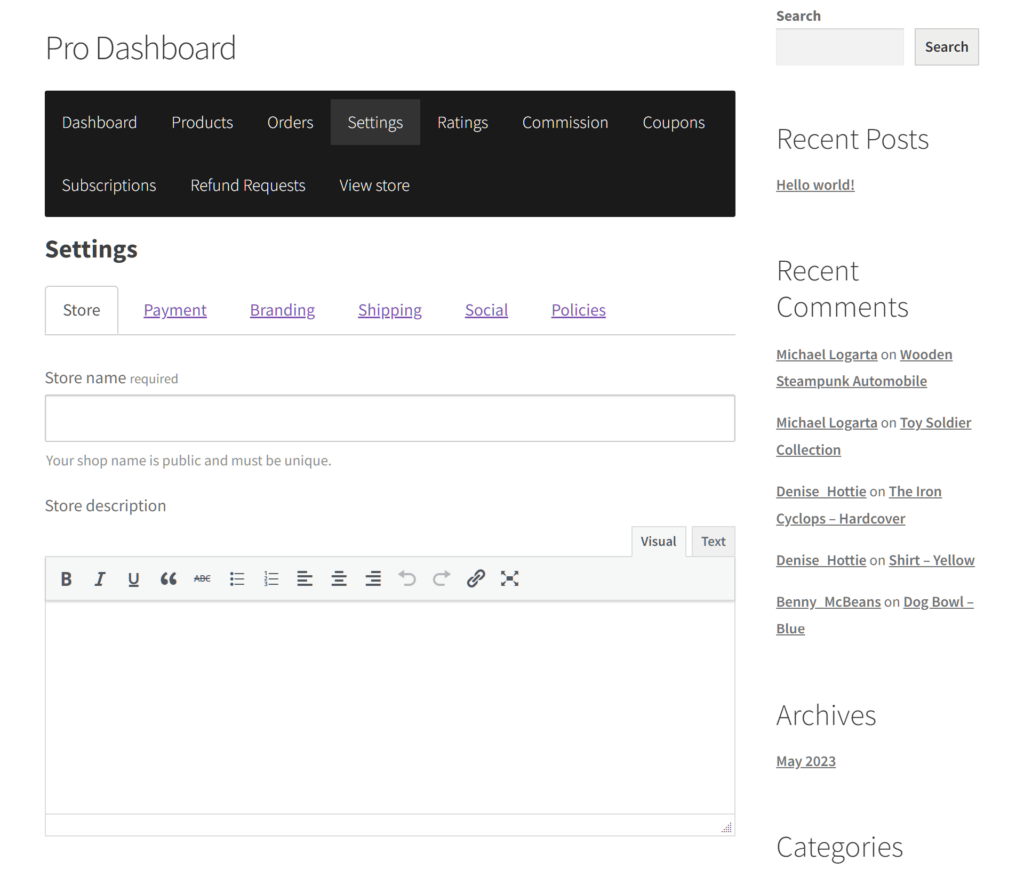
To do so, they must first access their vendor dashboard, and then click the Settings panel.
Next, they must scroll down to the Seller Info option and write down their information in the provided text box.
And that’s it! The vendor is ready to share their information with the world.
Viewing Seller Information: The Customer’s Perspective
To view information about a vendor, a customer must first click on a product.
Once on the product page, they must scroll down to and click the Store Info panel to reveal information about the vendor.
Alternative Method To Display Seller Information
As the marketplace operator, you can write information about the vendor yourself.
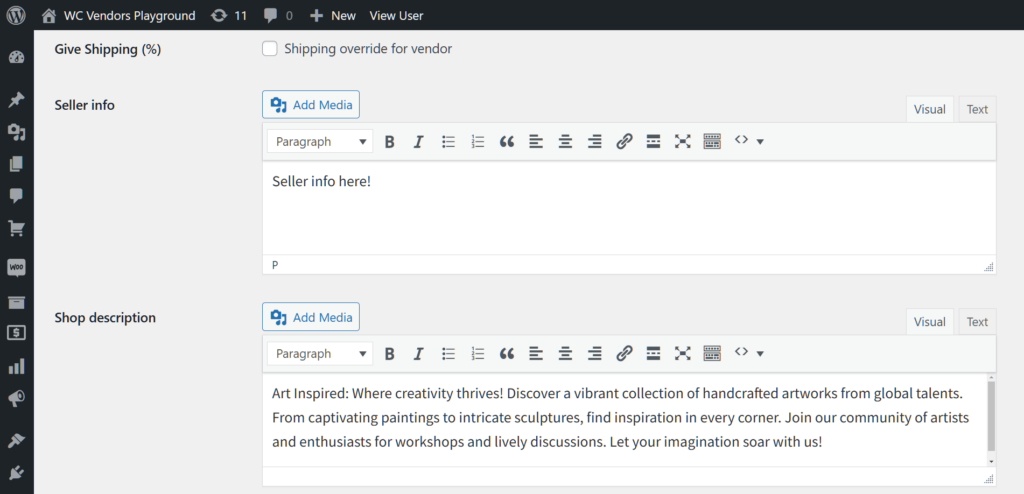
To do this, head to your WordPress dashboard. Then, click Users > All Users. From the list, click on the name of the vendor whose information you wish to enter.
Now, simply scroll down to the Seller Info option and write the information in the provided text box.
When you’re done, scroll down the page and click Update User. Basically, this saves and implements the changes you’ve made.
Take note: if you’re going to use this method, make sure to coordinate with the vendor. This will ensure the information you write is accurate, thus preventing misunderstanding with the vendor.
Requesting Seller Information From The Start
The best way to ask vendors for their information is during the vendor registration process.
You’ll have to configure the registration form so that it asks vendors for their information. To do this, click WC Vendors > Settings > Forms > Signup. Then, scroll down to the Store area and look for the Seller Info option. Now, either make sure this option is enabled or tick its “Required” checkbox.
However, there’s more you have to do. For a full guide on implementing vendor registration, read our article, “Streamlining The Vendor Application Process: Your Ultimate Guide.”
Conclusion
Ensuring that seller information is readily available and well-presented is key to fostering a thriving marketplace ecosystem. By empowering vendors to share their background, expertise, and values, and by providing customers with easy access to this information, online marketplaces can cultivate trust, enhance transparency, and elevate the overall shopping experience.
To recap, you can allow vendors to share information about themselves and their stores. To do this, you must use WC Vendors to implement the following steps:
Do you have any questions about displaying seller information on vendor stores? Let us know in the comments!
