Marketplace coupons are a powerful tool for online multi-vendor marketplaces, offering special deals that can give your business an edge over competitors.
After all, what happens when customers apply coupon codes during checkout? They reap significant savings, making their shopping experience more pleasurable. This can boost their loyalty towards your platform, leading to repeat purchases. Moreover, it could encourage them to spread the word about your brand, promoting it to a wider audience.
In today’s article, we’ll teach you how to use the WooCommerce marketplace solution, WC Vendors, to create marketplace coupons. This way, you can benefit from this powerful promotional strategy to improve your sales and profits!
So let’s dive in!
I. What Are Marketplace Coupons?
Marketplace coupons are special offers, typically discounts, that customers can use when shopping in an online multi-vendor marketplace. They help customers save money on various products by applying the coupon code during checkout.
A vendor within a marketplace offers marketplace coupons to their customers to promote their store and marketplace. Such coupons can be created by the marketplace operator or the vendors themselves.
How online coupons can benefit your online marketplace
So, why offer coupons in the first place? Check out the statistics below for an idea of how this promotional strategy can benefit e-commerce platforms!
- If they have a coupon, 39% of consumers hasten their decision to purchase products.
- Coupons convince 67% of consumers to make purchases they hadn’t planned on.
- Consumers who use online coupons spend 24% more than regular shoppers.
- 2023 saw 92% of U.S. shoppers using coupons, with 79% using online coupons and 82% using physical coupons.
- A 2023 survey showed that 73% of U.S. online shoppers were willing to subscribe to emails to get a 20% discount coupon, while 67% would do the same for a 10% discount coupon. Furthermore, consumers reported taking short surveys, signing up for text messages, and downloading apps to receive online shopping coupons.
- According to a 2022 survey, online coupons were most commonly used by U.S. shoppers aged 18 to 34, with 48% of respondents in this age group reporting this habit. Meanwhile, 32% of U.S. shoppers aged 55 and older reported using online coupons.
- In 2022, the global value of the mobile coupon market was estimated at $509.7 billion. Moreover, projections indicate this value could reach $1.6 trillion by 2030.
In short, marketplace coupons can help boost customer satisfaction and loyalty, promote your e-commerce platform, and enhance your sales and profits!

II. How To Create Marketplace Coupons For Your Vendors (In 4 Simple Steps)
Is your online marketplace powered by WC Vendors? Then you’ll have an easy time creating marketplace coupons for your vendors! After all, WC Vendors boasts many tools for promoting your marketplace and vendor stores, ensuring enhanced sales and profits.
If you’ve yet to build a multi-vendor marketplace, you must first create a traditional online store using WordPress and WooCommerce. Then, you must use WC Vendors to convert said store into a marketplace. For more information on this conversion process, check out the following guides:
- How To Create An Online Marketplace: A Beginner’s Guide
- How To Build Your First Multi-Vendor E-Commerce Website (Full Guide)
With that in mind, let’s learn how marketplace operators/administrators can create marketplace coupons!
Step 1: Create a coupon
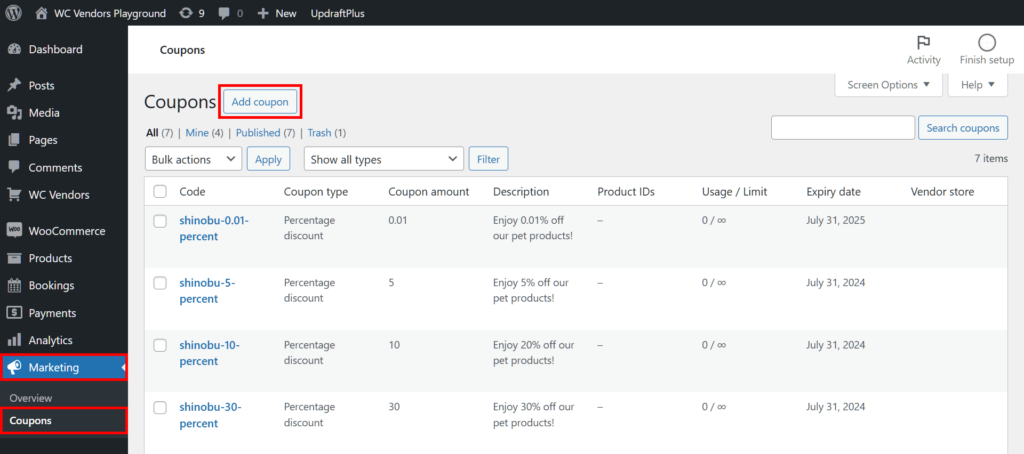
To create coupons for your vendors, you must first access the Coupons page. Thus, go to your WordPress dashboard and click Marketing > Coupons.
The Coupons page is where you’ll find a list of the coupons you’ve already created. From here, you can edit, delete, and create marketplace coupons. Furthermore, you can view important coupon data, such as discount types, discount amounts, expiry dates, and the number of uses left.
Click the Add Coupon button to create a new coupon.
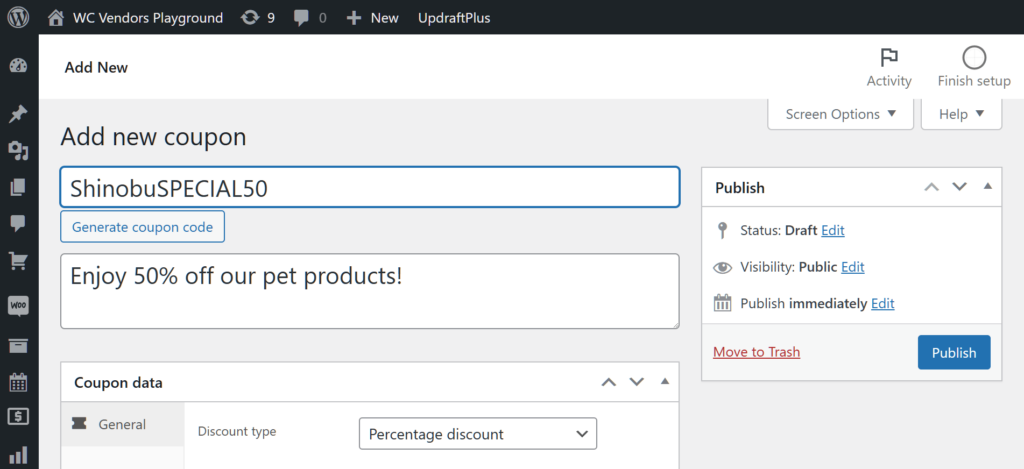
This takes you to the Add new coupon page. First, give your coupon a Coupon code. Alternatively, you can click the Generate coupon code button to have the system create a random code for you.
We also suggest giving your coupon a description.
Now, onto the next step!
Step 2: Customize your coupon
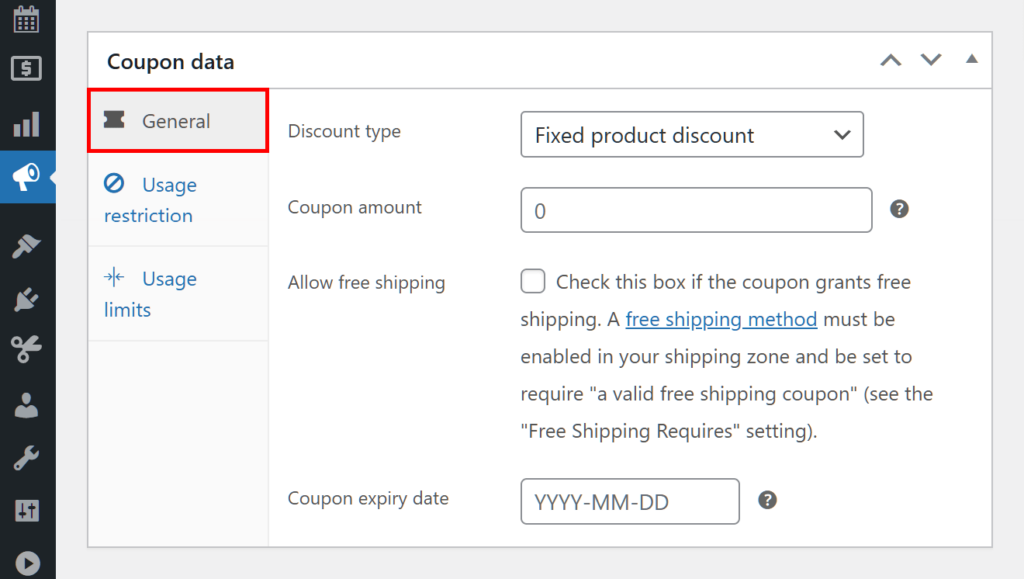
Next, scroll down to the Coupon data box. This is where you’ll provide information controlling the behavior of your coupon. Basically, you’ll have to select panels and fill in the entry fields they contain.
Let’s explore these three panels in detail.
i. General
The General panel contains options allowing you to control your marketplace coupon’s basic details.
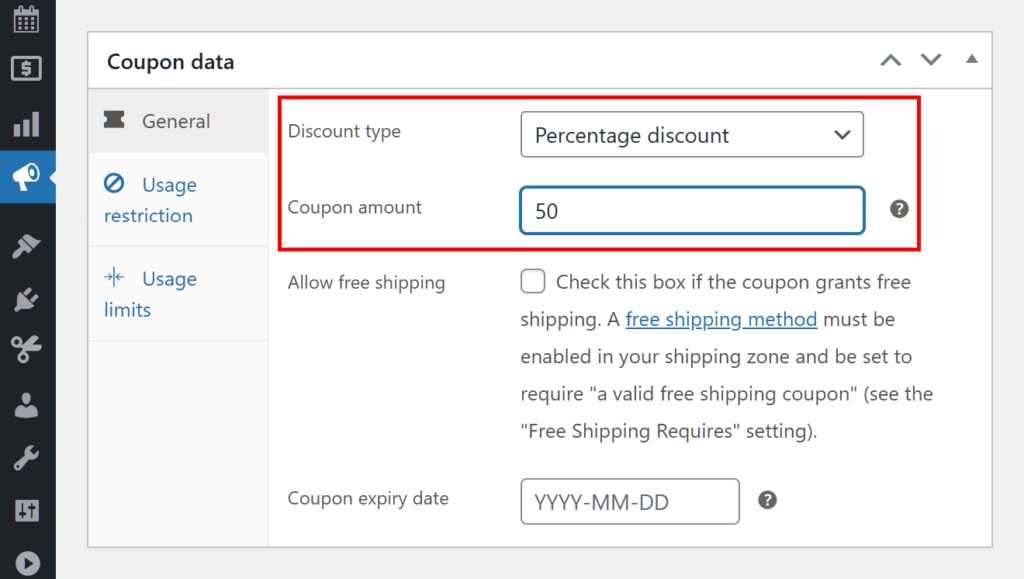
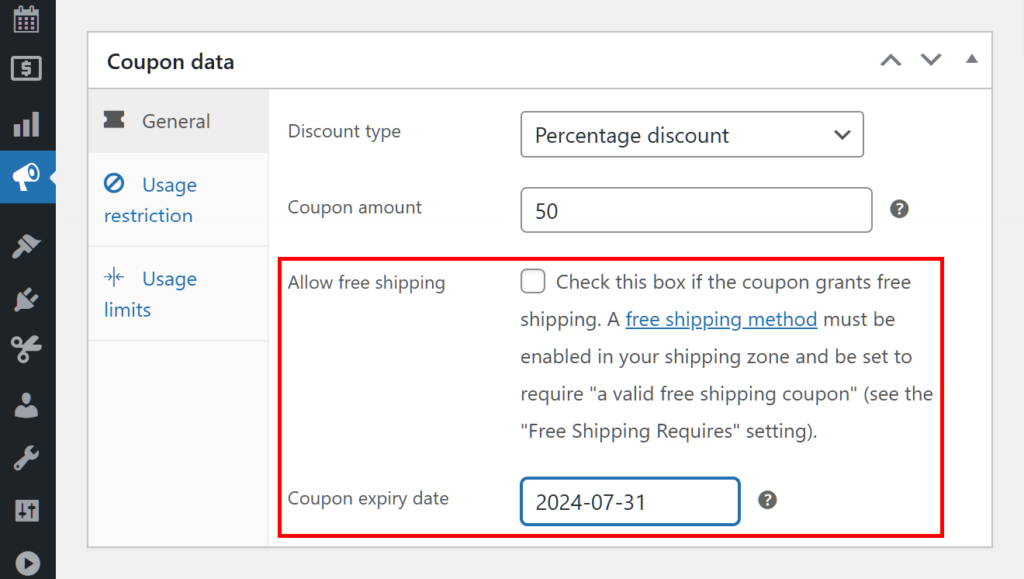
First, click the Discount type dropdown menu and select the type of discount you want to offer customers. Then, click the Coupon amount to set the amount you’re discounting.
For instance, you can pick the “Fixed product discount” Discount Type, then set the Coupon amount to $5. This means the customer gets a fixed discount of $5 when they buy a product regardless of its original cost.
For our coupon, we’ll choose a “Percentage discount” of 50%.
If you wish, you can offer free shipping by ticking the Allow free shipping checkbox.
Lastly, don’t forget to set the Coupon expiry date, which determines your marketplace coupon’s validity period. For our example, we’ll set ours to July 31, 2025.
ii. Usage restriction
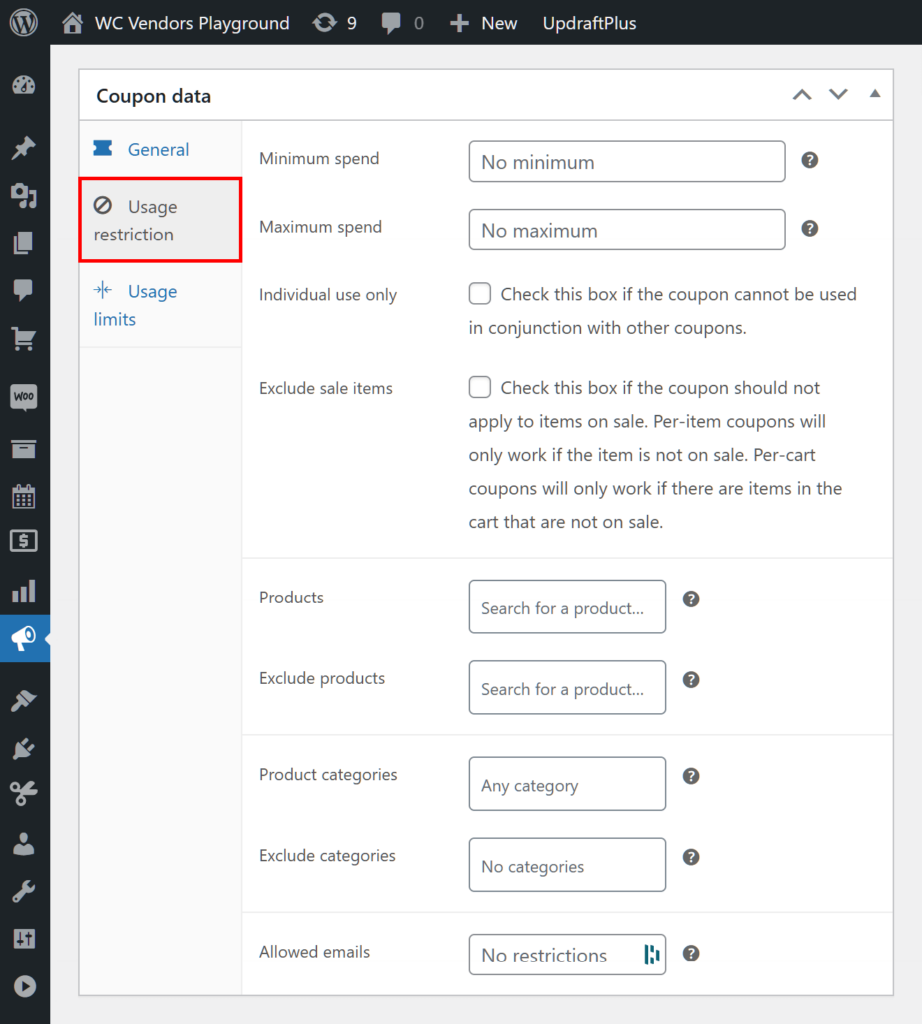
The Usage restriction panel’s options let you control how customers can use coupons.
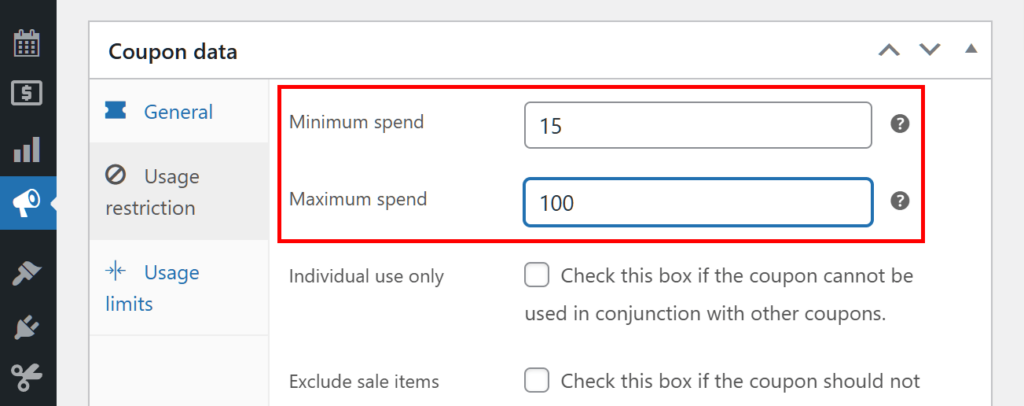
Minimum spend and Maximum spend let you determine the total expenditure a customer can make for the marketplace coupon to remain valid. For instance, a minimum of $15 means the customer must spend at least $15 to enjoy the discount. Meanwhile, a maximum of $100 means the discount is no longer applicable if they spend $100 or more on purchases.
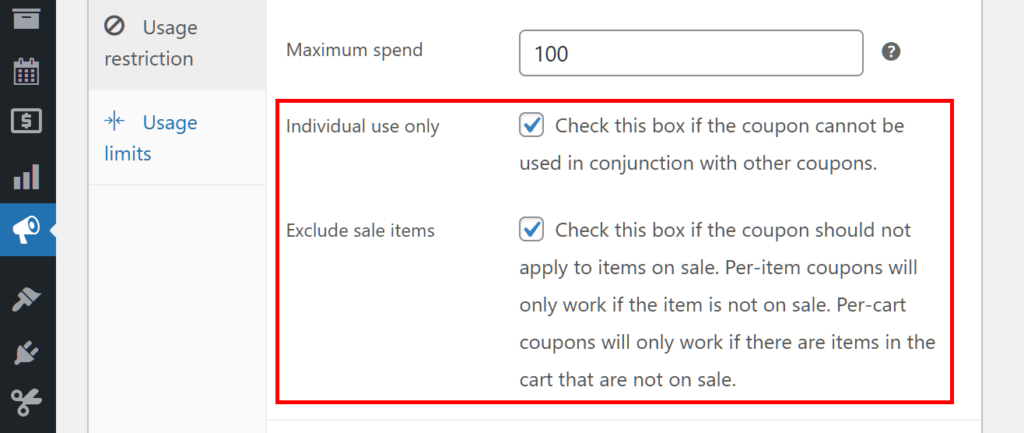
Tick the Individual use only checkbox if you don’t want the customer to use the coupon in conjunction with other marketplace coupons.
Tick the Exclude sale items checkbox if you don’t want the customer to apply the coupon discount on products on sale.
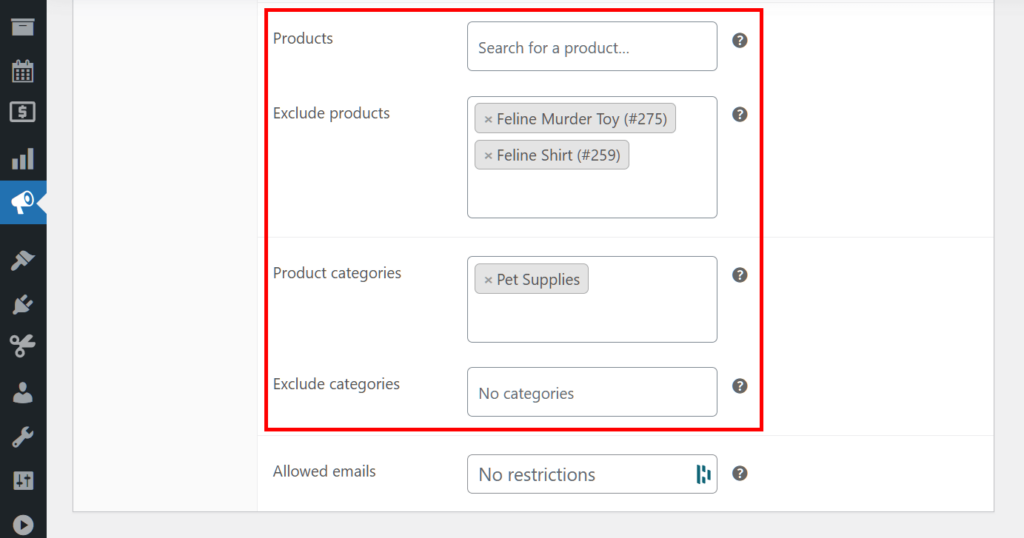
Products and Exclude products let you specify the products the customer can apply the discount to.
For example, entering “tablets” in the Products entry field lets customers use the coupon to reduce tablet prices only. Meanwhile, entering “smartphones” in the Exclude products prevents smartphones from being discounted.
Similarly, Product categories and Exclude categories let you specify the product categories that can be discounted.
Lastly, Allowed emails lets you specify the customer(s) who can use your marketplace coupons. For example, if you enter the emails of Cammy and Menat into the Allowed emails entry fields, only these customers can use your coupon. Leave the entry field blank if you want all of your customers to be able to use coupons.
For our example, we’ll leave Allowed emails empty. Thus, every customer can use the coupon.
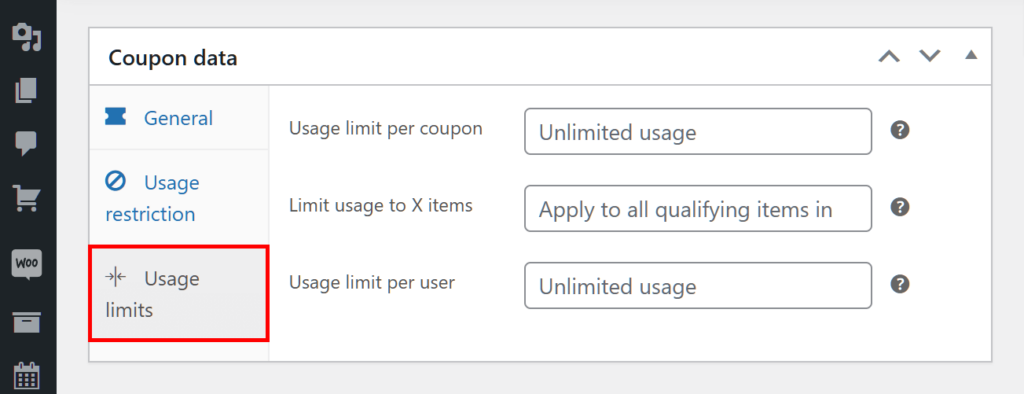
iii. Usage limits
The Usage limits panel contains options letting you limit coupon usage.
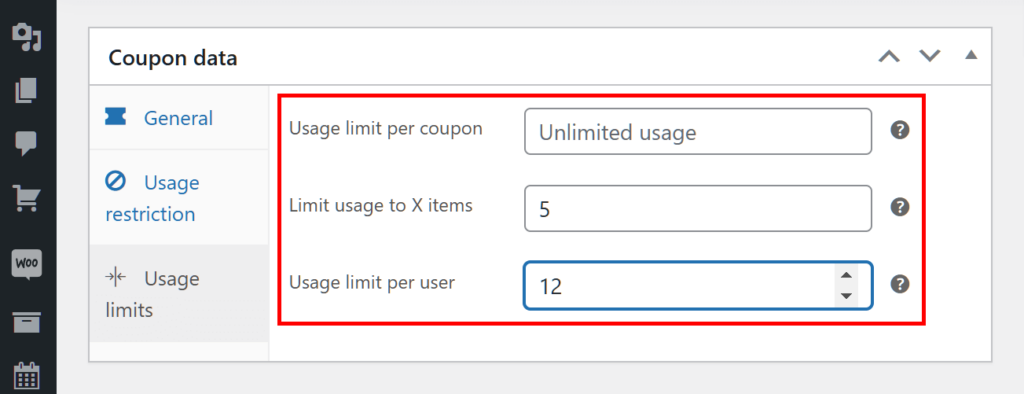
Usage limit per coupon lets you decide how many times the coupon can be used before it becomes void. By default, it’s set to “Unlimited usage.” We’ll use this setting for our example so that the coupon can be used any number of times no matter how many customers use it.
Limit usage to X items allows you to determine how many products the coupon discount can be used on. By default, it can be used on any number of items. However, for our example, we’ll set it to 5 items.
Lastly, Usage limit per user lets you decide how many times an individual customer can use the coupon before it becomes void. The default setting is “Unlimited usage,” but we’ll set ours to 12. This means each customer can benefit from the discount only a dozen times.
Step 3: Assign the coupon to a vendor
Scroll down the Vendor box. Then, click the dropdown menu and type the name of the vendor (or their store) you wish to assign the coupon to. Once their name appears, click on it to select the vendor.
Step 4: Publish your coupon!
Go to the Publish box in the upper right corner of the page and click the Publish button.
And that’s it! Your vendor can now offer your marketplace coupon to their customers so that they can enjoy discounts!
III. Creating Marketplace Coupons: The Vendor’s Perspective
As the marketplace operator, you’ve got your hands full managing various business-related responsibilities. Thus, creating marketplace coupons for your vendors may end up taking more time and energy than you can afford.
For this reason, it helps to give your vendors the ability to create coupons themselves.
To do this, you must make sure coupon creation is enabled for vendors by observing the following steps:
Step 1: Enable coupon management
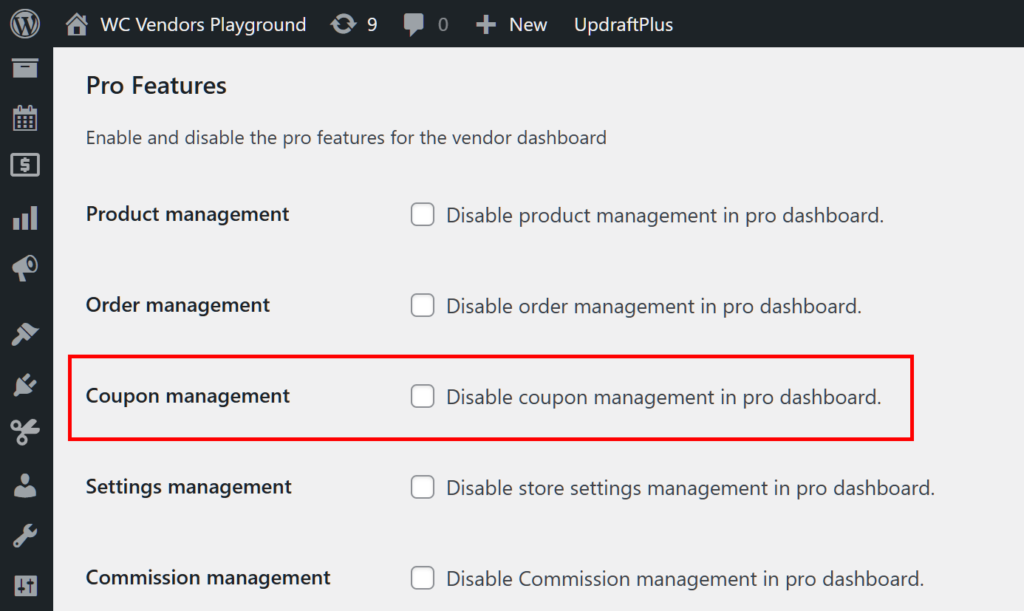
First, go to your WordPress dashboard and click WC Vendors > Settings > Capabilities > General. Then, scroll down to the Coupon management option and enable it by removing the tick from its checkbox.
Don’t forget to scroll down the page and click the Save changes button. This implements the setting you’ve just made, allowing vendors to create coupons via the Pro Dashboard.
Take note: you can only allow vendors to manage coupons via the Pro Dashboard if you own WC Vendors Pro.
Step 2: Determine the number of coupons displayed per page
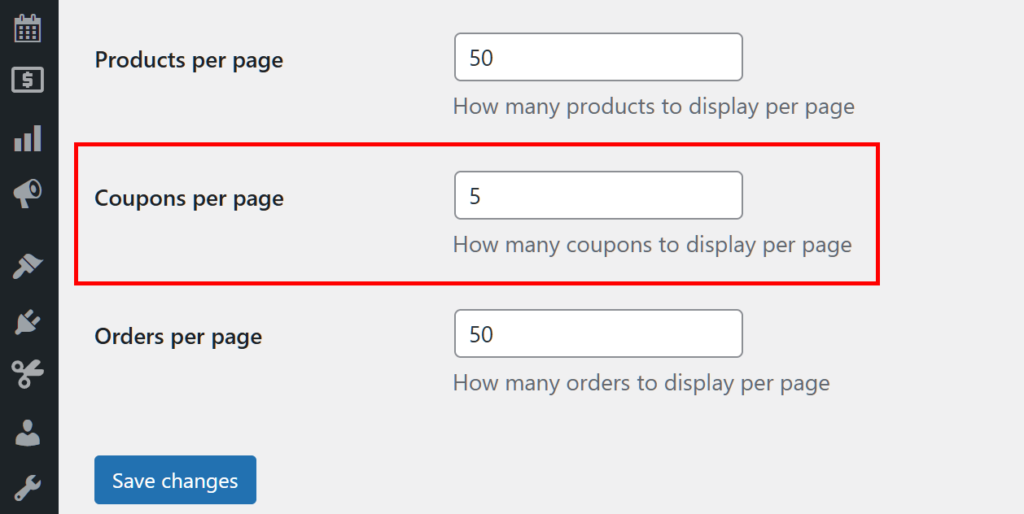
Now, click WC Vendors > Settings > Display > Pro dashboard. Then, scroll down to the Coupons per page option and input a desired number in the entry field. This determines the number of coupons per page that the Pro Dashboard includes in a vendor’s list of coupons.
Again, click the Save changes button.
This is another option available to WC Vendors Pro users only.
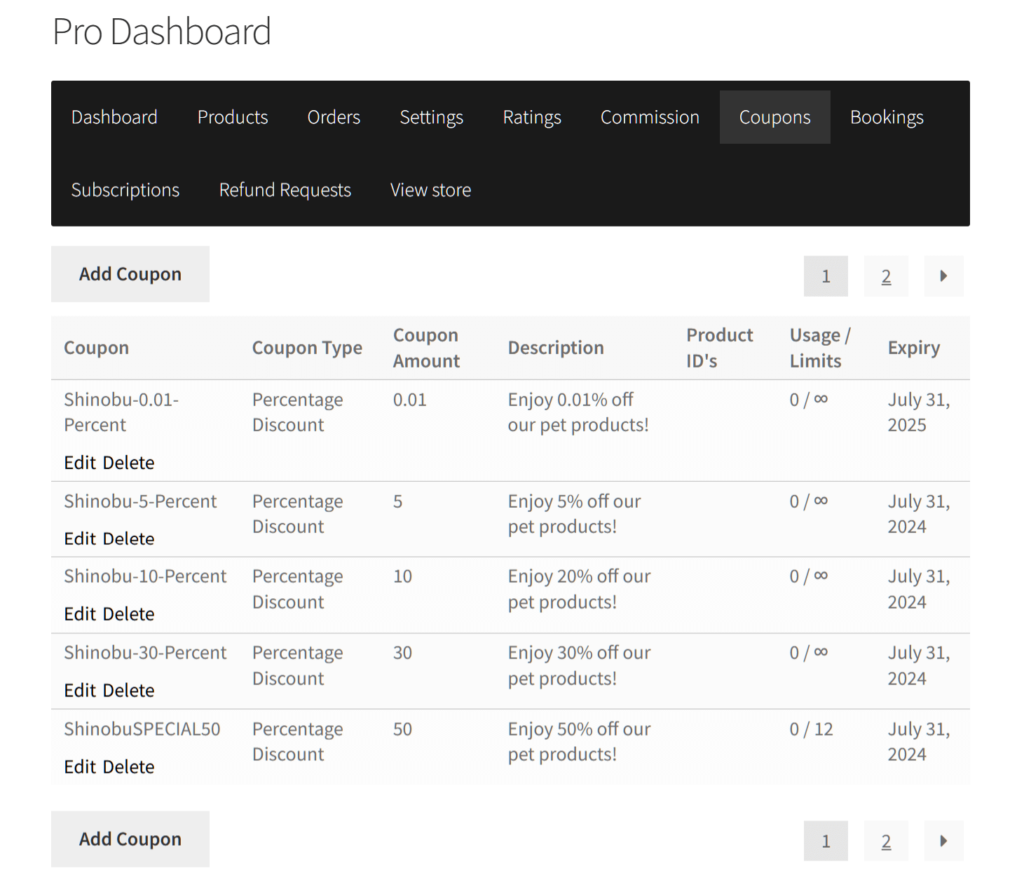
For example, if you enter the number 5 in the entry field, the Pro Dashboard only shows 5 coupons from the list per page. To see more coupons, the vendor must go to the next page. We illustrate this in the image below, which shows only 5 coupons on the page.
Step 3: Determine the redirect location after coupon creation
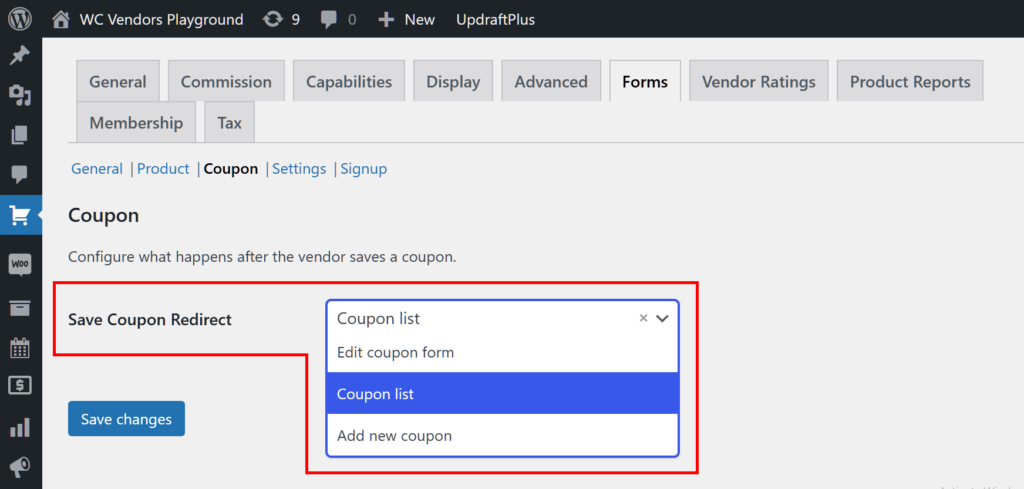
Lastly, click WC Vendors > Settings > Forms > Coupon. Then, click the Save Coupon Redirect option’s dropdown menu and make your selection.
Basically, this determines where the vendor is redirected to after creating a marketplace coupon.
Now that we’re done with these settings, it’s time to see how vendors can create marketplace coupons!
How Vendors Can Create Marketplace Coupons
To create marketplace coupons, vendors must go through the exact same steps you did as the marketplace operator/admin. The only difference is that vendors must implement these steps using the Pro dashboard.
First, the vendor must go to their dashboard and click the Coupons panel. This takes them to a page with a table showing the list of their coupons. They can edit or delete these coupons at any time. Moreover, the table shows them crucial information about their coupons, such as each coupon’s discount type, discount amount, expiry date, and the number of uses left.
To start creating a coupon, they must click the Add Coupon button.
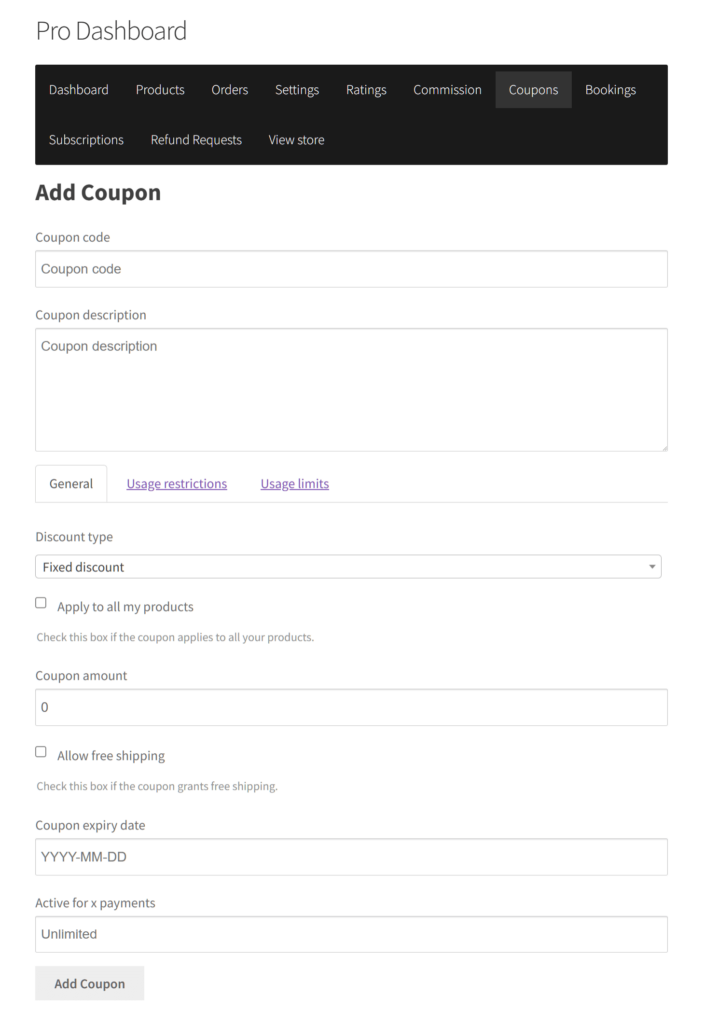
This redirects the vendor to a page providing them with the same options that you customized as the marketplace operator.
For example, this page also has entry fields asking the vendor to enter a coupon code and coupon description. In addition, they have access to the same panels—namely General, Usage restrictions, and Usage limits—each presenting the vendor with the options any marketplace operator would be familiar with.
Once the vendor has finished customizing their coupon, they must click the Add Coupon button at the bottom of the page. This creates the coupon, allowing their customers to use it!
IV. How Customers Can Use Marketplace Coupons
So, how do customers use your marketplace coupons?
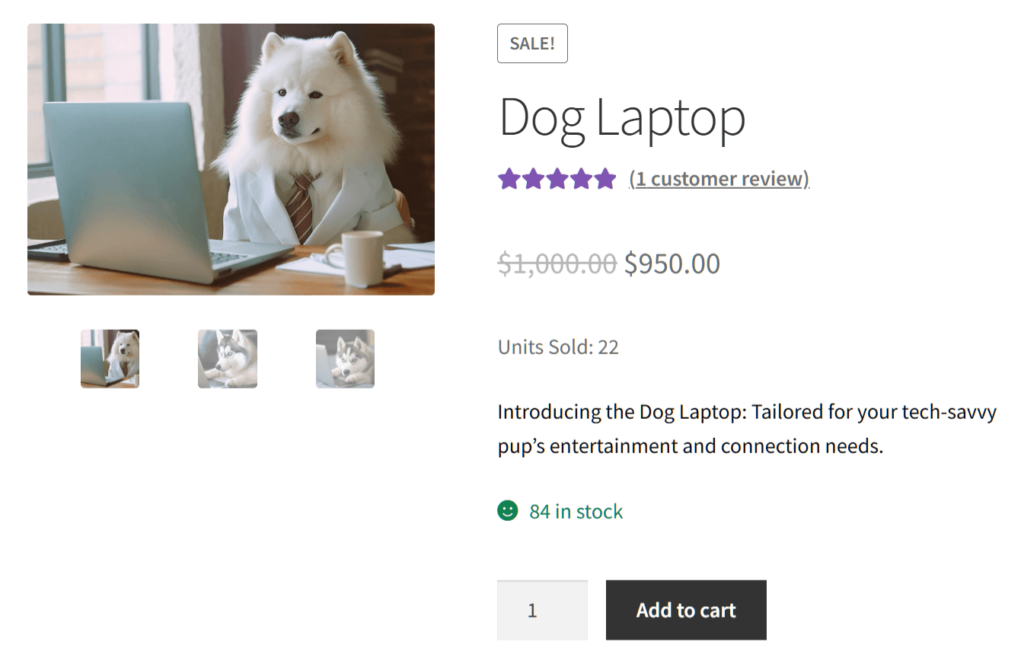
Let’s say a customer plans to buy a product, such as this premium Dog Laptop, which costs $950 due to a sale.
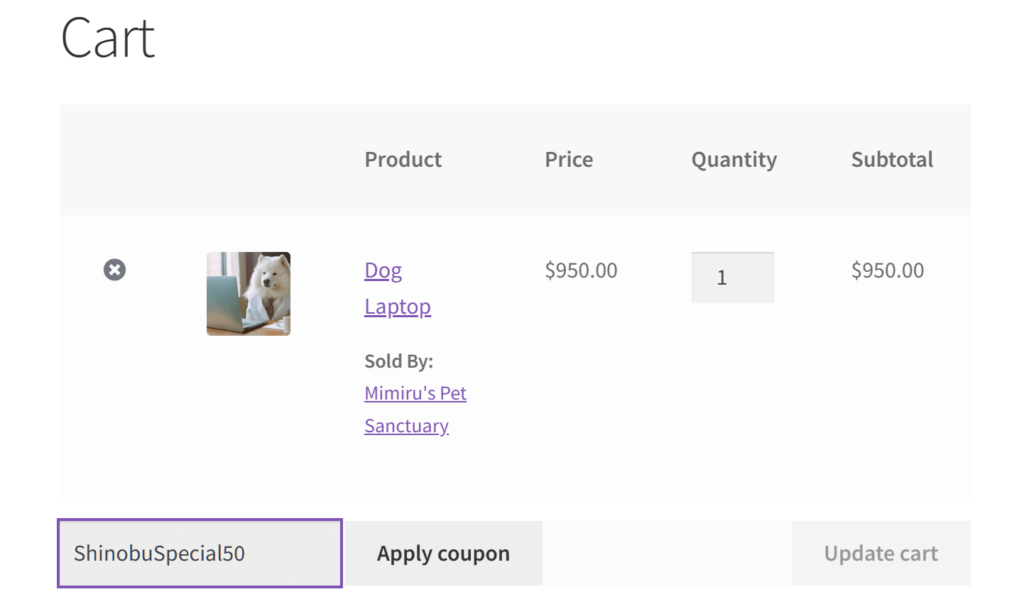
Upon adding the laptop to their cart, the customer must view their cart.
On the cart page, they must enter the coupon code in the Coupon code entry field, then click the Apply coupon button. They decide to use the coupon we created, ShinobuSpecial50.
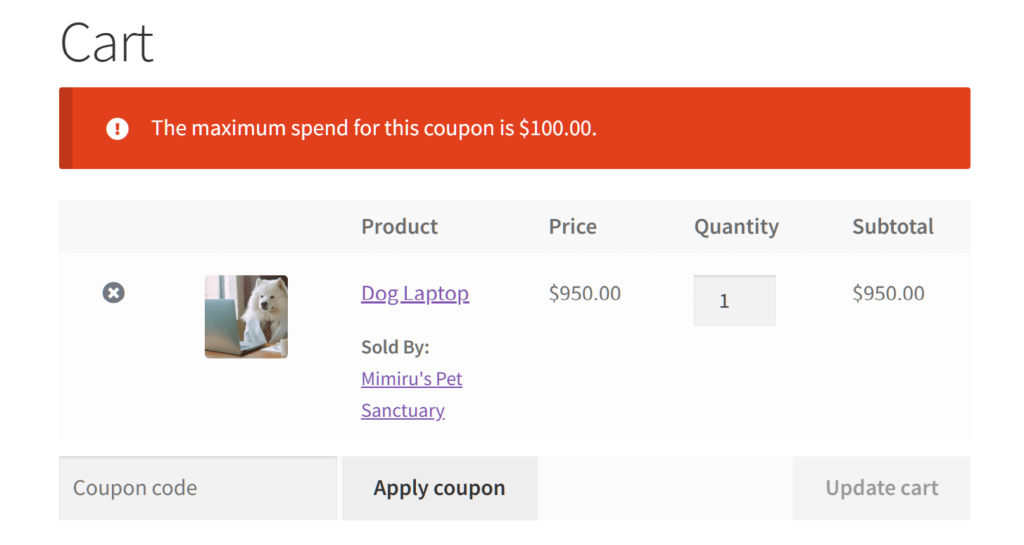
Oops! Because we set the coupon’s Maximum spend to $100, the customer can’t use the 50% discount on any item over $100.
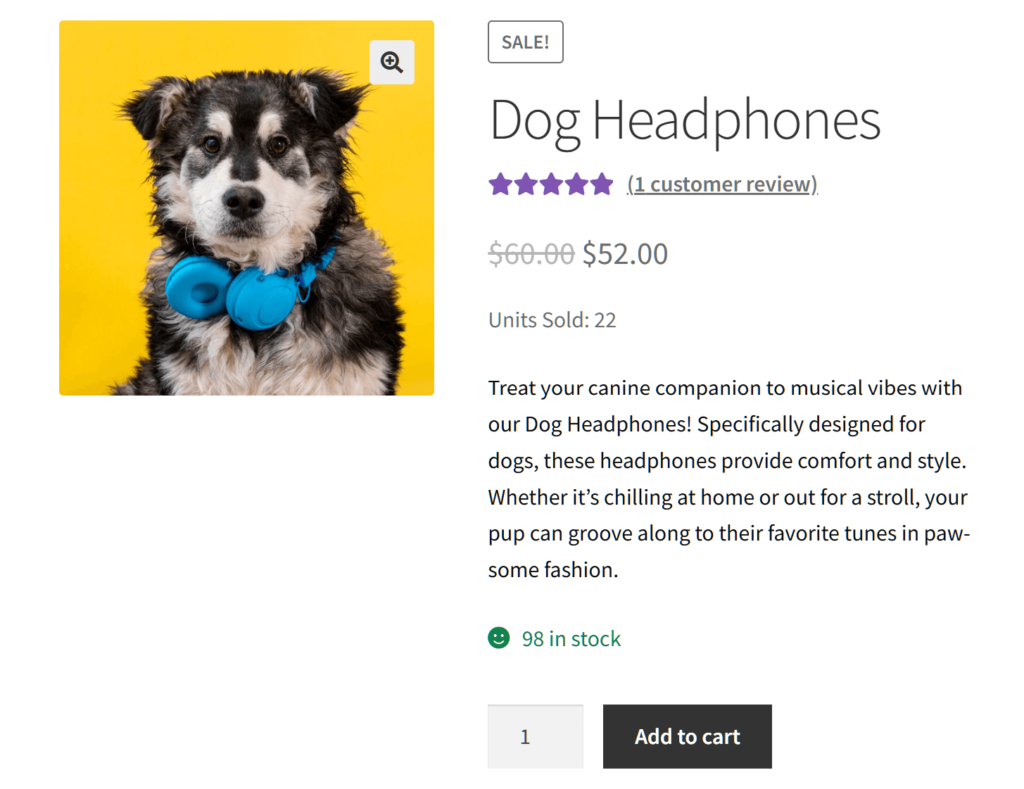
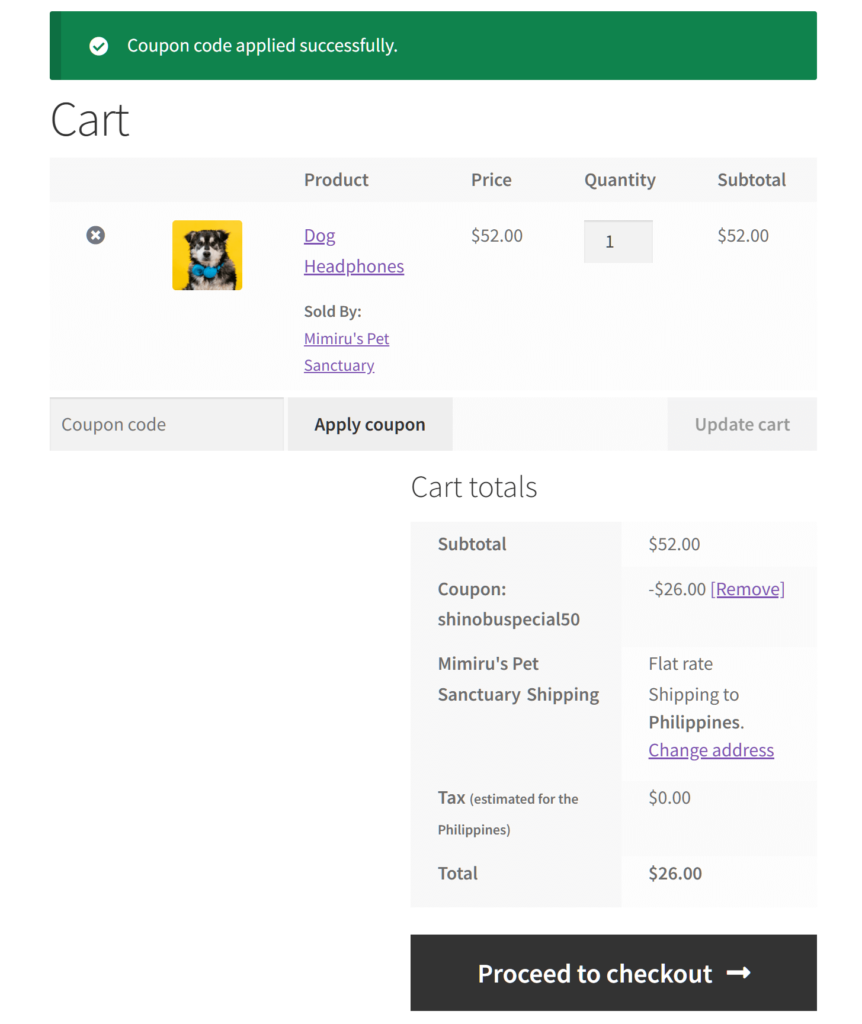
Instead, the customer decides to buy these Dog Headphones, which are on sale for $52.
Now, upon using the code, the coupon works, deducting 50% from the original price. Thus, the customer can now proceed to checkout and buy the product for $26 only!
And that’s it! Your vendors can now offer their customers marketplace coupons. As a result, they can help boost customer satisfaction, customer loyalty, marketplace promotion, sales, and profits!
Conclusion
Marketplace coupons are an excellent way to enhance your customers’ shopping experience while promoting your vendors and increasing sales. By understanding how to create and manage these coupons, both marketplace operators and vendors can take full advantage of this promotional tool.
To create marketplace coupons, the marketplace operator/administrator must observe the following steps:
In addition, vendors can create marketplace coupons themselves. But first, you must implement the following steps:
- Enable coupon management
- Determine the number of coupons displayed per page
- Determine the redirect location after coupon creation
Remember: whether you’re looking to boost customer satisfaction, increase sales, or build customer loyalty, implementing marketplace coupons is a strategy worth considering.
Do you have any questions about how to create marketplace coupons? Let us know in the comments!

