Creating and managing a successful online multi-vendor marketplace is no small feat. One critical aspect of this endeavor is the efficient recruitment of vendors. This is where vendor signup notifications come in.
Essentially, vendor signup notices are messages sent to users who are applying to become vendors in a marketplace. If used properly, they can significantly simplify and enhance the vendor application process.
For this reason, today’s article will explore how vendor signup notices work specifically within WC Vendors. In addition, we’ll provide you with a quick yet comprehensive guide on how to implement an automated vendor signup system.
Let’s begin!
Understanding Vendor Signup Notices Within WC Vendors
We’ve already defined what vendor signup notifications are. Now, let’s talk about how WC Vendors enhances this already powerful communication system.
WC Vendors boasts a feature called Signup Notices. Basically, this automates the communication process between marketplace owners and prospective vendors.
Designed to expedite the application and approval process, this can make the recruitment of vendors more convenient. In addition, by allowing a high degree of customization and control, it lets you craft messages that suit your specific business needs.
The Key Features And Benefits Of Vendor Signup Notices
So, what’s so good about implementing WC Vendors’ Signup Notices? Let’s find out!
1. Automated messaging
With Signup Notices, the days of manually conveying messages to applicants are over. This feature automatically displays predefined messages to users who apply to become vendors on your marketplace. This automation saves you time and ensures that no applicant falls through the cracks.
2. Customization
One size does not fit all, especially when it comes to communication. WC Vendors recognizes this and allows marketplace owners to customize the messages sent through vendor signup notices. This means you can tailor your messages to convey your brand’s tone and provide specific instructions or information to applicants.
3. Streamlined application process
Applicants receive these automated messages at various stages of the application process. These messages can include welcome messages, instructions for completing their profiles, and updates on the status of their applications. By keeping applicants informed, you create a more user-friendly experience and reduce the likelihood of abandoned applications.
4. Professionalism and brand consistency
The ability to customize messages not only ensures a professional and consistent brand image but also helps establish trust with potential vendors. Clear, personalized communication sets a positive tone from the start of their journey with your marketplace.
Benefits for newcomers
If you are considering starting your own online multi-vendor marketplace using WC Vendors, the Signup Notices feature can be a game-changer. It simplifies the recruitment process, allowing you to focus on growing your marketplace and attracting quality vendors. You can start with default templates and gradually customize messages as your marketplace evolves.
Benefits for experienced marketplace owners
Are you already operating a multi-seller marketplace powered by WC Vendors? Then this feature can be a valuable addition to your toolbox. By automating communication with applicants, you free up time and resources that can be allocated to other crucial aspects of managing your platform. Moreover, the customization options ensure that your marketplace’s unique identity is maintained throughout the application and onboarding process.

How To Customize WC Vendors’ Vendor Dashboard Notices (In 3 Easy Steps)
It’s time to learn how to use WC Vendors’ Signup Notices options!
However, before we get to that, you should know that using WC Vendors requires an online store that’s powered by:
Furthermore, you’ll have to use WC Vendors to convert your WooCommerce store into a multi-vendor marketplace. Check out the following articles if you’d like instructions on how to accomplish this:
- How To Create An Online Marketplace: A Beginner’s Guide
- How To Build Your First Multi-Vendor Ecommerce Website (Full Guide)
Now that we’re done with that, let’s start the guide!
Step 1: Head to the Display section
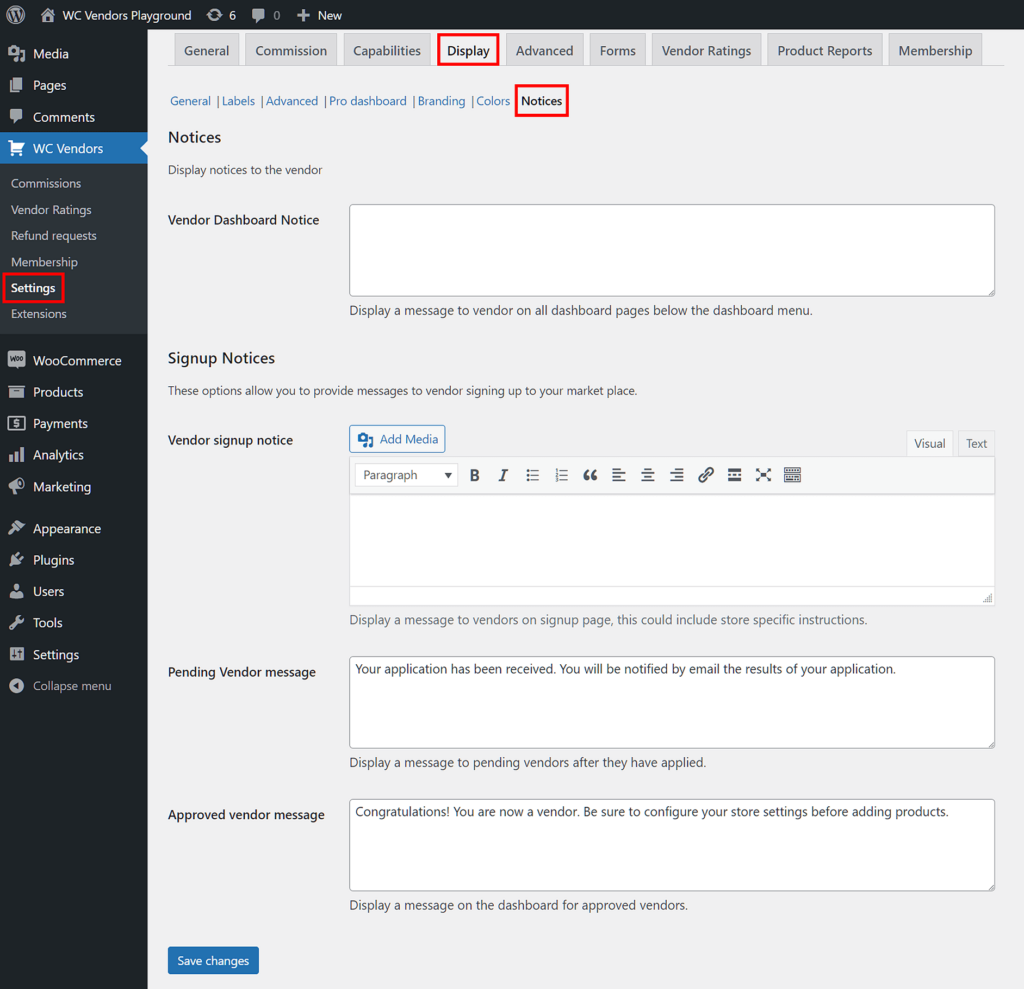
To find WC Vendors’ vendor signup options, you’ll have to go to the Display section. Therefore, navigate to your WordPress dashboard, click WC Vendors > Settings, and select the Display tab. Then, click the Notices subtab.
The Notices area features many options that facilitate communication with users, including those applying to your marketplace as vendors.
Step 2: Craft your messages
Now, you simply have to write the messages that you want the system to automatically display to applicants.
There are three types of messages you can craft. Let’s examine all three.
Vendor Signup Notice
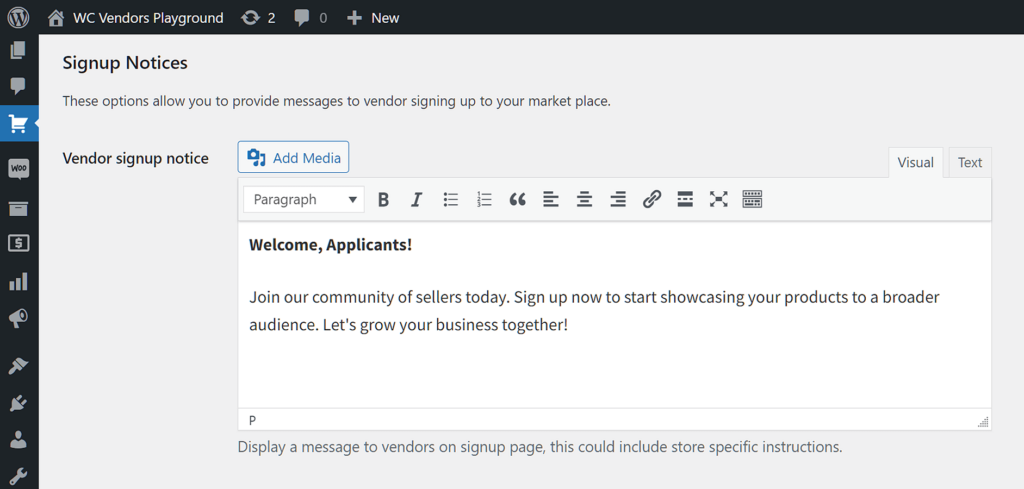
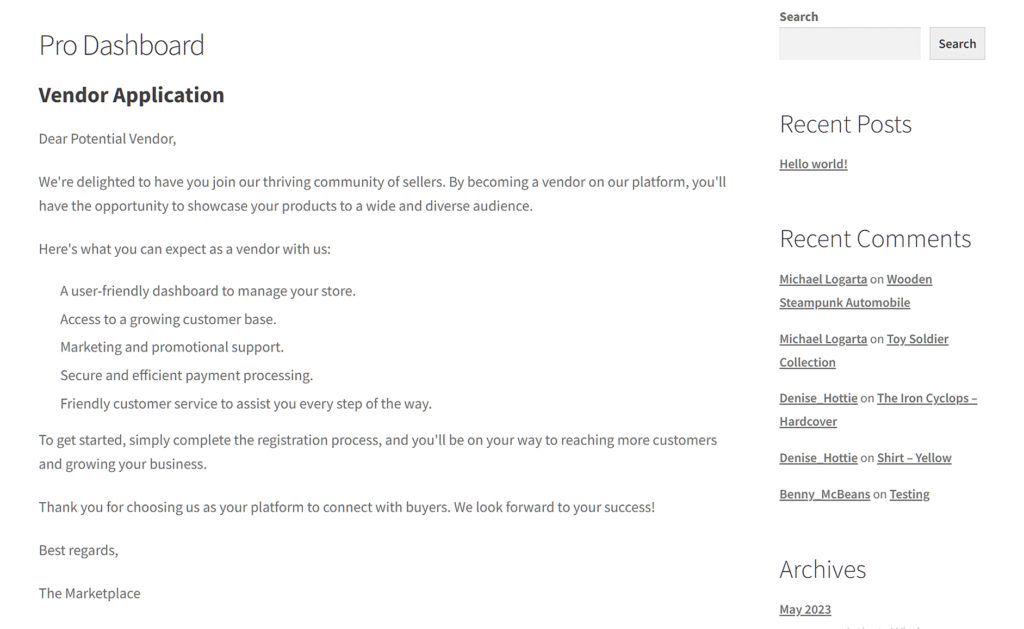
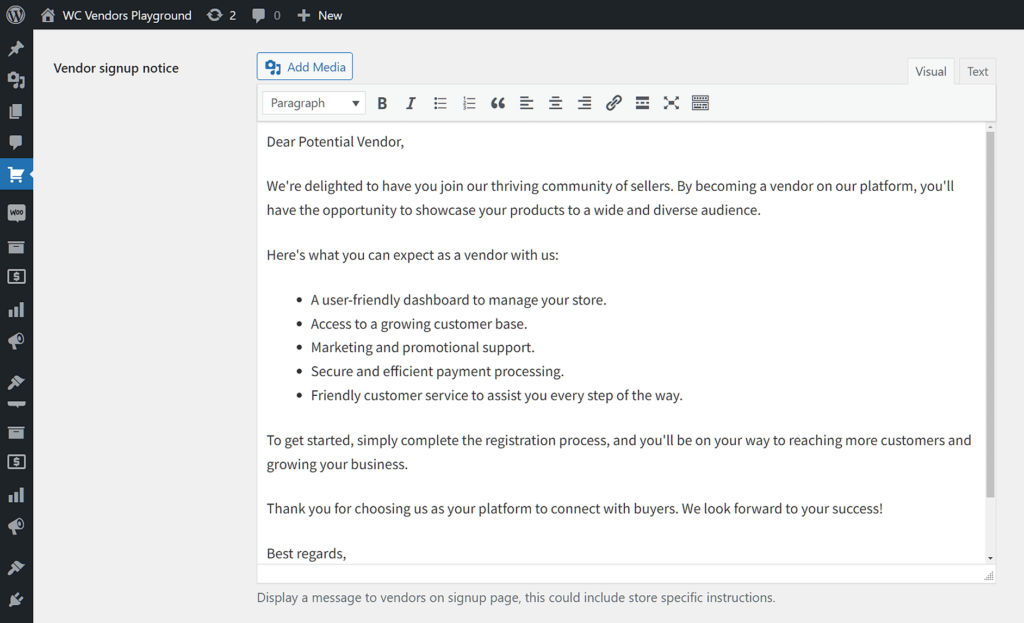
This is the message that shows up on the signup page when a user applies to become one of your vendors.
To write your message, simply start typing in the entry window. This window functions like any word processor you’ve likely already encountered. Thus, it lets you control the font size, style, alignment, and other aspects of your text.
You can even insert links, images, and videos into the message, which can be useful if you want to create an eye-catching and informative message.
Then, there are the Visual and Text tabs. Visual comes with symbols that you can click to make changes to your text. On the other hand, the Text tab is for those who know how to use HTML coding to make such tweaks.
As you can imagine, Visual is ideal for most users as it makes designing messages simple. However, Text grants you more control over how you design your message’s appearance.
The Vendor Signup Notice is an excellent opportunity to provide applicants with instructions on how to proceed with their registration.
Pending Vendor Message
This is the message that the system displays to applicants after their submission of the vendor signup form. Applicants will see your message on their My Account page while they’re waiting for you to approve them joining your marketplace.
As shown below, the Pending Vendor Message entry window comes with a default message. However, you can change this whenever you need to.
Take note: For the Pending Vendor Message option to work, you must first enable manual vendor approval. To do this, navigate to your WordPress dashboard and click WC Vendors > Settings. Then, select the General tab and tick the Vendor Approval checkbox.
Leaving the Vendor Approval checkbox unticked automatically adds applicants to your platform as vendors. In other words, you allow them to immediately use your platform to sell products. This can lead to issues if the system approves an applicant whose values don’t align with yours.
In contrast, enabling manual Vendor Approval prevents applicants from becoming vendors without your approval. This gives you ample time to analyze the information they provided during the registration process so that you can determine if they’re a good fit in your marketplace.
Approved Vendor Message
The system displays this message to users once you’ve approved their application to join your marketplace as vendors. Newly recruited vendors will see said message on their dashboard.
Approved Vendor Message also comes with a readymade message that you can freely customize as you wish.
Step 3: Save your changes
Satisfied with your vendor signup notices? Then scroll down the page and click the Save Changes button to implement the settings you’ve made. This will ensure the system automatically displays all your messages to users applying to your platform as vendors.
And that’s a wrap!
Conclusion
Vendor signup notifications empower marketplace owners to create efficient, personalized, and professional communication workflows with their vendors. And by automating messages and allowing customization, WC Vendors’ Signup Notices feature contributes to a smoother recruitment process and a stronger brand presence.
To use WC Vendors’ Signup Notices, simply observe the following steps:
Would you like to know more about vendor signup notifications? Please feel free to reach out to us; we’d be glad to hear from you!


