Creating a successful online multi-vendor marketplace requires effective communication between marketplace owners and vendors. Thankfully, the best marketplace solutions employ a powerful system known as vendor dashboard notifications to ensure efficient information exchange within the platform.
Basically, vendor dashboard notifications allow marketplace owners to display custom messages to vendors on their dashboard pages. This makes it nearly impossible for any vendor to not see what you have to say – which is crucial if the information you’re sharing is vital to the marketplace’s success.
Today, we’ll discuss why and how vendor dashboard notices can benefit your business. In addition, we’ll walk you through the process of customizing these notices using WC Vendors, a top-rated WooCommerce plugin for building online multi-vendor marketplaces.
What Are Vendor Dashboard Notifications?
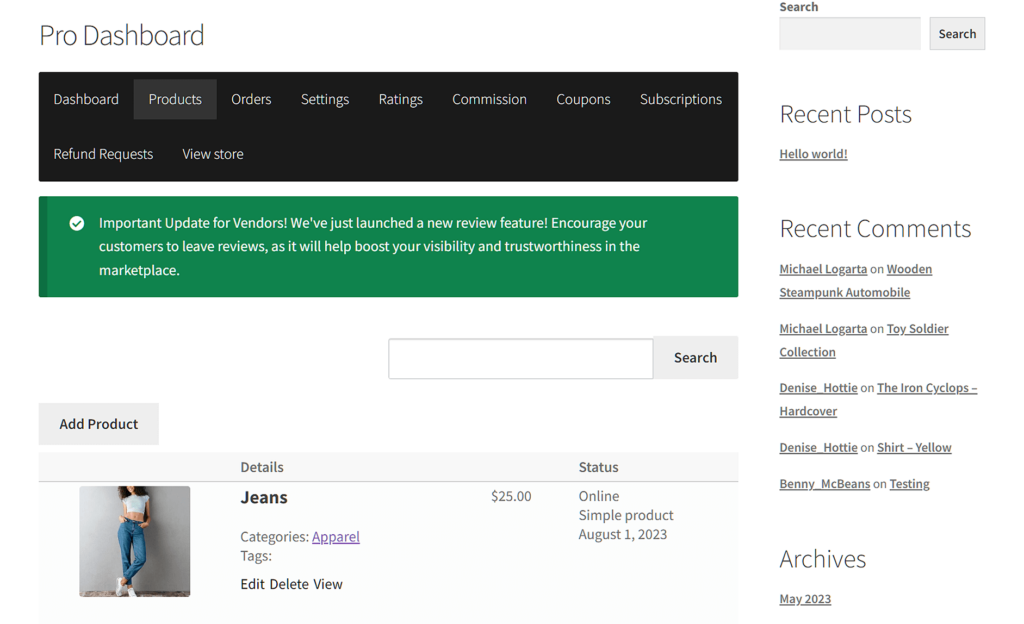
Vendor dashboard notifications (or notices) are messages displayed to vendors within their WC Vendors dashboard. These messages appear below the dashboard menu and can be used for various purposes, such as providing important updates, sharing guidelines, or highlighting promotions.
Customizing these notices ensures that your vendors receive essential information in a clear and organized manner.
Moreover, because of their placement just below the dashboard menu, these notices will serve you well if your intention is to immediately catch your vendors’ attention.
For all these reasons, vendor dashboard notifications help you enhance communication and streamline your online marketplace.
But why, exactly, is skillful communication so important?
Effective Communication – A Key To Business Success
Many studies have delved into the impact of good workplace communication, primarily centering on employer-employee dynamics. However, we can apply the insights gleaned from these studies to the marketplace environment.
For starters, effective communication builds trust. And according to a report by the Workforce Institute at UKG, 74% of employees prefer working with an employer they can trust.
In addition, the 2023 State of Business Communication learned that 72% of business leaders attested to the role of effective communication in enhancing their teams’ productivity. Furthermore, among the 251 business leaders surveyed, 60% acknowledged that effective communication bolstered employee confidence.
Moreover, Pumble in 2021 discovered that workplace teams that engage in effective communication may experience a productivity boost of up to 25%.
These are but some of the studies pointing to communication as a major key to business success.

Best Practices For Vendor Dashboard Notifications
To ensure that your vendor dashboard notifications are effective, consider these best practices:
1. Clarity: Keep your notices concise and clear, so vendors can easily understand the message.
2. Relevance: Only display notices that are relevant to your vendors. Avoid cluttering their dashboard with unnecessary information.
3. Timeliness: Use notices for updates and time-sensitive information to grab vendors’ attention when needed.
4. Consistency: Maintain a consistent format and design for your notices to create a cohesive dashboard experience.
5. Testing: Always test your notices to ensure they display correctly and are easily accessible to vendors.

How To Customize WC Vendors’ Vendor Dashboard Notifications (In 3 Easy Steps)
Now that we know how good communication can help your marketplace, it’s time to learn how to use WC Vendors’ Vendor Dashboard Notices option.
However, first things first: To use WC Vendors, ensure that you have an online store that’s powered by:
Of course, you also need to use WC Vendors to transform your WooCommerce store into a multi-vendor marketplace. If you’d like more information on how to do this, read the following guides:
- How To Build Your First Multi-Vendor E-commerce Website (Full Guide)
- How To Create An Online Marketplace: A Beginner’s Guide
With all that in mind, let’s proceed!
Step 1: Navigate to the Display section
WC Vendors’ Display section is where you’ll find the Vendor Dashboard Notices option.
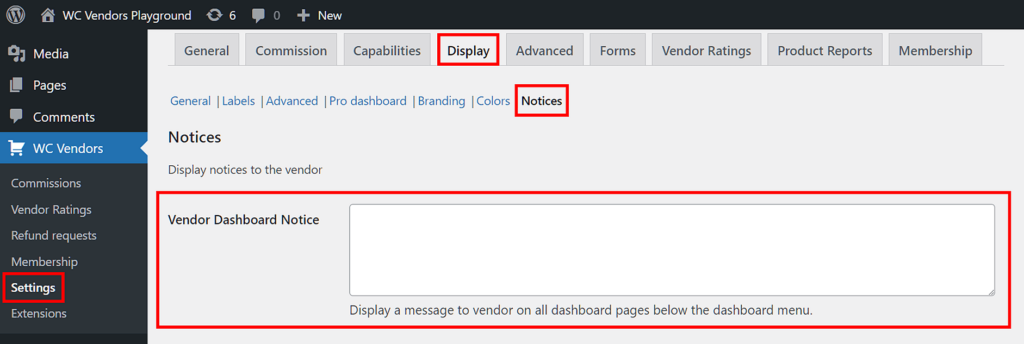
To get there, head to your WordPress dashboard, then click WC Vendors > Settings. Then, select the Display tab and Notices subtab.
As you can see, the Notices area is where you’ll find many of your vendor communication options.
You’ll also notice that Vendor Dashboard Notice is the first option you’ll see.
Step 2: Compose your message
The next step is to simply write your message in the entry field provided.
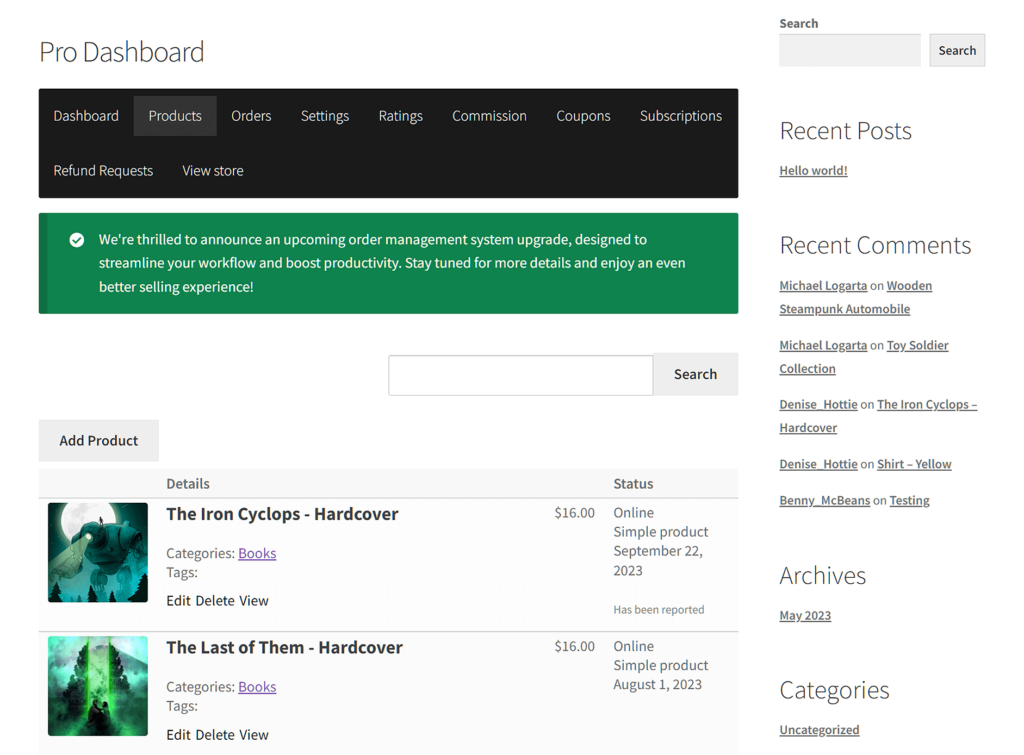
Here’s how the message will appear to your vendors on the front end:
Refer to the “Best Practices For Vendor Dashboard Notifications” section above for tips on how to write a great message!
Step 3: Save your changes
Once you’re happy with what you’ve written, scroll down the page and click the Save Changes button. This will apply the customizations you’ve made so that your message appears on every vendor’s dashboard.
And that’s all there is to it!
Conclusion
For your online multi-vendor marketplace to thrive, you, as the marketplace owner, must communicate properly with your vendors. Fortunately, WC Vendors boasts a simple system that facilitates effective communication.
In summary, using WC Vendors’ Vendor Dashboard Notices takes only three simple steps:
Of course, to write effective messages, make sure to familiarize yourself with the best practices for vendor dashboard notifications.
Do you have any questions about WC Vendors’ Vendor Dashboard Notices? Let us know in the comments section!


