
Running online auctions is like hosting a lively fair where every bid fuels the excitement. We understand that when you try to build an auction website, it can feel overwhelming at first, but with the right strategy, you can create a dynamic and engaging platform.
Over the years, our team has gathered practical insights from working with online auction marketplaces, and these experiences taught us that even small details can make a big difference.
Whether you’re a solo seller auctioning rare collectibles or planning a multi-vendor marketplace, this guide walks you through every step. We will start with the basics of building an auction site and then show how to expand it into a multivendor marketplace using WC Vendors and WooCommerce Simple Auctions.
So, let’s get started!
What Is An Auction Website?
An auction website is a platform where sellers list items for buyers to bid on. It can be:
- Single-vendor: One seller auctions their items (e.g., an antique store).
- Multi-vendor: Multiple sellers host auctions (e.g., eBay-style marketplace).
It works like a traditional auction house but offers a wider reach and real-time interaction. When you build an auction website, prioritize mobile responsiveness and transparent bidding rules.
Even small tweaks in the auction platform can affect how buyers and sellers interact. In an auction, the final price isn’t set in advance; it emerges from the active bidding of everyone involved, creating a lively and competitive atmosphere.
Types of Auctions
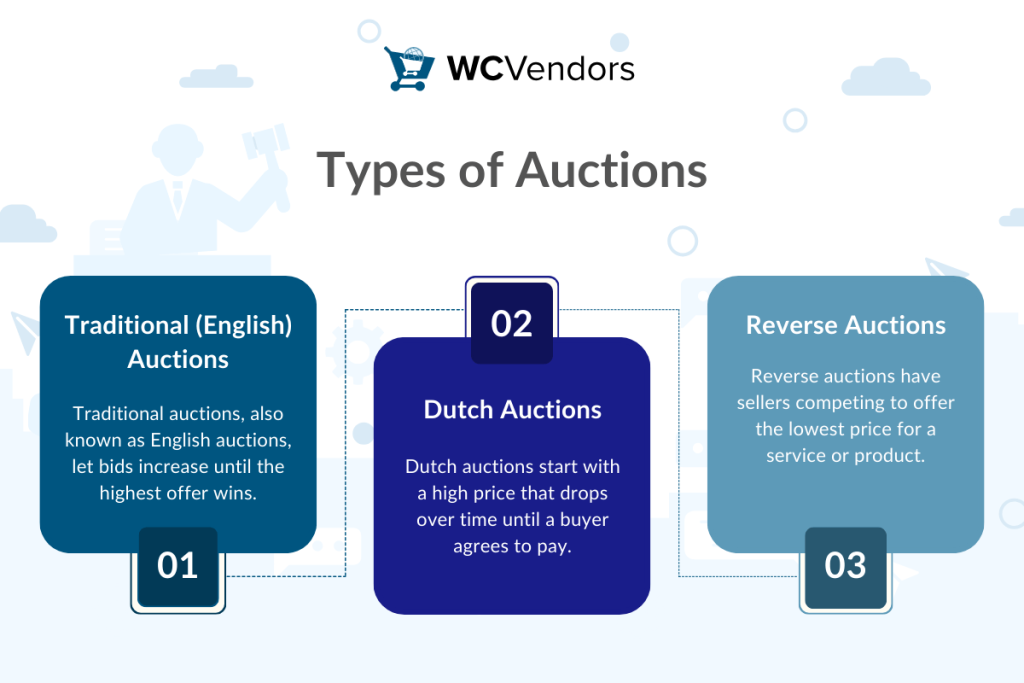
There are several common auction formats to consider when building your platform. Here’s a quick overview:
1. Traditional (English) Auctions
Traditional auctions, also known as English auctions, let bids increase until the highest offer wins.
2. Dutch Auctions
Dutch auctions start with a high price that drops over time until a buyer agrees to pay.
3. Reverse Auctions
Reverse auctions have sellers competing to offer the lowest price for a service or product.
Each auction type brings its own set of challenges and benefits, and the right choice depends on your items and audience. Auction platform owners have found that experimenting with various formats is an effective way to identify the best fit for their platform.
Pro Tip: Most auction websites start with English auctions (highest bid wins) before experimenting with Dutch or reverse formats.
Key Features Every Auction Website Needs
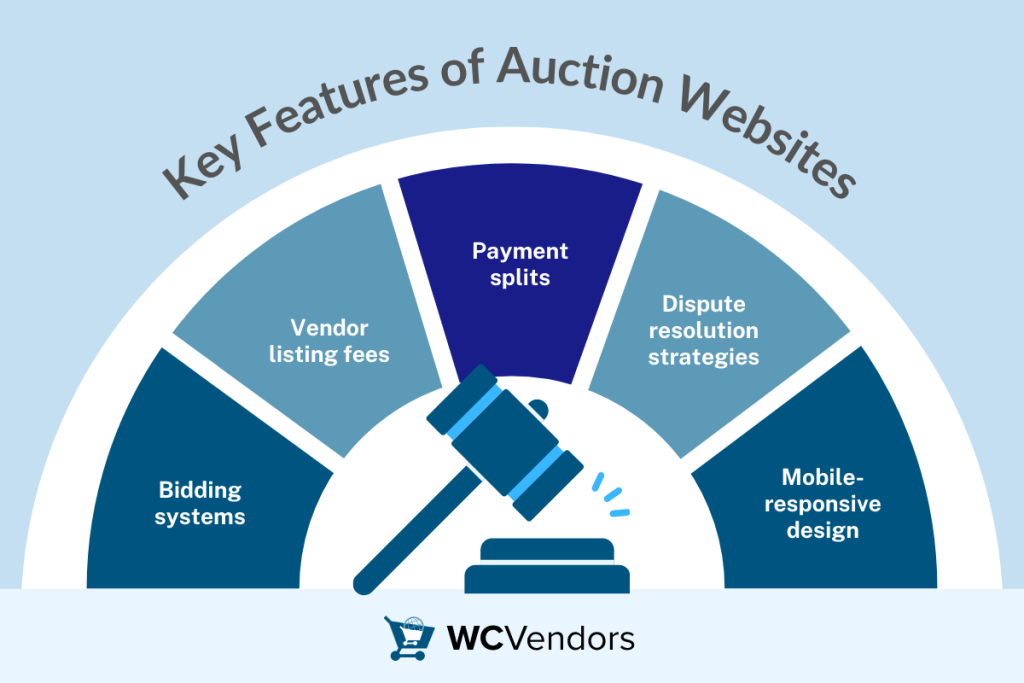
1. Bidding systems
Bidding systems are the engine of an auction website, enabling buyers to place offers in real time. A straightforward bidding system, with clear rules and an intuitive interface, creates a fair environment for all participants.
Platforms hosting live auctions rely on efficient bidding systems to handle rapid bid changes without disruption. Research suggests that straightforward bidding rules help create a more engaging environment for buyers.
2. Vendor listing fees
Vendor listing fees are important for covering operating costs while encouraging serious participation. A balanced fee structure can help maintain a steady flow of quality listings and keep vendors motivated to offer their best items.
By setting reasonable fees, platforms can ensure that both vendors and buyers have a positive experience without feeling overwhelmed by costs.
Bonus Tip: Use tiered auction fees to your advantage. Charge higher fees for premium listings or featured placement, while keeping standard auction fees low to encourage more vendors to participate.
3. Payment splits
Payment splits ensure that earnings are shared fairly between sellers and the platform. Clear guidelines on how payments are divided not only simplify transactions, but also build trust among users in an online auction marketplace.
This approach works well whether you’re running live auctions or managing other specialized auction formats.
4. Dispute resolution strategies
Dispute resolution is a critical element for maintaining a healthy trading environment in an online auction website. A clear process for addressing conflicts helps reduce downtime and keeps operations running smoothly for both buyers and sellers.
Having a structured system in place is particularly important when handling time-sensitive events like liquidation auctions, ensuring that any issues are resolved efficiently.
5. Mobile-responsive design
Did you know that over 60% of bids happen on mobile? Yes!
One analysis by Handbid of 2,000 auctions found that 79% of bids were placed on iOS devices (with 21% from Android), meaning nearly all bidding activity occurs on mobile. This aligns with studies by Statcounter showing that mobile devices account for around 59–62% of global web traffic.
This underscores the importance of optimizing your site for mobile when you build an auction website. You need to create a seamless, fast-loading, and intuitive user experience that keeps bidders engaged and maximizes conversion rates.
With these key elements in place, your online auction marketplace has a solid foundation!
In the next section, we’ll guide you through building your auction site and show how to expand it into a multivendor platform using WC Vendors and auction plugins.
Build An Auction Website On WooCommerce
When you build an auction website on WooCommerce, it should start by choosing a reliable auction plugin that adds bidding features to your site.
With just a few clicks, you can install and activate the plugin to enable auction functionality.
Single-Vendor vs. Multi-Vendor: Which is Right For You?
| Single-Vendor | Multi-Vendor |
|---|---|
| Best for Small businesses, niche sellers | Best for Scaling, diverse inventory |
| Plugins Needed: WooCommerce + Simple Auctions | Plugins Needed: WooCommerce + WC Vendors + Simple Auctions |
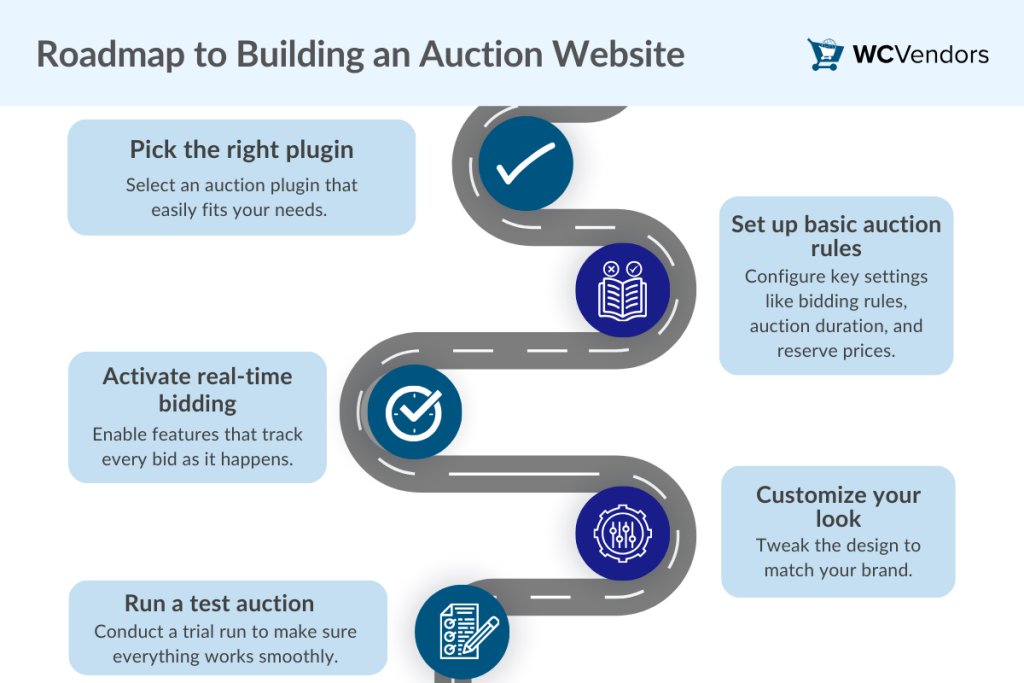
Here’s a quick roadmap to get started:
1. Install WooCommerce + Auction Plugin
Build an auction website by first installing WooCommerce and your chosen auction plugin. This choice brings your auction website one step closer to reality. Start with WooCommerce Simple Auctions for core features.
2. Set up basic auction rules
Configure key settings like bidding rules, auction duration, and reserve prices. A simple setup ensures that buyers understand how to participate.
Setting a reserve price ensures that your item won’t sell unless it reaches a minimum acceptable bid. This protects vendors from underselling valuable goods and sets clear expectations for bidders. Reserve price strategies are especially useful when auctioning high-ticket or limited-edition items.
3. Activate real-time bidding
Enable features that track every bid as it happens, keeping the excitement alive during live auctions.
4. Customize your look
Tweak the design to match your brand and make the auction process clear and user-friendly. A well-designed layout makes your site inviting to visitors.
5. Run a test auction
Running a test auction ensures your site works smoothly before you build an auction website for the public. This step helps catch any hiccups early on.
Examples of items to auction:
- Fine art pieces that attract art lovers and collectors
- Rare coins for exciting coin auction events
- Unique collectibles and vintage items that add variety to your marketplace
- Limited edition designer sneakers that capture modern fashion trends
- NFT collectibles that bridge art and technology in today’s digital age
With your basic auction marketplace up and running, it’s time to explore new possibilities!
In the next section, we’ll explain how to set up a multi-vendor auction marketplace using WC Vendors WooCommerce Simple Auctions, so that multiple sellers can showcase their own auctions.
Scaling To A Multi-Vendor Auction Website
Already have a single-vendor auction site? Expand it into a marketplace in 3 steps! This step-by-step guide shows how multiple vendors can easily host their own auctions within your multi-vendor auction site.
Note: In this example, we’ll walk you through the process of setting up a charming antique jewelry auction marketplace using WC Vendors Pro and WooCommerce Simple Auctions.
Admin view
As the multi-vendor marketplace owner, your first task is to set up the necessary plugins so your vendors can easily host auctions. Follow these steps:
1. Install WooCommerce and required plugins

- Log into your WordPress dashboard and go to Plugins > Add New.
- Search for and install WooCommerce.
- Next, install WC Vendors to enable multivendor capabilities.
- Finally, install WooCommerce Simple Auctions.
- After installing each plugin, click Activate.
2. Configure plugin settings
- In WooCommerce > Settings, locate the new Auctions tab and adjust settings such as currency decimals and cron jobs.
- In WC Vendors, review and update the vendor settings to allow auction products.
- Make sure all necessary integrations are enabled so vendors have access to auction-specific options.
3. Simple Auction options
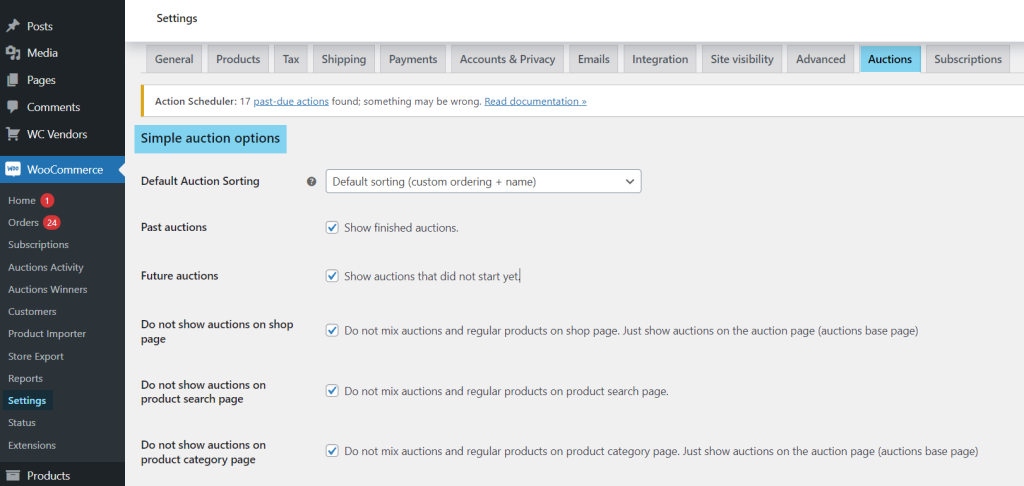
Auction Display and Sorting
- Default auction sorting
- Typically, using Custom ordering + name keeps your items in a steady, predictable order.
- Past & future auctions
- Enabling Show finished auction and Show auctions that did not start yet lets visitors review all auction activity.
- Separation from regular products
- Checking this option keeps auctions on their dedicated Auctions Base Page rather than mixing them with regular products.
Bidding behavior
- Allow Highest Bidder to outbid himself
- Enabling this allows a bidder to increase their own bid if needed.
- Proxy Auction settings
- If you want to support auto-bidding, check Set proxy auctions on by default.
- Enable Allow on proxy auction change to smaller max bid value if you want flexibility in adjusting proxy bids.
- Enable Sealed auctions
- Disable this unless you specifically want bids to remain hidden from all users.
Stripe Verification and Auto-Payment Options
- Do not allow bidding without credit card on file
- Enable this to ensure bidders have a valid payment method, which can reduce no-shows.
- Automatically charge for won auction
- Enable this if you’re using Stripe and want the payment process to be seamless upon winning.
Once the admin setup is complete, your platform is ready for vendors to start creating auction listings.
Vendor view
In this example, we’ll walk you through creating a charming vintage jewelry auction product using WC Vendors Pro and WooCommerce Simple Auctions.
Before we get started, let’s briefly review the three main auction types:
- Standard auction – Bidders openly compete by placing increasing bids, and the highest bid wins.
- Proxy bidding – The system automatically places bids on behalf of a bidder up to a set maximum, so they stay competitive without manual bidding.
- Sealed bid – Bidders submit confidential bids, and the highest bid wins once all bids are revealed.
Note that we’ll choose the Standard Auction option because it’s straightforward and widely used.
1. Access the Vendor Dashboard
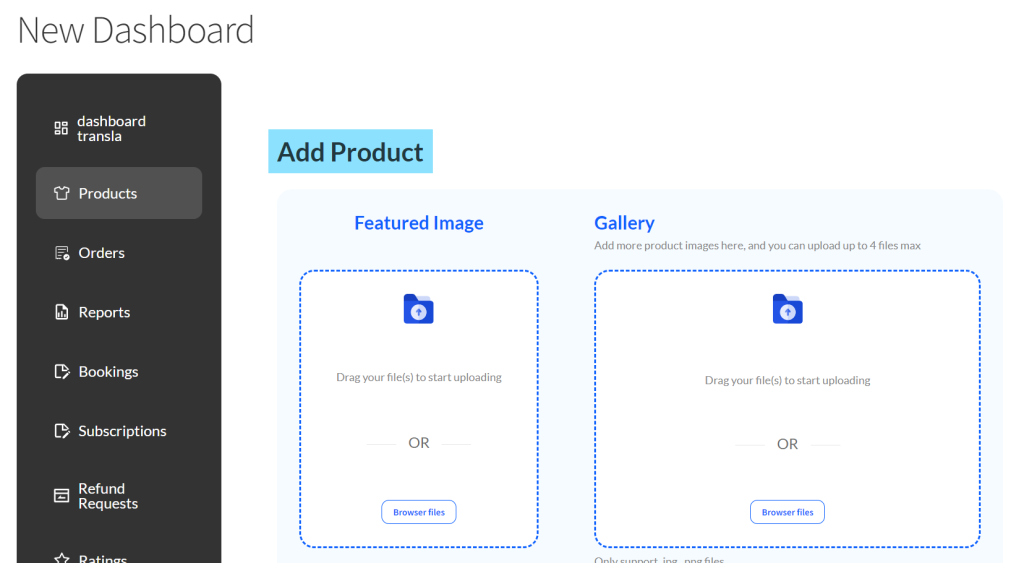
- Log in to your WC Vendors account and navigate to Products > Add New.
2. Enter product details
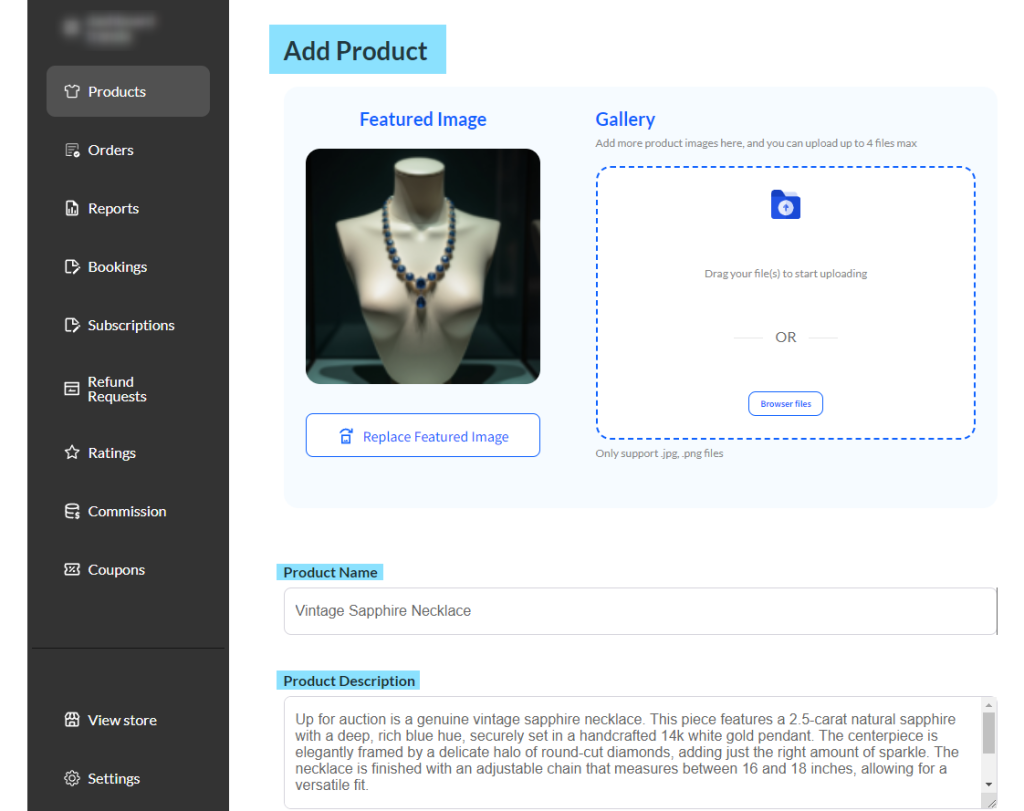
- Fill in the product title (e.g., “Vintage Sapphire Necklace”), description, images, and featured image.
- Select the appropriate category and add relevant tags.
3. Select Auction product type and configure Auction specifics
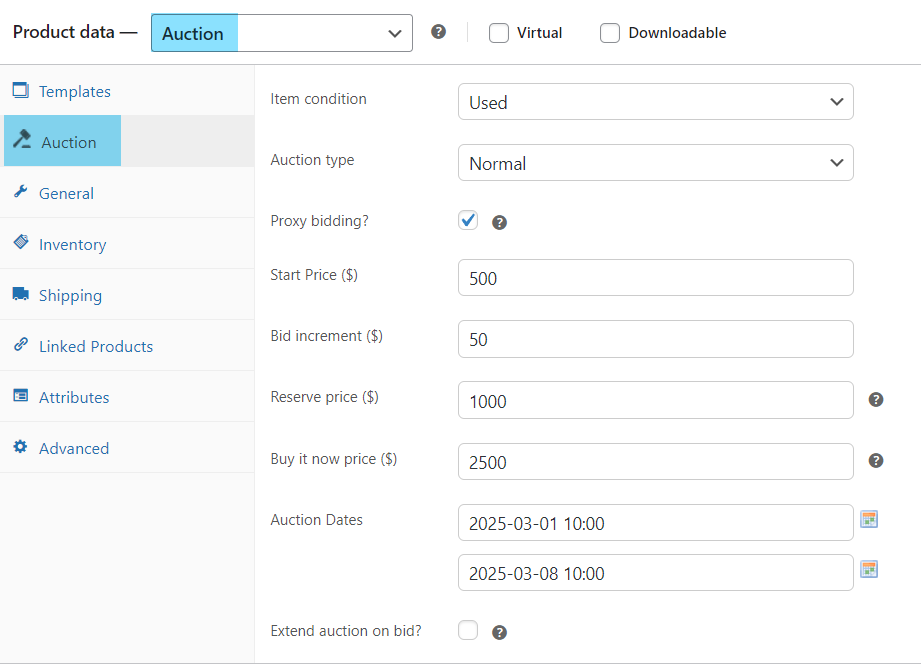
- In the Product Data dropdown menu, choose Auction.
- This action reveals a new Auction tab on the left side of the product editor.
Note: After an auction ends with a “sold” or “failed” status, you can relist the auction if needed. If the winner doesn’t pay, you also have the option to relist.
4. Relisting an Auction
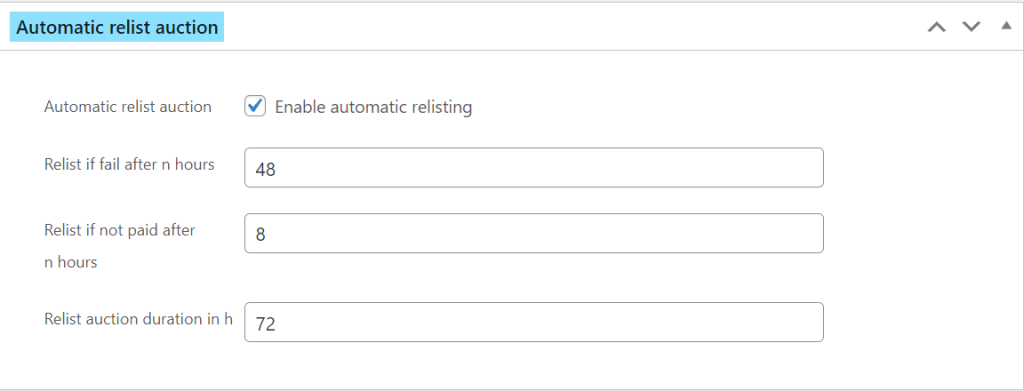
- Go to your WordPress dashboard and find the product you want to relist.
- Under the Auction tab, look for the Relist option.
- Enter the new start and end date for your auction.
- Click Relist to confirm.
5. Publish your Auction
- Review all details, then click Publish to make your auction live.
- Once published, refresh your store page to see your auction product displayed with an auction badge.
6. Explore Advanced options (optional)
- Vendors can set a reserve price for proxy bidding, which automatically raises the initial bid to a specified value.
- Experiment with advanced features like live AJAX updates for current bid prices and detailed auction history available in the WooCommerce dashboard.
Note: For additional features such as auction closing soon email reminders, SMS notifications, and detailed activity reports, refer to the plugin documentation at WooCommerce Simple Auctions Documentation.
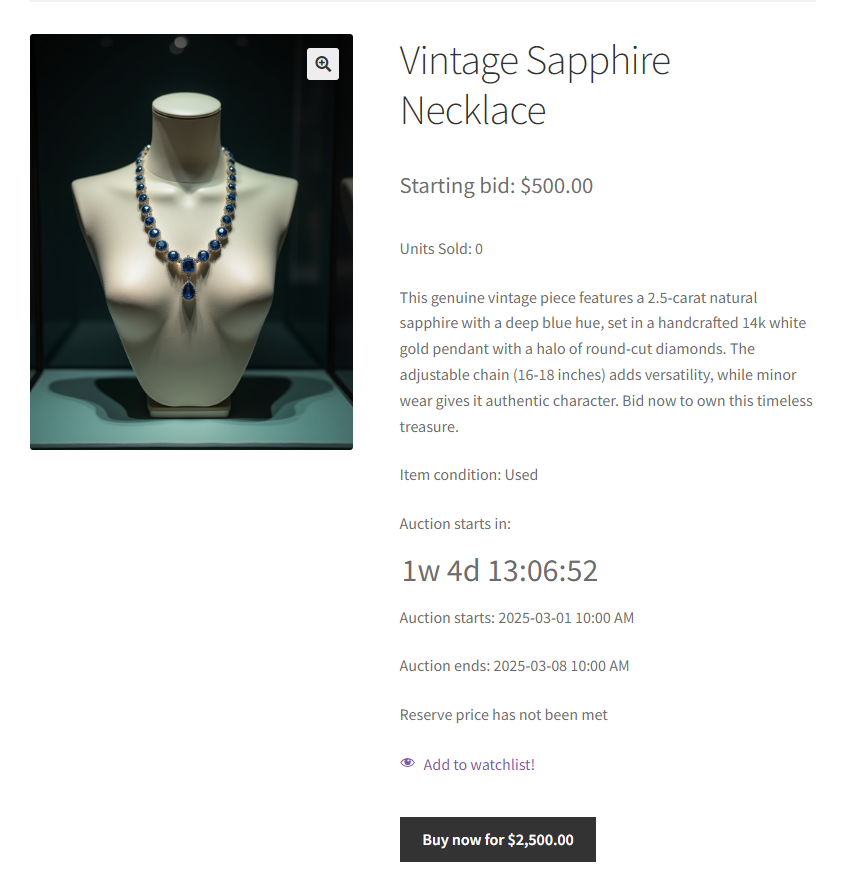
And that’s it! You’ve just built your first auction product—Vintage Sapphire Necklace.
While the setup process might seem detailed, every step is designed to simplify the complexities and make it easy for you to create a vibrant multi-vendor auction marketplace.
If you have been considering starting your own auction site, consider this your sign to begin. Your first auction product may mark the start of a rewarding new chapter in your business, bringing sellers and buyers together in an engaging way!
Bonus Tip: Knowing which items to auction is key to driving bids and maximizing profits. Read this data-backed list to choose proven, high-performing items: 11 Best Auction Item Ideas For Online Marketplaces
Conclusion
Building an online auction marketplace on WordPress is now simpler than ever. Tools like WooCommerce Simple Auctions and WC Vendors give you everything you need to host competitive auctions and scale into a marketplace.
To recap, here’s what you need to know to build your own online auction marketplace:
- What Is An Auction Website?
- Types of Auctions
- Key Features Every Auction Website Needs
- Build An Auction Website On WooCommerce
- Scaling To A Multi-Vendor Auction Website
By following these steps, you can build an auction website that’s competitive, user-friendly, and ready to scale.
If you have been considering starting your own online auction marketplace using WC Vendors, now is the time to begin! We can’t wait to hear your thoughts—share your questions and ideas in the comments below.
Frequently Asked Questions
1. Do I need coding skills to build an auction website with WooCommerce?
No! WooCommerce and plugins like WooCommerce Simple Auctions allow you to create a fully functional auction site without coding. The setup is drag-and-drop, with pre-built templates for bids, product pages, and checkout.
2. Can I start with a single-vendor site and add multi-vendor features later?
Yes! Start with WooCommerce Simple Auctions for solo selling. When ready, install WC Vendors Pro to turn your site into a marketplace. No data migration needed.
3. What’s the best plugin to build an auction website with WooCommerce?
For most users, WooCommerce Simple Auctions is ideal. It supports proxy bidding, countdown timers, and anti-sniping. For multi-vendor auctions, pair it with WC Vendorto manage fees, vendors, and payments.
4. Are there legal requirements for running an auction website?
Yes. In the US and UK, you must:
- Comply with GDPR (data privacy).
- Disclose fees and terms clearly.
- Follow consumer rights laws (e.g., returns).

