Ever wondered how to build a successful multi-vendor marketplace without spending a fortune? With Marketplace WordPress solutions, you can create a dynamic platform where multiple vendors sell their products or services—all for free!
Imagine having a thriving online store where you and your vendors both win, maximizing sales and expanding reach effortlessly. Sounds like a great opportunity, right?
In this guide, we’ll show you why WordPress is the ideal choice for your marketplace and provide a step-by-step plan to get you started without spending a dime. So let’s get started!
Is WordPress Good For A Multi-Vendor Marketplace?
Yes, WordPress is an excellent choice for building a multi-vendor marketplace.
Here are a few reasons why:
- Cost-effective: WordPress is free and open-source, meaning you don’t need to pay any license fees. Furthermore, many WordPress plugins offer essential features for free, making it budget-friendly.
- Flexibility and customization: WordPress allows you to customize every aspect of your site. You can choose from thousands of themes and plugins to create the exact look and feel you want.
- Ease of use: Even if you’re not a developer, WordPress is relatively easy to learn and use. For starters, it enables you to add products quickly and easily. In addition, you can seamlessly manage vendors. Finally, it lets you handle transactions without the need for deep technical knowledge.
- Strong community support: With its vast user community, you’re never alone. Firstly, there are abundant resources at your disposal. Secondly, tutorials are readily available. Lastly, forums await to help you tackle any challenges that come your way.
Which Platform Is The Best For A Marketplace?
When it comes to building a marketplace, choosing the right platform is crucial. There are many platforms available, but WordPress stands out as one of the best. It offers versatility and is highly cost-effective. Plus, it has an extensive plugin ecosystem that makes customization easy.
Benefits of choosing WordPress over other Platforms
- Affordability: WordPress is free to use, which is a major advantage. Additionally, many vital marketplace plugins are available for free. Moreover, should you need more features, affordable premium options exist.
- Scalability: Whether starting small or with many vendors, WordPress is adaptable. Initially, it meets your modest needs effortlessly. Over time, it can scale and accommodate your business growth seamlessly.
- Control and Ownership: Unlike many SaaS platforms, WordPress offers a key advantage. It gives you complete ownership of your site. Furthermore, it allows you the flexibility to make changes as needed.
Steps To Build A Free Marketplace WordPress Site

Now that you understand why WordPress is a great choice, let’s dive into the steps to build your marketplace.
Step 1: Choose a hosting provider
To get started, you’ll need a hosting provider. Many hosts offer free plans or affordable options to get your WordPress site up and running. Look for a hosting provider that offers:
- Free SSL: SSL (Secure Sockets Layer) encryption is crucial for websites dealing with transactions or personal info. Firstly, a free SSL certificate ensures that data between the user’s browser and the site stays private and secure. Secondly, this protects your customers. Thirdly, it improves your site’s credibility. Lastly, it can positively impact your search engine ranking.
- One-Click WordPress Installation: One-click WordPress installation simplifies website setup. It’s great for beginners or anyone wanting a fast launch. Also, it cuts out manual software configuration and database setup. As a result, the whole experience becomes more accessible, regardless of skill level.
- Good customer support: Reliable customer support is essential, especially for sudden issues. Good support offers 24/7 help, including chat, email, and phone. Plus, it provides tutorials and forums. This way, you get help anytime, keeping your site running smoothly with minimal downtime.
Examples of hosting providers that meet these criteria include:
- Kinsta: Known for premium managed WordPress hosting, Kinsta offers automated SSL certificates, one-click WordPress installations, and excellent customer support, including 24/7 chat.
- SiteGround: SiteGround provides managed WordPress hosting with free SSL, easy WordPress launch, and excellent customer service backed by fast response times.
- DreamHost: DreamHost provides affordable WordPress hosting plans with free SSL certificates included, a one-click WordPress installer, and award-winning customer support.
Choose a provider that aligns well with your specific marketplace needs and offers a good balance between performance, security, and customer service.
Step 2: Install WordPress
Once you’ve chosen a host, you can install WordPress. Most hosting providers have a one-click installation process that makes it easy, even for beginners. Follow the prompts to install WordPress and set up your site.
Step 3: Choose a free Multi-Vendor Plugin
To turn your WordPress site into a marketplace, you’ll need a reliable multi-vendor plugin. WC Vendors is an excellent choice for creating a marketplace WordPress site for free.
It offers powerful features and a user-friendly interface, making it easy for both beginners and experienced users to build and manage a multi-vendor store.
To set up WC Vendors for your marketplace:
1. Install the plugin
- Go to your WordPress dashboard.
- Click on ‘Plugins’.
- Select ‘Add New’.
- Type “WC Vendors” in the search bar.
- Press ‘Install Now’ for the WC Vendors plugin.
2. Configure the settings
- Once installed, click ‘Activate’.
- Go to WC Vendors settings.
- Set commission rates according to your plan.
- Configure vendor registration settings.
- Choose and set up payment methods.
3. Customize the vendor dashboard
- Access WC Vendors’ settings.
- Use the built-in tools to modify the vendor dashboard.
- Ensure vendors can manage products, orders, and earnings smoothly.
WC Vendors is designed to help you build a thriving multi-vendor marketplace quickly and efficiently. It provides everything you need to manage vendors, products, and transactions—all from within your WordPress site.
Step 4: Select a free theme
To make your site look professional, choose a free WordPress theme that supports multi-vendor functionality. Some popular free themes are:
- Storefront: A clean and flexible theme designed for WooCommerce.
- Astra: A lightweight and customizable theme.
Step 5: Customize your marketplace

Once you have your theme and plugins in place, it’s time to tailor your site to represent your brand. Begin by uploading your brand logo to establish your visual identity. Proceed to structure your site by setting up the navigation menus, which will guide your visitors through different sections effortlessly.
Remember to also create and publish key pages such as the homepage, which serves as the welcoming gateway; the shop page, which showcases your products; a vendor registration page to onboard new sellers; and the terms of service page to outline the rules and regulations of your marketplace.
For customization specific to WC Vendors, follow these detailed steps:
1. Add your logo and branding
- Navigate to ‘Appearance’ > ‘Customize’ in your WordPress dashboard.
- Click on the ‘Site Identity’ section.
- Here, you can upload your logo and make other brand-related changes.
- Still within the ‘Customize’ interface, find the ‘Menus’ section.
- Create new menus and add items such as home, shop, vendor registration, and terms of service pages.
- Assign your menus to different locations, like the main header or footer, as per your theme’s options.
3. Create essential pages
- Go to ‘Pages’ > ‘Add New’ for each new page you need to create.
- Use the page editor to add content and images.
- Publish each page when it’s ready.
4. Customize vendor-specific pages with WC Vendors
- From your dashboard, access ‘WC Vendors’ > ‘Settings’.
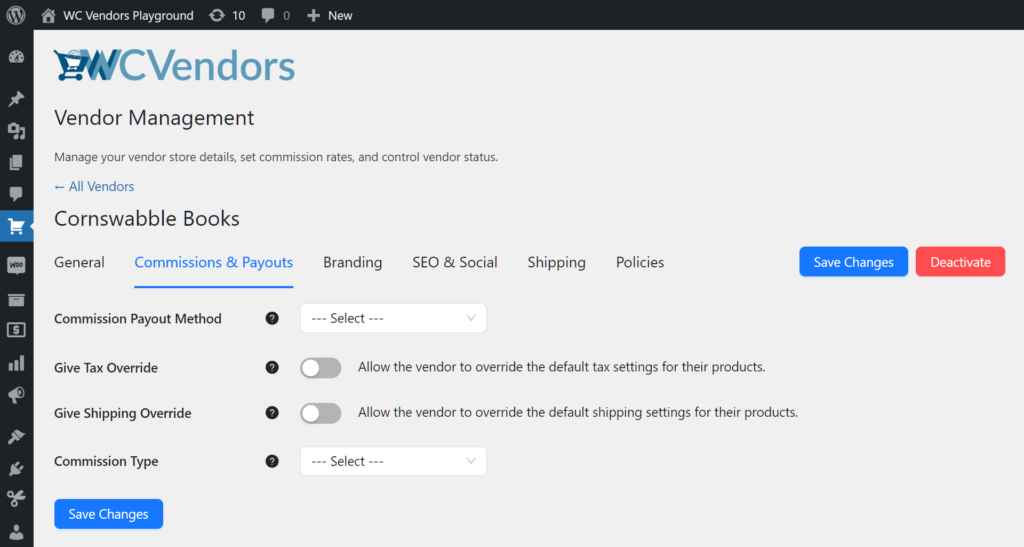
- Adjust the commission rates based on your business model in the ‘Commissions & Payouts‘ tab.
- Configure settings for vendor registrations and permissions in the ‘Capabilities’ tab.
- To customize the layout and content of vendor-related pages, you can edit the templates via the ‘Templates’ section in the ‘Display’ tab.
- Finally, ensure that your payment gateways are set up correctly in the ‘Payments’ tab to handle transactions between customers and vendors efficiently.
By following these steps, you will not only align your website with your brand identity but also ensure a functional and inviting marketplace for both customers and vendors using WC Vendors.
Step 6: Add payment gateways
To handle transactions efficiently in your online marketplace, setting up reliable payment gateways is essential. WC Vendors provides seamless integration with leading payment solutions such as PayPal and Stripe, allowing both you and your vendors to manage finances smoothly.
When choosing a payment gateway, it’s important to consider the compatibility with your business model, ease of use for your customers, and the level of support and security offered by the payment service provider.
To set up payment gateways in WC Vendors:
1. Access payment settings
- Navigate to ‘WC Vendors’ > ‘Settings’ from your WordPress dashboard to access the marketplace’s settings.
2. Configure PayPal payments
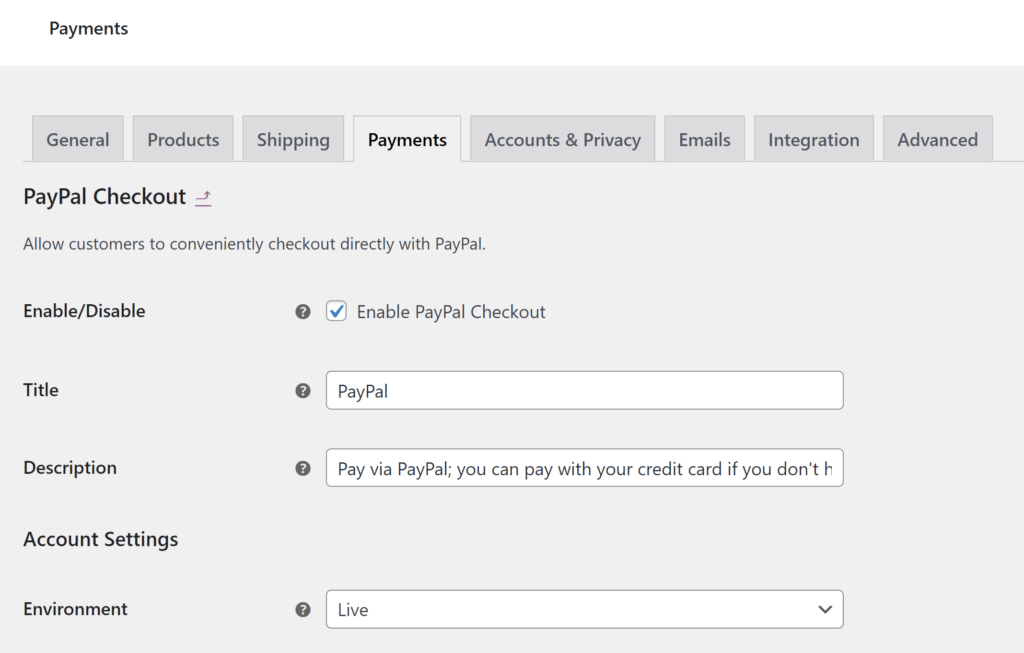
- Click on the ‘Payments’ tab.
- Look for PayPal settings. Here you can enable ‘PayPal Mass Payments’ if you plan to automate payments to your vendors.
- Enter your PayPal API credentials (API Username, API Password, and API Signature). These are necessary for processing payments and need to be obtained from your PayPal account under API Access.
- Decide on the payment schedules and thresholds.
3. Set up Stripe payments
- Within the same ‘Payments’ tab, find Stripe settings.
- Toggle ‘Enable Stripe’ to on. This requires that you have the Stripe for WooCommerce plugin installed and activated.
- You’ll need to insert your Stripe API keys for both test and live environments. These can be found in your Stripe dashboard under Developers > API keys.
- Configure Stripe Connect if you want to enable direct payments to your vendors’ accounts.
4. Save changes
- After entering all the necessary details for the payment gateways, make sure to save your changes.
By meticulously setting up and testing your payment gateways, you provide a seamless and secure transaction process for your customers and vendors, which is crucial for the smooth operation of your online marketplace.
Step 7: Invite vendors to join your marketplace
With your marketplace WordPress site set up, it’s time to invite vendors to join. Promote your marketplace through social media, email marketing, and other channels. Offer incentives like a low commission rate or free listings to attract vendors.

Conclusion
Creating a free marketplace WordPress site for multi-vendor stores is not only possible; it’s also simple. With the right tools, you can get started quickly. Just follow the steps outlined, and you’ll be able to launch a successful online marketplace without spending a fortune.
To build your marketplace, here’s what you need to remember:
- Is WordPress good for a multi-vendor marketplace? Understand why WordPress is an excellent choice for multi-vendor marketplaces, considering its cost-effectiveness and flexibility.
- Which platform is the best for a marketplace? Explore why WordPress stands out compared to other platforms and what makes it the ideal option.
- Benefits of choosing WordPress over other platforms: Learn about the unique advantages WordPress offers, from its extensive plugin ecosystem to its scalability.
- Steps to build a free marketplace WordPress site: Follow a step-by-step guide to set up your site, choose the right plugins, customize your theme, and invite vendors to join.
By focusing on these key areas, you can confidently build a strong foundation for your multi-vendor marketplace. Start today with WordPress, and take the first step toward marketplace success.
If you need more help or have any questions, don’t hesitate to reach out—we’re here to support you every step of the way!

