When adding items to their online stores, vendors benefit from having a variety of ways to customize their product listings. For this reason, you should grant your team of sellers access to a range of WooCommerce product options.
What types of goods can your vendors create? Can they display SKU or tax information on their product listings? Can they delete or duplicate items in their stores? You can answer these questions by determining the product options your vendors can use.
Today, we’ll explore what WooCommerce product options are. Furthermore, we’ll give you an easy, 3-step guide on how to use WC Vendors to enable or disable such options for your vendors during the product-creation process.
So let’s get started!
Why Give Vendors Access To WooCommerce Product Options When Creating Products?
Enabling vendors to use product options empowers them to tailor their product listings to better suit their offerings and customer needs. By providing vendors with access to a range of product options and functionalities, you enhance their ability to showcase and sell their products effectively on your marketplace.
Here are some key benefits of allowing vendors to use WooCommerce product options:
1. Customization
Granting vendors access to a range of product options provides them with ample opportunities for customization in their product listings. This enables them to craft listings that highlight what makes their products special. As a result, they ensure that their offerings stand out to potential customers.
In addition, well-made product listings not only attract consumers but also tell them everything they need to know about the product, allowing them to make informed purchase decisions.
2. Flexibility
Offering a variety of product options gives vendors the flexibility to adapt their listings to different product categories and customer preferences. This enhances the diversity and appeal of your marketplace.
3. Streamlined product management
By providing vendors with intuitive tools to manage their product listings, you simplify the product-creation process. Thus, you empower vendors to efficiently manage their inventory and sales.
4. Improved user experience
What happens when you enhance the capabilities of vendors to create and manage their product listings? Basically, you contribute to an overall improved user experience for both vendors and customers. This fosters satisfaction and loyalty within your marketplace community.
How To Let Vendors Use WooCommerce Product Options When Creating Products (A 3-Step Guide)
So, how do we grant vendors access to specific WooCommerce product options during product creation?
For this tutorial, we’ll use the powerful marketplace solution, WC Vendors.
However, as WC Vendors is a WooCommerce plugin, you must first create a traditional online store using:
Then, you must use WC Vendors to convert this online store into a multi-vendor marketplace. Check out the guides below to learn how this is done:
- How To Create An Online Marketplace: A Beginner’s Guide
- How To Build Your First Multi-Vendor Ecommerce Website (Full Guide)
With that in mind, let’s start the guide!
Step 1: Navigate to the Add/Edit Product page
First, you must head to the Add/Edit Product page. This page allows you to select the WooCommerce product options to give vendors access to when they’re creating or editing products.
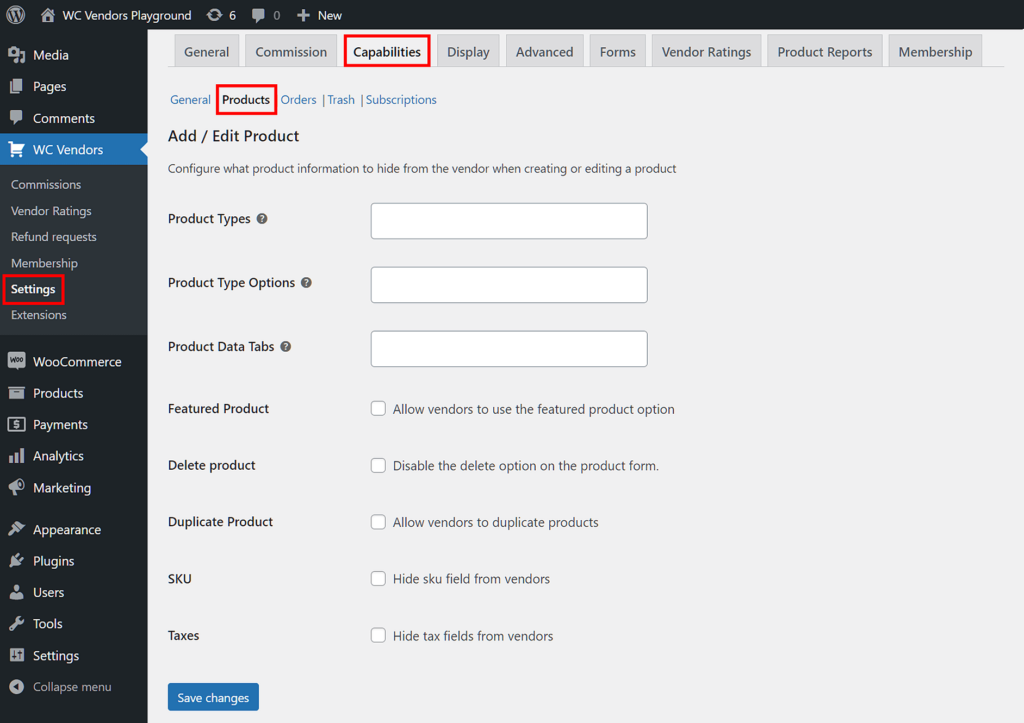
Head to your WordPress dashboard and click WC Vendors > Settings. Then, click the Capabilities tab followed by the Products subtab.
As you can see above, the Add/Edit Product page includes many product options that you can enable or disable.
Now, onto the next step.
Step 2: Enable/disable WooCommerce product options
The next thing to do is select which product options to enable or disable. To help you make the right choices, we’ll explore some of the options in detail:
Product Types
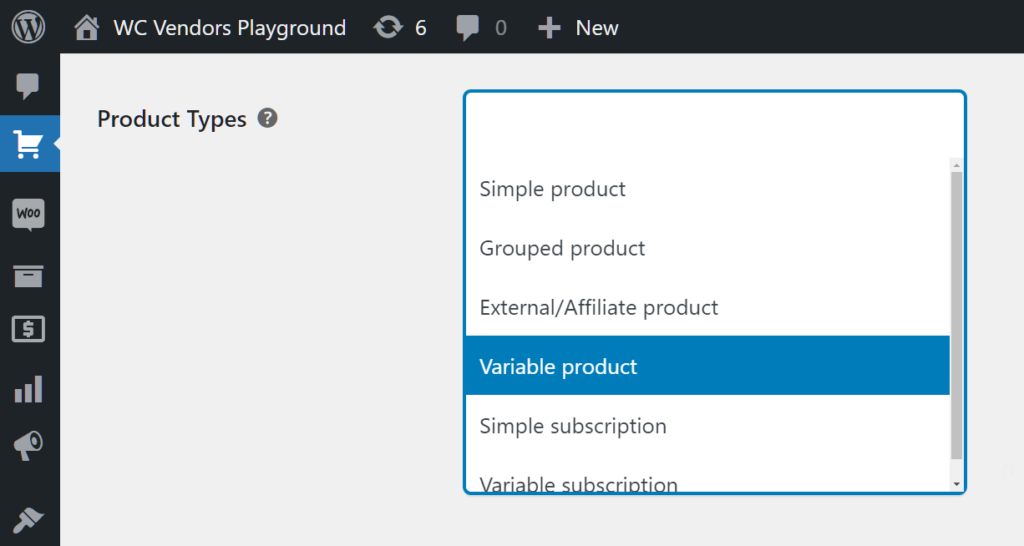
The Product Types option comes with a dropdown menu. This lets you pick the product types to disable for vendors when they’re adding/editing products on their frontend dashboard.
For example, if you don’t want vendors creating variable products, simply select “Variable product” from the dropdown. Take note that you can select more than one product type.
Would you rather not give your vendors any restrictions? Then simply leave the Product Types field empty.
The vendor’s perspective
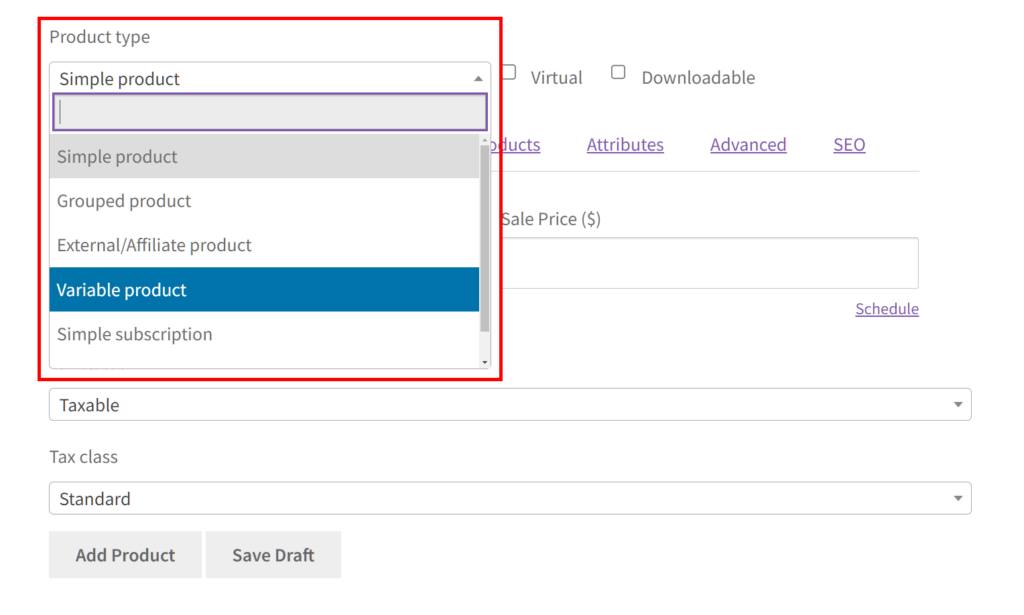
When creating or editing a product via the frontend vendor dashboard, the vendor can choose its product type from the Product Type dropdown menu:
If you previously disabled specific product types, they won’t appear in the dropdown. Thus, you prevent the vendor from selecting them and creating products of those types.
Product Type Options
With this option, you can prevent vendors from using specific product type options when they’re adding/editing products via the frontend vendor dashboard.
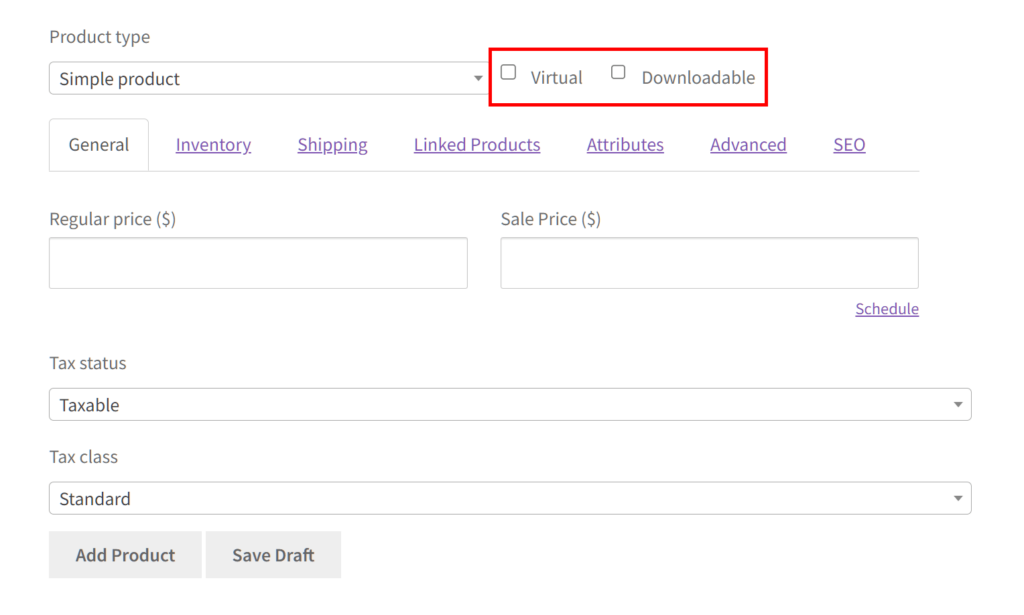
For instance, what if you don’t want vendors to create downloadable products? Then pick “Downloadable” from the dropdown menu. You can select more than one product type option.
Like the previous option, leave the field empty if you don’t want to limit your vendors’ choices.
The vendor’s perspective
During product creation or editing, the vendor dashboard will give the vendor access to the product type options you enabled, while hiding any disabled options:
Disabled options are hidden on the frontend vendor dashboard. Thus, it prevents the vendor from ticking their checkboxes.
Product Data Tabs
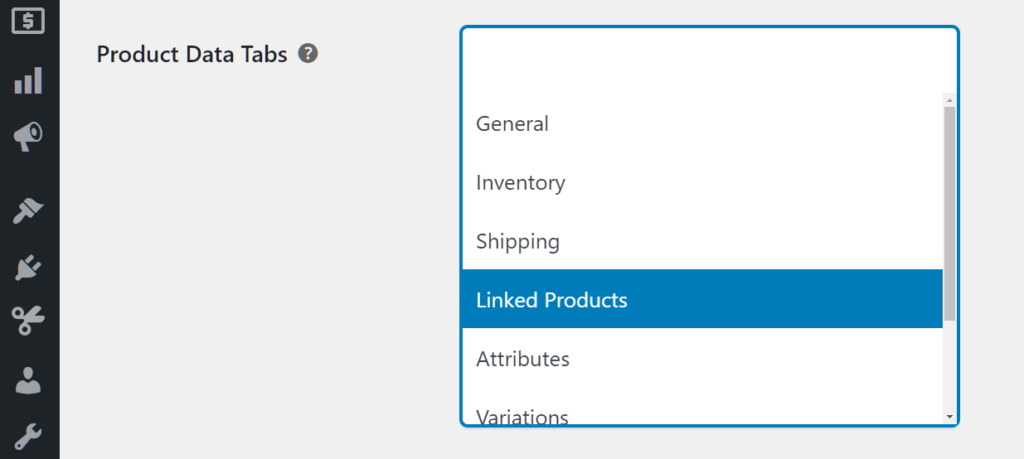
The Product Data Tabs option also has a dropdown menu that allows you to choose which data tabs to hide from vendors on the frontend vendor dashboard.
Let’s say you don’t want vendors accessing the Linked Products data tabs. All you have to do is pick “Linked Products” in the dropdown. Again, you can pick more than one data tab.
Don’t want to restrict your vendors’ choices? Then leave the field empty!
The vendor’s perspective
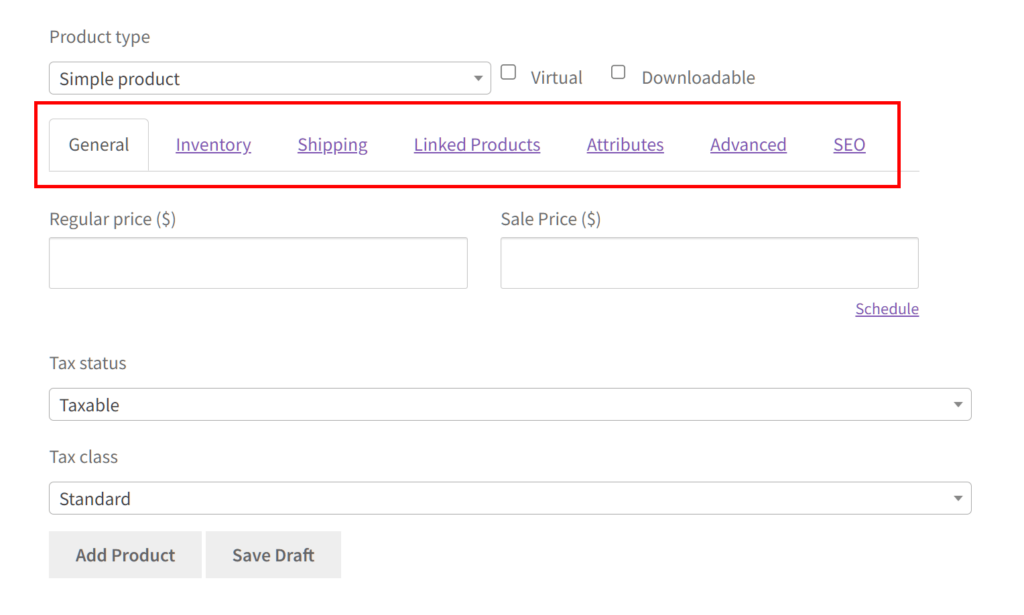
When using the frontend vendor dashboard to add/edit a product, the vendor can select any tabs you enabled:
Disabled tabs vanish from the selection. This prevents the vendor from clicking them.
Delete Product
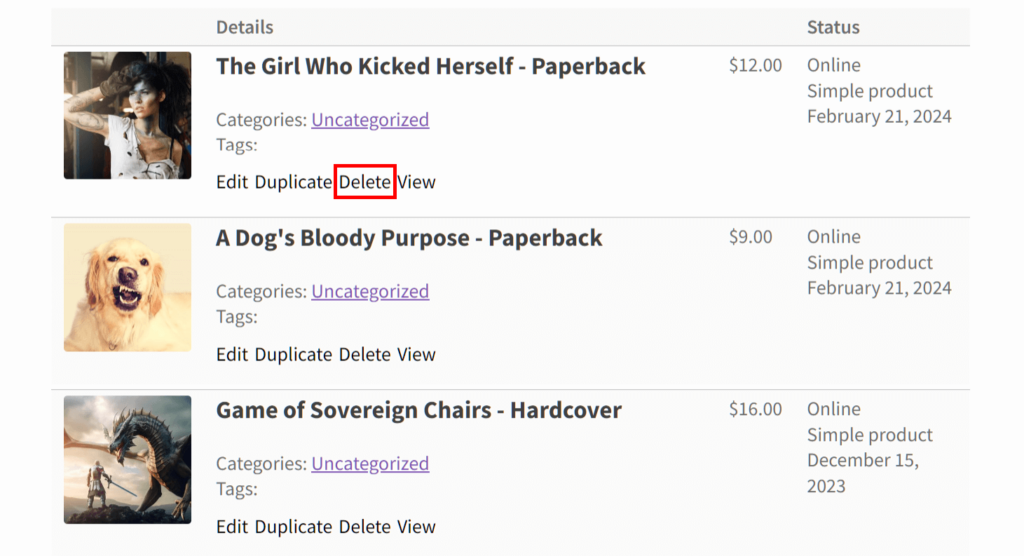
The Delete Product option grants the vendor the ability to delete an item on their online store.
If you want vendors to have this ability, leave the option’s checkbox unticked. On the other hand, tick the checkbox if you don’t want vendors deleting any of their goods.
The vendor’s perspective
When the Delete Product option is disabled, the button that lets vendors delete their products disappears from their vendor dashboard. Otherwise, it remains on said dashboard:
Duplicate Product
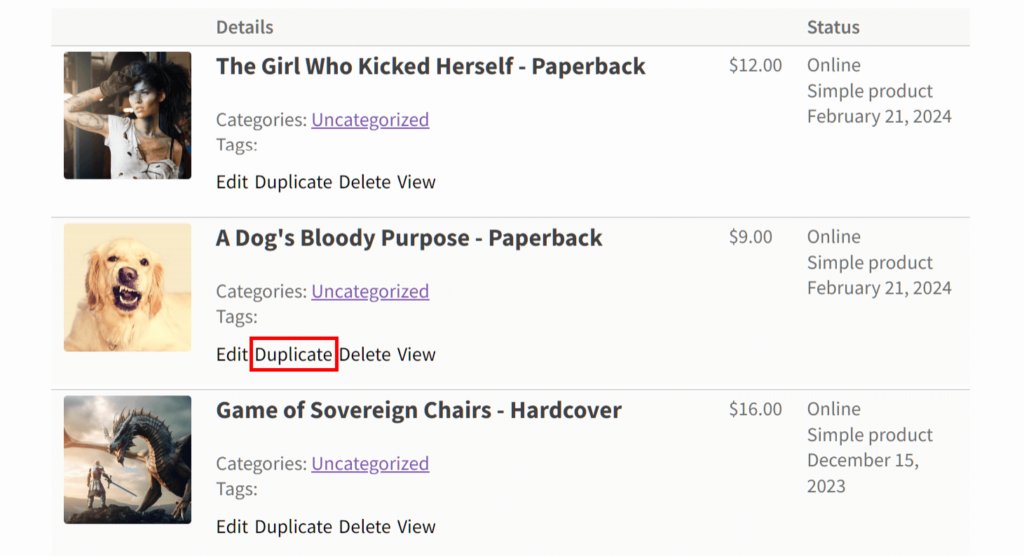
The Duplicate Product option allows the vendor to create an exact clone of any chosen item on their online store.
Do you want your vendors to have access to this duplication ability? Then tick the option’s checkbox. Otherwise, untick the same checkbox.
The vendor’s perspective
When the Duplicate Product option is disabled, the button that lets vendors duplicate their products disappears from their vendor dashboard. Otherwise, it remains in its usual position:
SKU
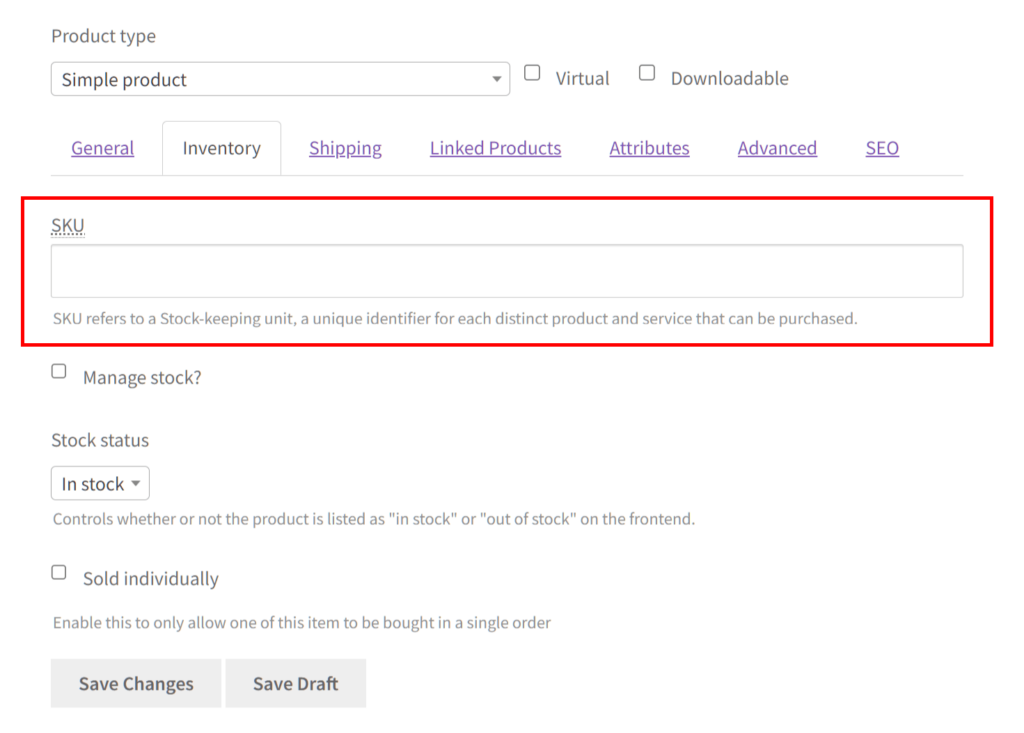
The SKU option lets vendors provide their products with unique identifiers, or Stock-keeping unites (SKU).
If you don’t want your vendors creating SKUs, simply tick the option’s checkbox. Otherwise, tick the same checkbox.
The vendor’s perspective
Disabling the SKU option removes the SKU entry field from the vendor dashboard, preventing the vendor from giving their products SKUs. Otherwise, the field remains in the dashboard.
Step 3: Save your work!
Once you’re happy with your Add/Edit Product settings, scroll down to the bottom of the page and click the Save Changes button. This activates your options, giving your vendors access to your selected product options during product creation.
Take note: If you want more information on how to configure the Orders subsection page, check out the Capabilities documentation.
Conclusion
Allowing vendors to use WooCommerce product options is a powerful strategy for enhancing the functionality and attractiveness of your multi-vendor marketplace. It empowers vendors to showcase their products effectively. Furthermore, it provides customers with a diverse and engaging shopping experience.
In this guide, we explored the process of granting vendors access to specific WooCommerce product options within your multi-vendor marketplace using WC Vendors. To recap, all you have to do is follow the outlined steps:
Do you have any questions about how to give vendors access to WooCommerce product options? Let us know in the comments!
