Managing inventory is an important part of running a marketplace. WC Vendors works together with WooCommerce to provide vendors with the tools they need to control their stock levels. Below are the steps and settings you need to know.
Enable Stock Management
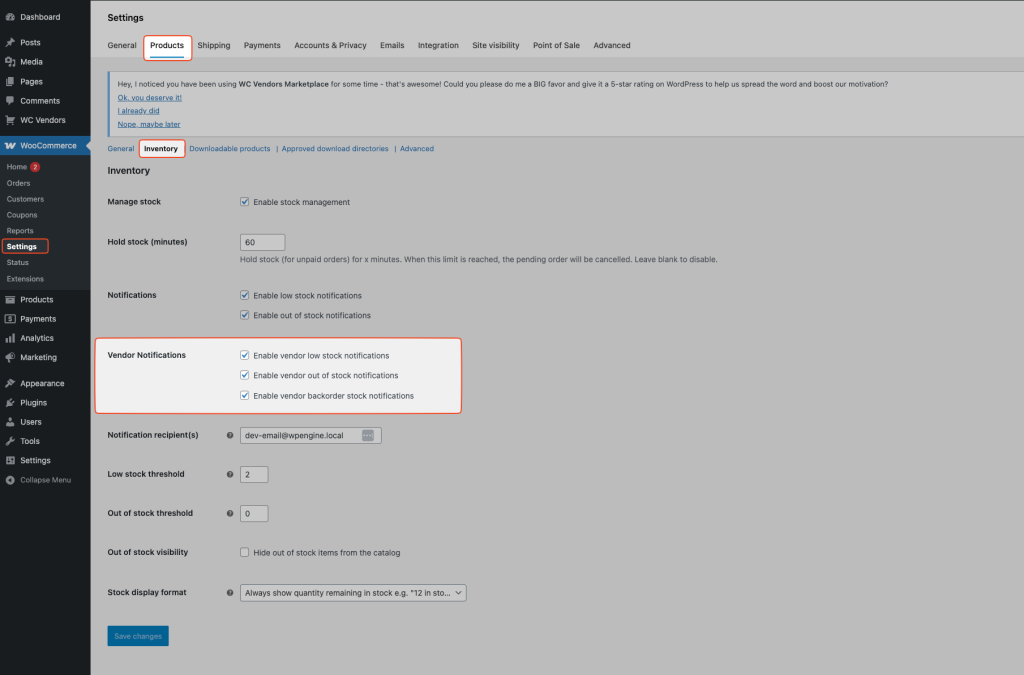
- Go to WooCommerce > Settings > Products > Inventory.
- Check the option Enable stock management.
- This will activate WooCommerce’s stock control system.
- Once enabled, vendors will automatically see the Inventory tab when editing their products.
⚠️ Important:
You must use the Standard Product option on the Default Product Form in WC Vendors > Settings > Forms > Product.
- The Simple and Downloadable product form options do not include the inventory tab.
Inventory Fields Available to Vendors
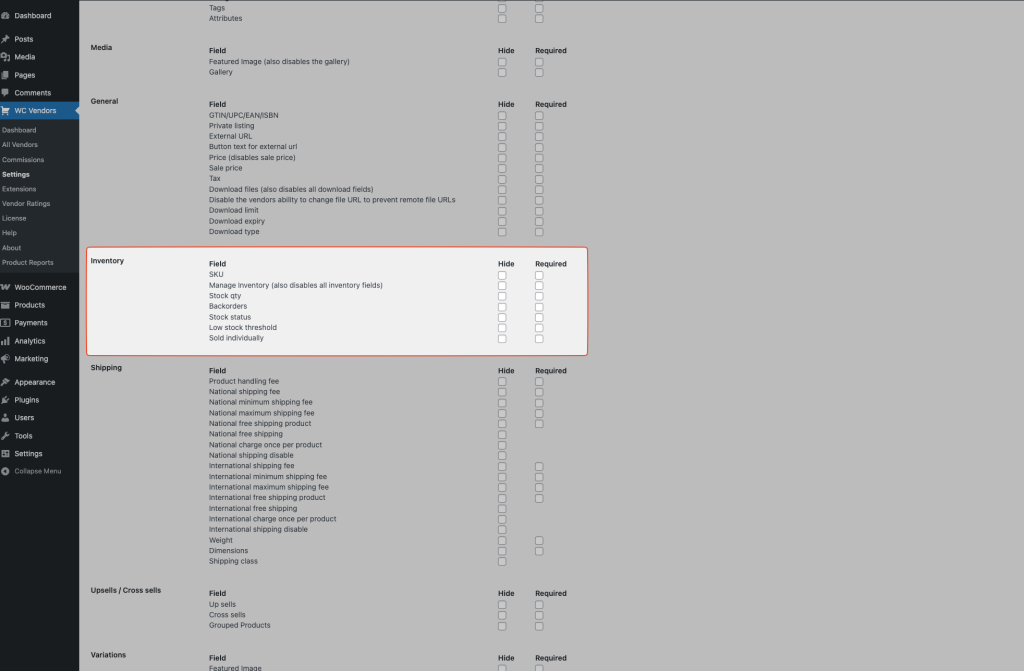
When stock management is enabled, vendors can configure inventory settings for their products. These fields can be shown, hidden, or set as required from the admin panel under WC Vendors > Settings > Forms – Product.
Available fields include:
- SKU
- Manage Inventory
- Stock Quantity
- Backorders
- Stock Status
- Low Stock Threshold
- Sold Individually

Vendor Stock Notifications
WooCommerce allows store owners and vendors to receive automatic notifications about stock changes.
To manage these settings:
- Go to WooCommerce > Settings > Products > Inventory.
- Scroll down to Vendor Notifications.
- Enable or disable the following options:
- Enable vendor low stock notifications
- Enable vendor out-of-stock notifications
- Enable vendor backorder stock notifications
With these enabled, vendors will receive email notifications whenever their product stock reaches the thresholds you set.
Notification Thresholds
You can set custom thresholds for notifications:
- Low stock threshold: The quantity at which the system sends a low stock warning.
- Out of stock threshold: The quantity at which the system marks a product as out of stock.
